Taking screenshots on your HP laptop doesn’t have to be complicated. Whether you need to capture your entire screen or just a portion of it, Windows offers several easy methods. To take a screenshot on your HP laptop, press the Windows key + PrtScn keys together, and your screen will be saved automatically to your Pictures folder under Screenshots.
If you need more control over what you capture, try using the Windows + Shift + S shortcut. This opens the Snipping Tool interface, which lets you select exactly what part of the screen you want to capture. After selecting an area, the screenshot is copied to your clipboard, ready to paste into any document or image editor.
For those who only need to capture the active window, the Alt + PrtScn combination works perfectly. This shortcut copies just the current window to your clipboard without any extra steps. HP laptops make screenshot capturing simple with these built-in Windows features, no extra software needed.
Taking A Screenshot on an HP Laptop
Here are the common ways to take a screenshot on an HP laptop:
Method 1: Using the Print Screen (PrtScn) Key
This is the most basic and universal method.
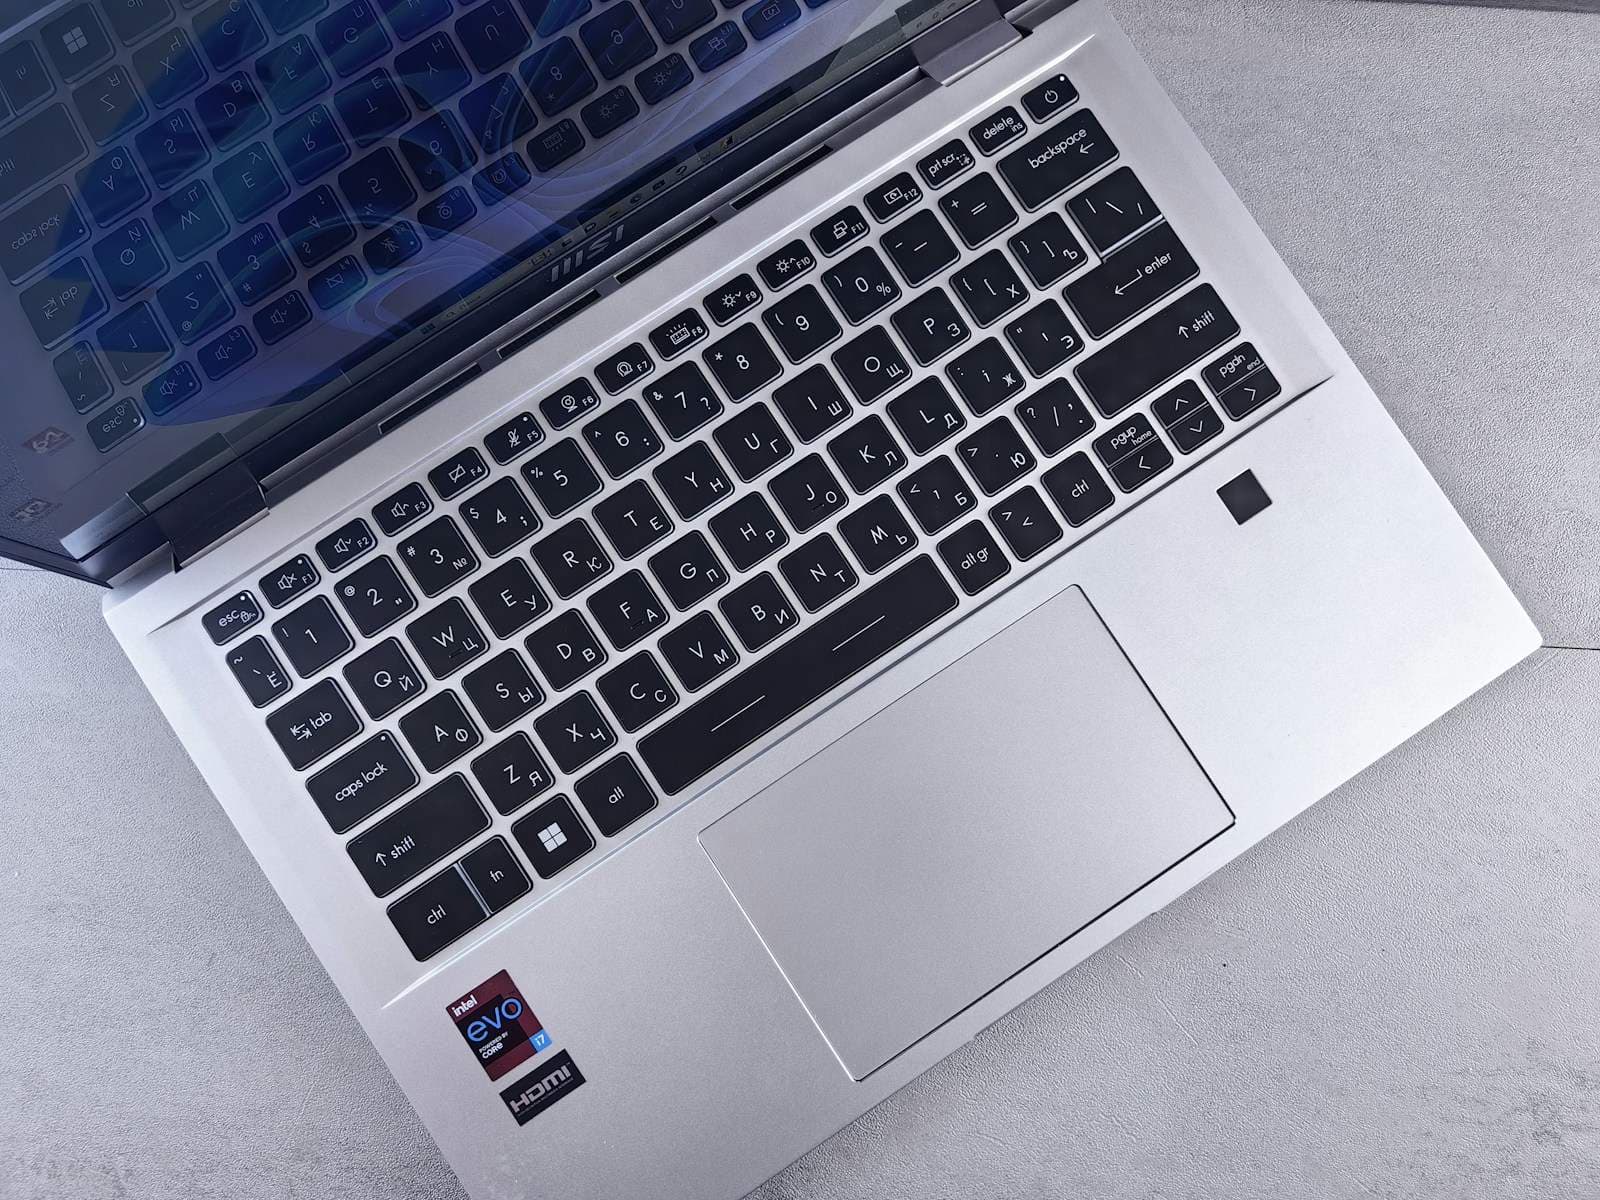
- Identify the PrtScn Key: Look for the “PrtScn,” “PrntScrn,” “Print Scrn,” or a similar variation on your keyboard. It’s usually located in the upper-right area.
- Take the Full Screen Screenshot:
- Press the PrtScn key once.
- This copies an image of your entire screen to the clipboard (it’s not saved as a file yet).
- Paste and Save:
- Open an image editing program like Paint (search for “Paint” in the Windows search bar).
- Press Ctrl + V (or right-click and select “Paste”) to paste the screenshot into Paint.
- Click File and then Save As.
- Choose your desired file format (like JPG or PNG), give your screenshot a name, and select a location to save it. Click Save.
Method 2: Taking a Screenshot of a Single Active Window (Alt + PrtScn)
This method captures only the window you are currently working in.
- Select the Window: Make sure the window you want to capture is active (click on it).
- Press Alt + PrtScn: Hold down the Alt key and then press the PrtScn key once.
- Paste and Save: Follow the same steps as in Method 1 to paste the screenshot into an image editor (like Paint) and save it.
Method 3: Using the Windows Key + Shift + S (Snipping Tool)
This opens the Snipping Tool, which offers more flexibility in selecting the area you want to capture.
- Press Windows Key + Shift + S: Simultaneously press the Windows logo key, the Shift key, and the S key.
- The Screen Dims and a Snipping Menu Appears: Your screen will dim slightly, and a small menu will appear at the top of your screen.
- Choose Your Snipping Mode:
- Rectangular Snip (default): Drag your cursor around the part of the screen you want to capture to form a rectangle.
- Free-form Snip: Draw any shape around the area you want to capture.
- Window Snip: Click on the window you want to capture.
- Full-screen Snip: Captures the entire screen immediately.
- Notification and Saving:
- After you make your selection, the screenshot will be copied to your clipboard, and a notification will appear in the bottom-right corner of your screen.
- Click on the notification to open the Snip & Sketch tool (which has replaced the classic Snipping Tool).
- In Snip & Sketch, you can annotate, crop, and then click the Save icon (floppy disk) to save your screenshot as a file.
Method 4: Using the Game Bar (Windows Key + Alt + PrtScn)
This method is primarily designed for capturing gameplay but can also capture regular applications.
- Open the Application: Make sure the application you want to screenshot is open.
- Press Windows Key + Alt + PrtScn: Simultaneously press the Windows logo key, the Alt key, and the PrtScn key.
- Screenshot Saved Automatically: The screenshot will be automatically saved as a PNG file in the “Captures” folder within your “Videos” library (usually located in your user profile). You’ll likely see a notification indicating that the screenshot was saved.
Choose the method that best suits your needs for capturing screenshots on your HP laptop!
Key Takeaways
- Press Windows + PrtScn to capture and save your entire screen automatically to the Screenshots folder.
- Use Windows + Shift + S to select a specific area of your screen and copy it to your clipboard.
- Alt + PrtScn captures only the active window, perfect for documenting a single program or dialog box.
Understanding Screenshots
Screenshots are digital images that capture exactly what appears on your screen. They help save information quickly and share what you see with others.
What Is a Screenshot
A screenshot is a digital photo of your computer screen. Think of it like taking a picture with your phone, but instead of capturing the world around you, you’re capturing what’s on your display. Your HP laptop has built-in tools that make this easy.
Screenshots save exactly what you see – including all windows, icons, and cursor positions. They capture the entire screen or just a portion you select.
The resulting image is usually saved as a PNG or JPG file on your computer. These files can be opened, edited, and shared like any other image.
Uses for Screenshots
Screenshots serve many practical purposes in daily computer use. They’re excellent for saving information that might be difficult to copy, like error messages or confirmation numbers.
When getting tech support, screenshots help explain problems clearly. Instead of describing what you see, you can show the exact issue.
They’re also great for:
- Saving recipes or articles without bookmarking
- Capturing important information before it disappears
- Creating tutorials with visual instructions
- Documenting software bugs
- Sharing interesting content with friends
In work settings, screenshots can document website changes, preserve important conversations, or help explain technical concepts to colleagues.
Students often use screenshots to capture lecture slides or online research for later study.
Preparing Your HP Laptop for Screenshots
Before taking screenshots on your HP laptop, it’s important to understand your keyboard layout and check your settings. This ensures you can capture images quickly when needed without any technical issues.
Accessing Screenshot Settings
HP laptops use Windows operating systems, which have built-in screenshot settings you can customize. To check these settings, press the Windows key and type “Settings” to open the Settings app. Navigate to “Ease of Access” and then “Keyboard” to find screenshot-related options.
Some HP models include additional screenshot tools through the HP Support Assistant software. Open this program from your Start menu to see if any HP-specific screenshot features are available.
Windows 10 and 11 also offer Snip & Sketch or Snipping Tool apps. You can pin these to your taskbar for quick access by right-clicking them in the Start menu and selecting “Pin to taskbar.”
For cloud saving options, check your OneDrive settings. Screenshots can automatically save to OneDrive if this feature is enabled.
Understanding HP Laptop Keyboards
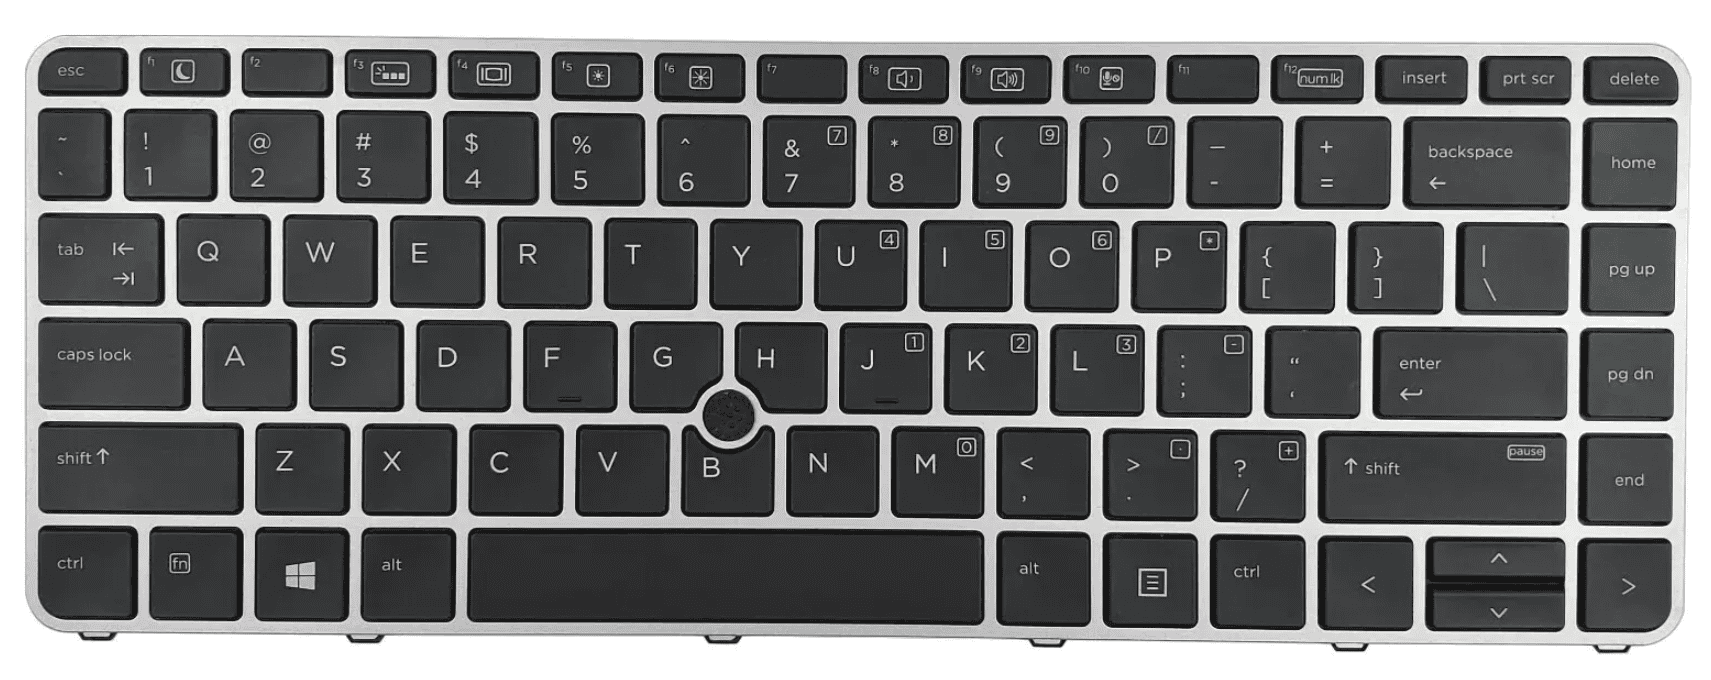
HP laptop keyboards vary slightly between models, but most include a Print Screen key (labeled as “PrtSc,” “PrtScn,” or similar). This key is typically located in the top row of the keyboard, often near the function keys.
On smaller HP laptops, you might need to use the Function (Fn) key with PrtSc. The key will usually have a secondary color label indicating this combination.
Common HP screenshot key combinations include:
- PrtSc: Captures the entire screen
- Fn + PrtSc: On compact keyboards, used to activate Print Screen
- Alt + PrtSc: Captures only the active window
- Windows key + Shift + S: Opens the Snipping Tool interface
If your keyboard lacks a dedicated PrtSc key, check your HP documentation for alternative methods. Some HP models use different function key combinations for screenshots.
Basic Screenshot Techniques
Taking screenshots on your HP laptop is easy once you learn a few simple methods. These techniques let you capture your whole screen or just the parts you want to save.
Using Print Screen Key
The Print Screen key (often labeled as PrtSc) is the simplest way to take screenshots on HP laptops. This key is usually located on the top row of your keyboard, near the function keys.
When you press the Print Screen key alone, it copies your entire screen to the clipboard. However, this doesn’t save the image automatically. You’ll need to paste it into an application like Paint, Word, or PowerPoint to save it.
For HP laptops with smaller keyboards, you might need to use the Function (Fn) key with Print Screen. Try pressing Fn + PrtSc if the regular method doesn’t work.
Taking a Full Screenshot
To capture and automatically save your entire screen on an HP laptop:
- Press Windows key + Print Screen together
- Your screen will briefly dim to show the screenshot was taken
- The image saves automatically to Pictures > Screenshots folder
This method is faster than using the Print Screen key alone since it saves the file automatically without needing to paste it somewhere else.
For older HP models running Windows 7, the keyboard shortcut might be different. Try Windows + PrtSc or use the Snipping Tool from the Start menu.
Capturing a Partial Screenshot
Sometimes you only need to capture a specific area of your screen. HP laptops make this easy with the Windows Snipping Tool.
Press Windows + Shift + S to activate the snipping tool. Your screen will dim and a small toolbar will appear at the top. You can choose from several options:
- Rectangle: Drag to select a rectangular area
- Free-form: Draw around an irregular shape
- Window: Select a specific window
- Full-screen: Capture the entire screen
After selecting an area, the screenshot is copied to your clipboard. A notification will appear that you can click to edit and save the image. Otherwise, paste it into any program that accepts images.
Advanced Screenshot Tools on HP Laptops
HP laptops offer several powerful screenshot options beyond the basic Print Screen key. These tools let you capture exactly what you need with more control and editing features.
Leveraging the Snipping Tool
The Snipping Tool is a built-in Windows application that gives you more flexibility than standard screenshot methods. To access it on your HP laptop, press Windows + Shift + S. This shortcut opens a small menu at the top of your screen with different capture options.
You can choose from several capture modes:
- Rectangular snip: Draw a box around what you want to capture
- Free-form snip: Draw any shape you want
- Window snip: Select a specific window
- Full-screen snip: Capture your entire screen
After taking a screenshot, a notification appears. Click it to open the Snipping Tool editor where you can mark up your screenshot with a pen, highlighter, or eraser. You can also crop the image further before saving or sharing it.
Third-Party Screenshot Software
While Windows offers good built-in options, third-party tools provide even more features for HP laptop users.
EaseUS Screenshot is a popular option that offers scrolling screenshots for capturing long webpages – something the built-in tools can’t do. It also includes a screen recorder and advanced annotation tools.
Other powerful options include:
- Snagit: Professional-grade tool with extensive editing capabilities
- Lightshot: Simple, lightweight, and easy to use
- Greenshot: Free, open-source option with good editing tools
These programs let you set custom keyboard shortcuts, create screenshot presets, and offer cloud uploading options. Many also include automatic saving features to prevent losing your captures.
Utilizing Windows Game Bar
The Windows Game Bar isn’t just for gaming – it’s a powerful screenshot and recording tool for HP laptops. Press Windows + G to open the Game Bar overlay.
To take a screenshot with Game Bar, click the camera icon or press Windows + Alt + PrtScn. These screenshots are automatically saved to your Videos/Captures folder.
Game Bar excels at capturing gameplay and fast-moving content on your screen. It also lets you record video with audio from your microphone or system sounds.
You can customize Game Bar settings by opening Settings > Gaming > Xbox Game Bar. Here you can change keyboard shortcuts and adjust recording quality. This tool works especially well when you need to capture action sequences or demonstrations.
Using Keyboard Shortcuts for Screenshots
Capturing screenshots on your HP laptop is quick and simple when you know the right keyboard shortcuts. These methods let you grab images of your screen without installing extra software.
Print Screen Shortcut
The Print Screen key (often labeled as “PrtScn” or “PrtSc”) is the most basic way to take screenshots on an HP laptop. When you press this key alone, it copies an image of your entire screen to the clipboard.
To save the screenshot as a file automatically, press the Windows key + PrtScn together. Your screen will briefly dim to indicate success. Windows saves these images in the Pictures folder under a subfolder called “Screenshots.”
For HP laptops without a dedicated PrtScn button, try using Fn + Windows + Space bar instead. Some HP models use different key combinations, so check your specific laptop model if this doesn’t work.
Alt Key Combos
The Alt + PrtScn combination captures only the currently active window instead of the entire screen. This is useful when you want to screenshot just one application without showing everything else.
After pressing Alt + PrtScn, the image is copied to your clipboard. You can then:
- Paste it into an application like Paint, Word, or PowerPoint
- Press Ctrl + V to paste it into an email or messaging app
- Use Windows + V to access your clipboard history if you’re on Windows 10 or 11
This method helps when you need to share specific information from one program without showing personal details that might be visible in other windows.
Function Key Options
Many HP laptops require using the Function (Fn) key for screenshots since the PrtScn button often serves multiple purposes. Common combinations include:
- Fn + PrtScn: Captures the entire screen on laptops where PrtScn is a secondary function
- Fn + Windows + PrtScn: Saves a full-screen image directly as a file
- Fn + Alt + PrtScn: Captures only the active window
On some HP models, especially newer ones, you might find dedicated screenshot buttons in the function key row. These could be marked with a camera icon or screen symbol.
HP’s gaming laptops often include the OMEN Command Center that offers additional screenshot options through function keys with customizable settings.
Navigating Windows Screenshot Features
Windows offers several built-in tools and keyboard shortcuts to capture screenshots on your HP laptop. These features vary slightly between Windows 10 and Windows 11 but provide flexible options for capturing your screen.
Screenshots on Windows 10
Windows 10 includes multiple ways to take screenshots on your HP laptop. The simplest method is pressing the PrtScn (Print Screen) key, which captures the entire screen and copies it to your clipboard. You can then paste it into an application like Paint or Word.
For more control, press Windows key + PrtScn to automatically save the full-screen capture to the Pictures > Screenshots folder. Your screen will briefly dim to indicate a successful capture.
Alt + PrtScn captures only the active window instead of the entire screen. This option is helpful when you want to share just one program or dialog box.
Windows 10 also includes the Snipping Tool, which offers more advanced options:
- Rectangle mode for selecting a specific area
- Free-form mode for drawing around an object
- Window mode for capturing a specific window
- Full-screen mode for the entire display
Screenshots on Windows 11
Windows 11 enhances screenshot capabilities with an improved Snipping Tool that combines features from the Windows 10 Snipping Tool and Snip & Sketch applications. Press Windows key + Shift + S to activate the screenshot toolbar at the top of your screen.
This toolbar offers several capture options:
- Rectangular Snip: Draw a rectangle around the area you want to capture
- Freeform Snip: Draw any shape around your desired content
- Window Snip: Select a specific window to capture
- Fullscreen Snip: Capture your entire screen
After taking a screenshot, a notification appears allowing you to open, edit, and annotate your capture. Windows 11 also retains the traditional PrtScn and Windows key + PrtScn methods from Windows 10.
Differences Between Windows Versions
The main difference between Windows 10 and 11 screenshot features is the unified Snipping Tool in Windows 11. Windows 10 has both Snipping Tool and Snip & Sketch applications, which can be confusing for users, while Windows 11 combines them into one intuitive tool.
Windows 11 also offers a more streamlined editing experience after capturing screenshots. The notification that appears after taking a screenshot provides direct access to markup tools without needing to open another application.
Both versions support basic keyboard shortcuts like PrtScn and Alt+PrtScn. However, Windows 11’s screenshot interface is more modern and touch-friendly, making it easier to use on HP laptops with touchscreens.
The screenshot save locations remain consistent between versions—both save to the Pictures > Screenshots folder by default when using Windows key + PrtScn.
Editing and Annotating Screenshots
After capturing a screenshot on your HP laptop, you might need to make changes or add notes to it. Windows offers several built-in tools that make editing screenshots simple and efficient.
Basic Photo Manipulation
When you take a screenshot on your HP laptop, you can make basic edits before saving. The Snipping Tool and Snip & Sketch both offer simple photo manipulation features. You can crop unwanted parts of the image by dragging the handles at the corners and edges.
You can also resize your screenshots to fit your needs. In most Windows image editors, look for the “Resize” option under the Image or Edit menu. This lets you adjust dimensions by percentage or pixels.
For basic color adjustments, these tools offer brightness and contrast controls. These options help make text more readable or highlight important elements in your screenshot.
Using Annotation Tools
Windows screenshot tools include several annotation options that help you communicate ideas clearly. The most common annotations include:
- Highlighter: Draw attention to specific text or elements
- Pen tool: Create freehand markings in different colors
- Text boxes: Add explanatory notes directly on the image
- Arrows and shapes: Point to important elements
The annotation toolbar typically appears at the top of the editing window. You can select different colors for your markings to create visual hierarchy.
Most annotation tools also include an eraser function to remove mistakes. This gives you flexibility when marking up your screenshots.
Rectangular and Freeform Modes
Screenshot tools on HP laptops offer different capture modes to suit various needs. Rectangular mode lets you draw a precise box around what you want to capture. This works well for capturing specific windows, menus, or sections of a document.
Freeform mode allows you to draw an irregular shape around elements. This is helpful when you need to capture non-rectangular content or exclude certain parts of the screen.
Both modes activate from the same screenshot tool. In the Snipping Tool, select the mode from the “Mode” dropdown menu before taking your screenshot. In Snip & Sketch, you’ll find these options in the toolbar that appears after pressing Win+Shift+S.
Troubleshooting Screenshot Issues
Taking screenshots on your HP laptop should be simple, but sometimes the function stops working. Let’s look at how to fix the most common screenshot problems on Windows devices.
When Print Screen Doesn’t Work
If your Print Screen key isn’t working, try a simple restart first. Sometimes your computer just needs a quick refresh to get everything working again.
Check your keyboard settings by going to Settings > Ease of Access > Keyboard. Scroll down to the “Print Screen Shortcut” section and make sure it’s switched ON. This setting lets you use the PrtScn key properly.
Try pressing Windows + Print Screen together instead of just the Print Screen key alone. This combination saves screenshots directly to your Pictures > Screenshots folder.
If that doesn’t work, update your keyboard drivers. Right-click on the Start button, select Device Manager, expand “Keyboards,” right-click your keyboard, and select “Update driver.”
On-screen Keyboard Alternatives
When your physical keyboard fails, Windows has built-in solutions. Open the on-screen keyboard by typing “on-screen keyboard” in the search bar and clicking the app.
The on-screen keyboard has a PrtScn button you can click to take screenshots just like the physical key.
Try using Snip & Sketch, a built-in Windows tool. Press Windows + Shift + S to open it instantly and select the area you want to capture.
Another option is the Xbox Game Bar. Press Windows + G to open it, then click the camera icon to take a screenshot of your active window.
Resolving Software Conflicts
Background programs might interfere with your screenshot function. Close any unnecessary applications, especially gaming overlays or screen recording software.
Check if any third-party screenshot tools are conflicting with Windows. Temporarily disable them to see if that resolves the issue.
Make sure your graphics drivers are up to date. Outdated display drivers can sometimes cause screenshot functions to fail. Visit your HP support page to download the latest drivers.
Run the Windows troubleshooter. Right-click the Start button, select Settings > Update & Security > Troubleshoot > Additional troubleshooters > Keyboard.
If nothing else works, try creating a new user account to determine if the issue is profile-specific.
Frequently Asked Questions
Taking screenshots on HP laptops can be done in several ways depending on your operating system and specific laptop model. The process is generally straightforward but varies slightly across different Windows versions.
What are the steps to capture a screenshot on an HP laptop running Windows 10?
On Windows 10, press the Windows key + Print Screen key simultaneously. Your screen will dim briefly, indicating the screenshot was taken.
The screenshot is automatically saved in the Pictures folder under a subfolder called “Screenshots.”
You can also use Windows key + Shift + S to open the Snipping Tool, which lets you select a specific portion of your screen to capture.
Can you describe the process for taking a screenshot on an HP laptop equipped with Windows 11?
For Windows 11 users, press the Windows key + Print Screen to capture the entire screen. The image will save automatically to the Screenshots folder.
Windows 11 also offers the Snipping Tool, accessed by pressing Windows key + Shift + S. This opens an overlay that allows you to select the type of screenshot you want.
After capturing with the Snipping Tool, the image is copied to your clipboard, and a notification appears, which you can click to edit and save the image.
How can a user take a screenshot on an HP laptop that is operating on Windows 7?
On Windows 7, press the Print Screen (PrtScn) key to copy the entire screen to your clipboard. Nothing will appear to happen when you press this key.
To save the screenshot, open an application like Paint, then press Ctrl + V to paste the image. You can then save it in your preferred format.
Windows 7 also includes the Snipping Tool in the Accessories folder of the Start menu, which allows for more precise screenshots.
What alternatives are available for taking a screenshot on an HP laptop if the PrintScreen button is not present?
If your HP laptop lacks a dedicated Print Screen key, look for a key with a camera icon, often on the function keys (F12). Press this key or Fn + this key.
HP laptops sometimes require pressing the Fn key along with the Print Screen key if it’s a secondary function on another key.
You can also use software alternatives like the built-in Snipping Tool or third-party screenshot applications available for download.
Is there a specific method to capture a screenshot on an HP EliteBook laptop?
HP EliteBook laptops typically follow standard Windows screenshot methods. Press the Print Screen key or Windows + Print Screen to capture the entire screen.
Some EliteBook models include HP’s custom software that might offer additional screenshot capabilities. Check your installed HP applications.
The function keys on EliteBooks may require pressing the Fn key in combination with the Print Screen key to activate the screenshot function.
Where can I find the screenshot function on an HP Chromebook?
On an HP Chromebook, press Ctrl + Show Windows key (which looks like a rectangle with two lines) to capture the entire screen.
For a partial screenshot on a Chromebook, press Ctrl + Shift + Show Windows key, then click and drag to select the area you want to capture.
Screenshots on Chromebooks are automatically saved to the Downloads folder, and a notification appears when the screenshot is taken.


