Turning on your Dell laptop’s Wi-Fi is a simple process that takes just a few seconds. Whether you’re at home, a coffee shop, or traveling, getting connected to the internet is essential for most computer tasks. You can turn on Wi-Fi on a Dell laptop using keyboard shortcuts (usually Fn+F2 or Fn+F8), through Windows settings, or by using a physical switch on some older models.
Many Dell laptops have dedicated keys or key combinations to control wireless functions. Look for a key with a wireless icon, which typically shows an antenna or similar symbol. If your keyboard shortcut isn’t working, you can always go through Windows by clicking on the network icon in the taskbar or going to Settings > Network & Internet > Wi-Fi and toggling the switch to “On.”
Sometimes Wi-Fi issues go beyond just turning the feature on. If your Dell laptop won’t connect even after enabling Wi-Fi, you might need to check your wireless adapter in Device Manager or reset your network settings. Some Dell models also have settings in the BIOS that could affect wireless functionality if they’ve been changed.
Turn WiFi On or Off When Using A Dell Laptop
Whether you need to connect to a wireless network or save battery by turning off your WiFi, Dell laptops make it simple to manage your wireless settings. Here’s a step-by-step guide on how to turn WiFi on or off on a Dell laptop.
1. Using the Function (Fn) Key
Many Dell laptops have a dedicated key or a combination of keys to enable or disable WiFi quickly.
Steps:
- Look for the WiFi symbol on the function keys at the top row (often F2, F3, or F12, depending on the model).
- Press Fn + (the corresponding function key) to toggle WiFi on or off.
- You should see an on-screen notification indicating the WiFi status.
2. Using Windows Settings
You can also control WiFi through Windows settings.
Steps (Windows 10/11):
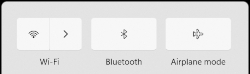
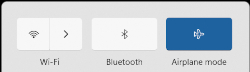
- Click the Network icon (WiFi symbol) in the taskbar, usually at the bottom-right corner.
- If WiFi is off, click WiFi to turn it on.
- To turn it off, click the WiFi icon again, or select Airplane Mode to disable all wireless communication.
Or, go through Settings:
- Open Settings > Network & Internet > WiFi.
- Toggle the WiFi switch on or off as needed.

3. Using the Physical Wireless Switch (Older Models)
Some older Dell laptops include a physical wireless switch on the side of the laptop.
Steps:
- Find the switch on the side or front edge of your laptop.
- Slide it to turn WiFi on or off.
- Confirm the change by checking the WiFi icon on your screen.
4. Turn WiFi Off/On in Device Manager (Advanced)
If you’re troubleshooting, you can disable WiFi via Device Manager.
Steps:
- Right-click the Start menu and select Device Manager.
- Expand Network adapters.
- Right-click your WiFi adapter (typically listed as “Wireless” or “WiFi”) and select Disable device to turn it off.
- To re-enable it, right-click and select Enable device.
By using any of these methods, you can quickly turn WiFi on or off on your Dell laptop, whether for connectivity, troubleshooting, or conserving power.

Key Takeaways
- Dell laptops typically use the built-in Wifi settings in Windows but might also use a key combination like Fn+F2 or Fn+F8 to toggle Wi-Fi on and off.
- You can also enable Wi-Fi through Windows settings by going to Network & Internet in the Settings app.
- If Wi-Fi options are missing, check Device Manager or your laptop’s BIOS settings to ensure the wireless adapter is enabled.
Understanding Wi-Fi Networking
Wi-Fi technology enables wireless connections between devices and the internet. This invisible network connects your Dell laptop to the online world through radio signals instead of physical cables.
Evolution of Wireless Networking
Wi-Fi began in the 1990s when the Institute of Electrical and Electronics Engineers (IEEE) created the 802.11 standard. Early wireless networks were slow, with speeds of only 1-2 Mbps. These networks used large, expensive equipment that limited their usefulness.
As technology improved, wireless networking became faster and more reliable. The adoption of Wi-Fi in homes and businesses grew quickly in the early 2000s. Desktop computers needed special cards for wireless connectivity, but laptops (including Dell models) started including built-in wireless adapters.
Today’s Wi-Fi networks can handle multiple devices and high-bandwidth activities like video streaming. Modern Dell laptops include advanced wireless adapters that automatically detect and connect to available networks.
Wi-Fi Standards and Dell Laptops
Wi-Fi standards have evolved significantly over time:
- 802.11b/g/n: Earlier Dell laptops supported these standards with speeds up to 300 Mbps
- 802.11ac: Found in mid-range Dell laptops, offering speeds up to 1300 Mbps
- 802.11ax (Wi-Fi 6): Latest standard in newer Dell models, providing speeds up to 9.6 Gbps
Dell laptops typically display the supported Wi-Fi standard in their specifications. Newer models include dual-band capability, connecting to both 2.4 GHz and 5 GHz networks. The 2.4 GHz band offers better range but slower speeds, while 5 GHz provides faster connections over shorter distances.
Most Dell laptops also feature Bluetooth alongside Wi-Fi for connecting peripherals like mice, keyboards, and headphones wirelessly.
Identifying Your Dell Laptop Model
Knowing your Dell laptop model helps you find the right instructions for turning on WiFi. There are several easy ways to find this information.
The quickest method is checking the manufacturer’s label on your Dell laptop. Look for a sticker on the bottom of your device that shows both the model name (like Dell Inspiron 15) and the service tag number.
You can also find your model information through your computer settings:
- Click the Start button
- Type “System Information” and open it
- Look for “System Model” in the list
If you still have the packaging, check the box or Quick Start Guide that came with your Dell laptop. These materials typically display the model information prominently.
For Dell Inspiron users, the model number is often printed on the laptop’s bezel (the frame around the screen) or beneath the keyboard.
Another reliable method is using Dell’s own software. Install Dell Command Update from Dell Support website, which will display your service tag, express service code, and exact machine model.
Knowing your exact model helps you find specific instructions for your WiFi settings, as different Dell laptop series may have slightly different methods for enabling wireless connections.
Navigating to Wi-Fi Settings in Windows Operating Systems
Windows offers several ways to access and manage Wi-Fi settings. The exact steps vary depending on which version of Windows you’re using on your Dell laptop.
Windows 7 Wi-Fi Options
In Windows 7, you can access Wi-Fi settings through the Network and Sharing Center. Click on the network icon in the system tray (bottom right corner of the screen). This opens a small window showing available networks.
To see more options, click “Open Network and Sharing Center.” This takes you to a control panel where you can:
- View your active networks
- Set up a new connection
- Troubleshoot connection problems
- Change adapter settings
For more detailed control, click “Change adapter settings” in the left panel. This shows all network adapters. Right-click on your wireless adapter and select “Enable” if it’s disabled.
You can also reach these settings through Control Panel > Network and Internet > Network and Sharing Center.
Wi-Fi Settings in Later Windows Versions
Windows 8, 10, and 11 offer easier ways to control Wi-Fi. The quickest method is to click the network icon in the system tray. In Windows 10/11, this opens the action center where you can toggle Wi-Fi on or off with one click.
For more options in Windows 10/11:
- Press the Windows key + I to open Settings
- Select “Network & Internet”
- Click “Wi-Fi” in the left panel
This screen lets you:
- Turn Wi-Fi on or off
- Connect to available networks
- Manage known networks
- Set up a hotspot
- Configure advanced options
You can also right-click the Start button and select “Network Connections” for a more traditional view of network adapters similar to Windows 7.
Enabling Wi-Fi via Dell Keyboard Shortcuts
Dell laptops offer convenient keyboard shortcuts to quickly turn your Wi-Fi on or off without navigating through multiple menus. These shortcuts save time and provide immediate control over your wireless connectivity.
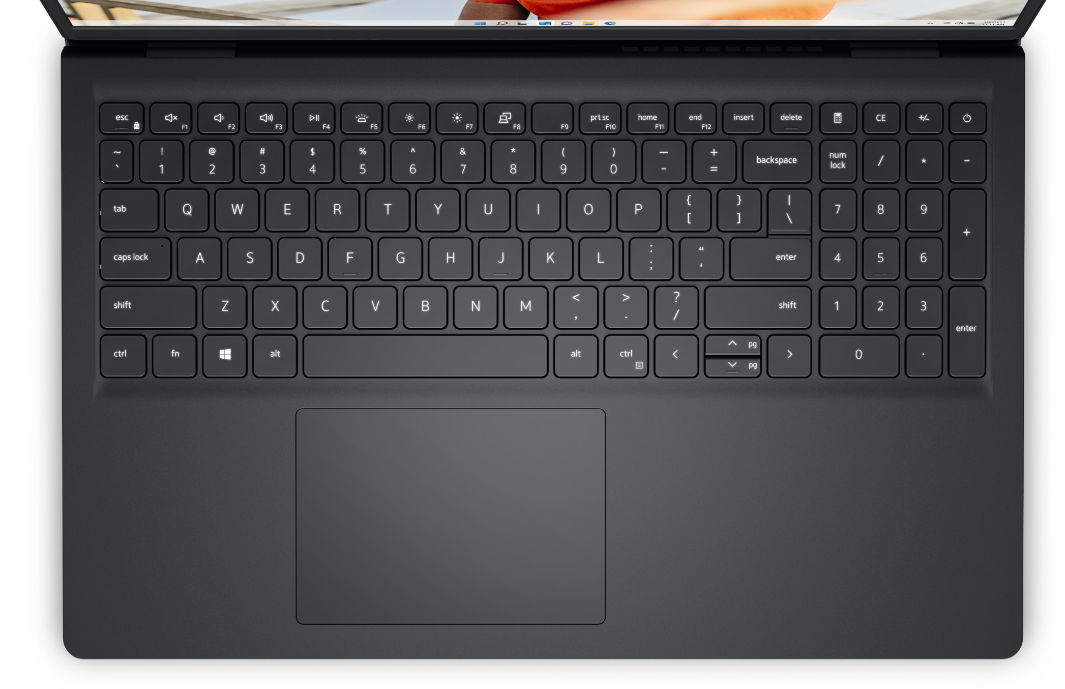
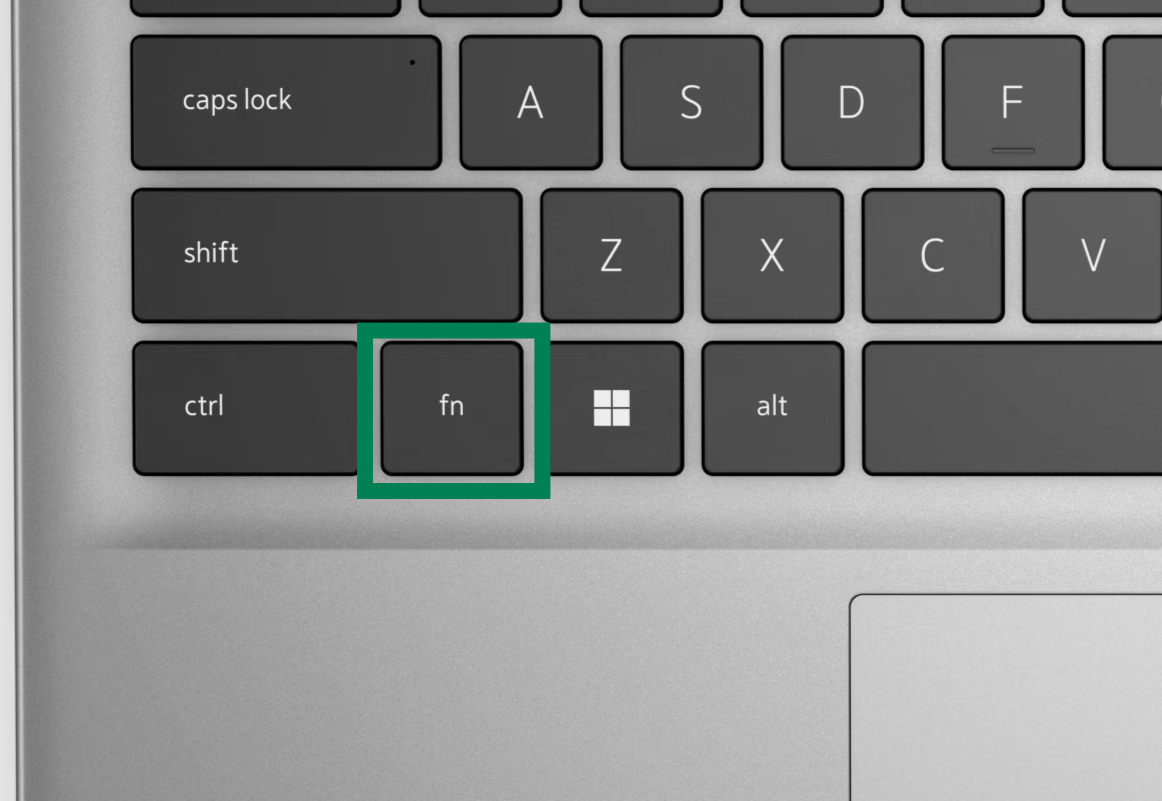
Function Key Combinations for Wi-Fi
Most Dell laptops use the F2 key combined with the Function (Fn) key to control Wi-Fi. To use this shortcut, locate the Fn key (usually in the bottom row of your keyboard) and press it together with F2. On newer Dell models, pressing Fn+F2 toggles all wireless devices, including Wi-Fi and Bluetooth.
Some Dell models might use different function keys. For example, certain Inspiron or XPS models might use Fn+PrtScr or Fn+F8 instead. If Fn+F2 doesn’t work, check your laptop’s user manual or look for a wireless icon on one of your function keys.
The keyboard shortcut behaves as a toggle. This means pressing it once turns Wi-Fi off, and pressing it again turns Wi-Fi back on.
Identifying the Wireless Icon on Your Keyboard
Dell keyboards typically mark wireless-related function keys with a distinctive icon. Look for a key with a small antenna or radio wave symbol. This icon resembles a broadcast signal – usually showing curved lines extending upward from a small point.
On most Dell laptops, this wireless icon appears on the F2 key. The icon might be printed on the front or top edge of the key. It’s typically blue or white, depending on your keyboard design.
Some Dell models feature a dedicated wireless button separate from the function keys. This button might be located above the keyboard, on the side, or even on the front edge of the laptop. It often has an LED indicator that shows orange when Wi-Fi is disabled and blue or green when enabled.
If you’re unsure which key controls your Wi-Fi, check the symbols printed on your function keys or consult your Dell’s documentation.
Using the Physical Wi-Fi Switch on Dell Laptops
Some Dell laptops come with a physical Wi-Fi switch located on the side or front of the device. This switch provides a quick way to turn your wireless connection on or off without going through software settings.
The location of this switch varies by model. On many Dell Latitude models, you’ll find it on the right side of the laptop. For Inspiron and XPS models, it might be on the left side or along the front edge.
The switch typically slides or toggles between two positions. When the switch is in the “on” position, your Wi-Fi radio is enabled. When moved to the “off” position, all wireless communications are disabled.
If your Wi-Fi isn’t working, check this switch first. It’s easy to accidentally bump the switch while carrying your laptop, which can disable your wireless connection.
Some newer Dell models have replaced the physical switch with keyboard shortcuts. The most common is pressing Fn+F2, which toggles airplane mode on and off.
For laptops with both a physical switch and keyboard controls, the physical switch usually overrides software settings. This means if the switch is off, pressing Fn+F2 won’t enable Wi-Fi.
Look for small icons near the switch that show wireless signals or an airplane symbol to identify it. If your Wi-Fi indicator light is off, this could indicate the physical switch is in the off position.
Checking the Wireless Adapter Status in Device Manager
Device Manager is a useful tool for diagnosing Wi-Fi problems on your Dell laptop. It lets you check if your wireless adapter is working properly and update drivers if needed.
Accessing Device Manager
There are several ways to open Device Manager on your Dell laptop. The quickest method is to right-click on the Start button and select “Device Manager” from the menu that appears.
You can also search for “Device Manager” in the Windows search box. Once open, look for the “Network adapters” category and click the arrow next to it to expand.
Your wireless adapter should be listed here with names like “Intel Wireless-AC,” “Broadcom,” or “Qualcomm.” If you see a yellow warning triangle or exclamation mark on the adapter icon, this indicates a problem.
Right-click on your wireless adapter and select “Properties” to view its status. The “Device status” section will tell you if the device is working properly or experiencing issues.
Updating Wi-Fi Driver
Outdated or corrupted Wi-Fi drivers often cause connection problems. To update your driver, right-click on your wireless adapter in Device Manager and select “Update driver.”
You can choose between:
- Search automatically for drivers: Windows will search your computer and the internet for the latest driver
- Browse my computer for drivers: Use this if you’ve downloaded a driver from Dell’s website
For best results, visit Dell’s support website and download the latest Wi-Fi driver specifically for your laptop model. You’ll need your service tag or model number to find the right drivers.
After installing new drivers, restart your laptop to apply the changes. This often resolves connection issues and improves Wi-Fi performance.
Troubleshooting Wi-Fi Connection Issues
When your Dell laptop won’t connect to Wi-Fi, a few simple fixes can often solve the problem. These solutions range from checking basic settings to performing more technical resets.
Ensuring Airplane Mode is Turned Off
Airplane mode is a common culprit for Wi-Fi connection problems. When activated, it disables all wireless communications, including Wi-Fi.
To check if Airplane mode is on:
- Look at the taskbar and click the “Internet” icon
- Make sure the Airplane mode toggle is turned off (not highlighted)
- If it’s on, simply click to disable it
On some Dell models, you might also need to check function keys. Press the F2 or F12 key (or Fn + wireless key) which often has an airplane icon. This key toggles wireless capabilities on and off.
Sometimes Windows updates can accidentally enable Airplane mode. If you recently updated your system and lost Wi-Fi, this might be the cause.
Resetting Hardware and Software Components
When simple fixes don’t work, resetting your network components often solves connection issues.
Restart your devices:
- Turn off your Dell laptop completely
- Unplug your router and modem for about 30 seconds
- Plug them back in and wait for full restart
- Turn your laptop back on
If that doesn’t work, try troubleshooting through Windows:
- Right-click the Wi-Fi icon in the taskbar
- Select “Open Troubleshooting”
- Follow the on-screen instructions
The troubleshooter often automatically resets your WLAN adapter. For more persistent problems, updating your wireless network adapter driver might help. Outdated drivers commonly cause Wi-Fi connection failures.
You can also try manually resetting your network adapter through Device Manager or using the Network Reset option in Windows Settings.
Understanding User Preferences and Cookies Consent
When turning on WiFi on your Dell laptop, you’ll encounter settings related to your network preferences and cookie management. These settings affect how your computer connects to networks and handles website data.
Setting Network Preferences
On Dell laptops, you can customize network preferences to match your connectivity needs. To access these settings, click the WiFi icon in the taskbar, then select “Network & Internet settings” or use the Windows key to open Settings directly.
WiFi preferences allow you to:
- Set connection priority: Choose which networks connect automatically
- Configure metered connections: Limit data usage on specific networks
- Enable/disable auto-connect options: Control when your laptop joins known networks
You can also set your Dell laptop to remember networks you’ve previously connected to. This saves time when you return to frequent locations like home, work, or school. The “Known Networks” section displays all saved networks and lets you manage their properties or remove them completely.
Managing Cookies for Optimal Performance
Cookie management affects how websites remember your preferences when using WiFi on your Dell laptop. Browsers like Chrome, Firefox, and Edge have settings to control cookie behavior.
To manage cookies effectively:
- Open your browser settings
- Navigate to Privacy or Cookie settings
- Choose your preferred cookie consent level
You can select options ranging from blocking all cookies to accepting all cookies. A middle-ground approach is accepting first-party cookies (from sites you visit directly) while blocking third-party cookies (from advertisers and trackers).
Browser cookie settings work independently from your WiFi connection, but they impact your browsing experience. Clear cookies periodically to improve performance, especially when experiencing slow loading times or website errors on your Dell laptop’s WiFi connection.
Frequently Asked Questions
Here are answers to common questions about turning on Wi-Fi on Dell laptops. These solutions address various issues you might face when trying to connect to wireless networks.
How do I enable Wi-Fi on a Dell laptop using Windows 10?
Click on the network icon in the taskbar at the bottom right of your screen. This icon looks like a computer or Wi-Fi signal.
If Wi-Fi is off, click on the “Wi-Fi” tile to turn it on. The tile will change from gray to blue when active.
You can also go to Settings > Network & Internet > Wi-Fi and toggle the switch to “On” position.
What should I do if the Wi-Fi button is missing on my Dell laptop?
Check if the Wi-Fi adapter is disabled in Device Manager. Right-click the Start button, select Device Manager, and expand “Network adapters” to see if your wireless adapter has a yellow warning symbol.
If you find the adapter with an issue, right-click it and select “Enable device.”
Sometimes a system update is needed. Go to Dell Support website and download the latest Wi-Fi driver for your specific Dell model.
How can I turn on Bluetooth on a Dell laptop with Windows 10?
Click on the Action Center icon in the bottom right corner of your screen (looks like a speech bubble). Then click on the “Bluetooth” tile to toggle it on.
You can also go to Settings > Devices > Bluetooth & other devices and switch the Bluetooth toggle to “On.”
If Bluetooth doesn’t appear, you may need to update your Bluetooth drivers from the Dell website.
What are the steps to activate Wi-Fi manually on a Dell laptop?
Press the Windows key + X and select “Device Manager.” Expand the “Network adapters” section.
Right-click on your wireless adapter and select “Enable device” if it’s disabled.
You can also try using the keyboard shortcut. Many Dell laptops use F2 or Fn + F2 to toggle wireless connections on or off.
Why is my Dell laptop unable to connect to Wi-Fi?
Check if Airplane mode is turned on accidentally. Go to Settings > Network & Internet > Airplane mode and make sure it’s off.
Your network adapter might need resetting. Right-click the Start button, select “Command Prompt (Admin)” and type “netsh winsock reset” followed by “netsh int ip reset”.
Outdated drivers often cause connection problems. Visit Dell’s Support website to download the latest network drivers for your model.
Is there a keyboard shortcut to enable Wi-Fi on a Dell laptop?
Most Dell laptops use F2 or Fn + F2 as the keyboard shortcut to toggle wireless connections on and off.
Some models may use different keys like F12 or Fn + F12. Look for a key with a wireless icon that resembles a broadcast signal.
If these don’t work, check your specific Dell model’s manual or support page for the correct shortcut combination.