
Keeping your browsing history private is a concern for many Chrome users. Whether you’re using a shared computer or simply want to maintain your privacy, knowing how to delete your search history is essential. You can delete your Google Chrome search history by pressing Ctrl+H to access your history, then clicking “Clear browsing data” and selecting the time range and types of data you want to remove.
Managing your search history doesn’t have to be complicated. On desktop, you can access Chrome’s history through the menu or keyboard shortcut, then choose which data to clear. For mobile devices, you can tap the three dots menu, select History, and clear your browsing data there. Google also lets you manage search activity directly through your Google Account settings.
Privacy management in Chrome gives you control over what information is stored. You can clear all data from “the beginning of time” or just remove recent searches. This helps protect your privacy and can sometimes help Chrome run better by clearing out old data.

How To Delete Search History on Google Chrome (Desktop)
Here’s a complete guide on how to delete your search history on Google Chrome—whether you’re on a desktop, Android, or iPhone. You’ll learn how to clear browsing history, search terms, and even how to manage auto-suggestions.
Clear All Search & Browsing History:
- Open Chrome and click the three-dot menu in the upper-right corner.
- Select “History” > then “History” again from the side menu.
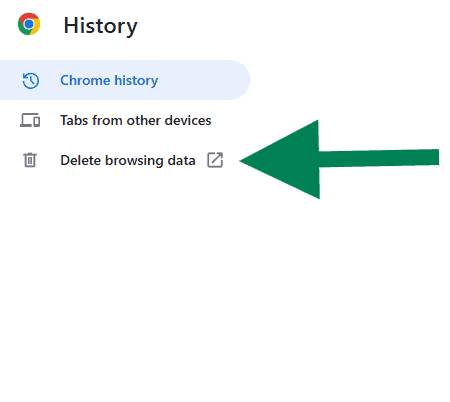
- On the left panel, click “Clear browsing data.”
- Choose a time range at the top (e.g., “Last hour” or “All time”).
- Check the boxes for:
- Browsing history
- Cookies and other site data
- Cached images and files
- Click “Clear data.”
Remove Specific Searches:
- Open the Chrome History page (
Ctrl + HorCmd + Y). - Use the search bar to find specific websites or terms.
- Click the three dots next to each result and choose “Remove from history.”
How To Delete Search History on Chrome (Android)
Clear All Search & Browsing History:
- Open the Chrome app.
- Tap the three dots in the top-right corner.
- Go to History.
- Tap “Clear browsing data…”
- Select a time range (e.g., Last hour, Last 7 days, All time).
- Check the options you want (Browsing history, Cookies, Cached files).
- Tap “Clear data.”
Delete Individual Search Items:
- Go to the History screen in Chrome.
- Tap the X next to any specific entry to remove it.
How To Delete Search History on Chrome (iPhone/iPad)
Clear All Search & Browsing History:
- Open Chrome on your iPhone or iPad.
- Tap the three-dot menu at the bottom right.
- Choose “History.”
- Tap “Clear Browsing Data.”
- Select a time range and the data types (Browsing History, Cookies, etc.)
- Tap “Clear Browsing Data” at the bottom.
Remove Specific Items:
- From the History screen, swipe left on an item.
- Tap Delete to remove it individually.
Bonus: Delete Google Account Search Activity (Optional)
If your search history is also stored in your Google account (not just on Chrome):
- Go to myactivity.google.com and sign in.
- Click “Web & App Activity.”
- Select “Manage all Web & App Activity.”
- Use the search bar or filter by date/product to delete specific items.
- Or click “Delete activity by” to remove history for a time range or all history.
Cleaning up your search history not only gives you a fresh start but also helps maintain privacy and optimize browser performance across all your devices.
Key Takeaways
- Access Chrome history with Ctrl+H on desktop or through the three-dots menu on mobile devices to delete browsing data.
- Choose specific time ranges when clearing history to remove only what you need rather than all browsing data.
- Manage Google search history separately through your Google Account settings for more comprehensive privacy control.
Understanding Browser Data
When you browse the internet with Google Chrome, the browser collects various types of data about your online activities. This information helps websites function properly but can also raise privacy concerns if not managed properly.
What Is Browsing Data
Browsing data is information that Chrome stores as you use the internet. It includes websites you’ve visited, files you’ve downloaded, and information you’ve entered into forms. This data helps Chrome load websites faster and remember your preferences.
Chrome saves this information on your device. When you revisit a website, Chrome uses this saved data to improve your experience. For example, it can automatically fill in login details or show you previously visited links in a different color.
Your browsing data is typically stored until you manually delete it. However, you can set Chrome to automatically clear this information when you close the browser or after a specific time period.
Types of Browsing Data
Chrome stores several different types of browsing data:
- Browsing history: Records of websites you’ve visited, including dates and times
- Cookies: Small text files that websites store on your device to remember your preferences
- Cache: Temporary storage of website components like images and scripts
- Form data: Information you’ve entered into online forms
- Site data: Settings and permissions you’ve granted to specific websites
- Downloads: Records of files you’ve downloaded
Third-party cookies deserve special attention. These are cookies placed by domains other than the one you’re visiting. They often track your browsing habits across multiple websites for advertising purposes.
Importance of Managing Browsing History
Regular management of your browsing data helps protect your privacy. Without clearing your history, anyone with access to your device can see which websites you’ve visited and what information you’ve entered.
Clearing browsing data can also fix certain website problems. Outdated cache files sometimes conflict with updated website content, causing display errors or functionality issues.
For shared computers, managing browsing history is especially important. Your personal information, including passwords and login details, could be accessible to others if not cleared regularly.
Some people clear their data to stop personalized ads that follow them around the internet. Removing cookies breaks the connection between websites that track your browsing habits for advertising purposes.
Google Chrome’s Privacy and Security Settings
Chrome offers several privacy features to help you control how your data is handled. These settings allow you to manage what websites can access and how your browsing information is stored.
Accessing Privacy and Security Settings
To find Chrome’s privacy settings, click the three-dot menu in the upper right corner of your browser window. Select “Settings” from the dropdown menu. On the left side panel, click “Privacy and security.” This section contains all the tools you need to manage your digital footprint.
The main privacy page displays several important options. Here you can:
- Clear your browsing data
- Manage cookies and site data
- Control site permissions
- Adjust security settings
You can also access these settings directly by typing “chrome://settings/privacy” in your address bar. This creates a shortcut to the privacy section without navigating through multiple menus.
Site Settings Overview
The Site Settings area lets you control what information websites can access. To find it, go to Privacy and security, then click “Site Settings.” This opens a page with permissions organized by category.
Key permissions you can manage include:
- Location: Control which sites can see your physical location
- Camera and Microphone: Manage which sites can use these devices
- Notifications: Choose which sites can send alerts
- Pop-ups and redirects: Block unwanted windows
Chrome lets you set global defaults for each permission type. You can also create exceptions for specific websites. For example, you might block all sites from accessing your location but allow your weather app.
Site Settings also includes controls for cookies, JavaScript, and sound playback. Review these settings periodically to maintain your preferred privacy level.
How To Clear Browsing Data on Desktop
Clearing your browsing data on Google Chrome can help protect your privacy and free up space on your computer. The process is straightforward and gives you control over what specific data you want to remove.
Navigating to Clear Browsing Data
There are several ways to access the Clear Browsing Data option in Chrome. The quickest method is using the keyboard shortcut Ctrl+Shift+Delete (Windows/Linux) or Command+Shift+Delete (Mac). This immediately opens the Clear Browsing Data window.
Another way is to click on the three dots menu in the top-right corner of Chrome. From the dropdown menu, hover over “History” and then click “History” again. A new tab will open showing your browsing history. Look for the “Clear browsing data” option on the left side of the screen.
You can also type chrome://settings/clearBrowserData in your address bar and press Enter to go directly to the clear data interface.
Choosing What to Delete
Chrome lets you select exactly what browsing data you want to remove. The basic options include:
- Browsing history: Sites you’ve visited
- Cookies and site data: Saved information from websites
- Cached images and files: Temporary files stored to make sites load faster
You can also click on Advanced to see more options like:
- Passwords
- Autofill form data
- Site settings
- Hosted app data
Choose the time range for deletion from the dropdown menu. Options range from “Last hour” to “All time.”
Clearing the Data
After selecting what you want to delete and the time range, click the blue “Clear data” button. Chrome will immediately start removing the selected information.
The process usually takes just a few seconds, but might take longer if you’re deleting a large amount of data or have selected “All time” as your range.
Once complete, Chrome won’t show any confirmation, but your selected data will be gone. Remember that clearing browsing data can sign you out of websites and remove saved preferences. Some website features might load slower the next time you visit them as Chrome rebuilds its cache.
For regular privacy maintenance, consider setting up Chrome to automatically clear certain data when you close the browser.
Managing Browsing History on Devices
Google Chrome makes it easy to manage your browsing history across different devices. The process differs slightly between Android and iOS platforms, but both offer simple ways to clear your data.
Clearing History on Android
To delete your browsing history on an Android device:
- Open Chrome on your Android device
- Tap the three dots menu in the top right corner
- Select “History” from the dropdown menu
- Tap “Clear browsing data” at the bottom of the screen
You can choose what type of data to remove by selecting from options like browsing history, cookies, and cached images. Chrome also lets you pick a time range for deletion – from the last hour to all time.
For a quicker option, you can access the same menu by tapping the three dots and selecting “Settings” > “Privacy and security” > “Clear browsing data.”
Clearing History on iOS
Clearing browsing history on an iPhone or iPad follows a similar process:
- Open the Chrome app on your iOS device
- Tap the three dots in the bottom right corner
- Select “History” from the menu
- Tap “Clear browsing data” at the bottom
- Choose what data you want to delete
- Tap “Clear browsing data” to confirm
The iOS version of Chrome also allows you to select specific time ranges for deletion. You can remove just the last hour of activity or your entire browsing history.
For more privacy, you can use Incognito mode on either platform by tapping the three dots menu and selecting “New Incognito tab.” This prevents Chrome from saving your browsing history from the start.
Controlling Site Data and Cookies
Chrome gives you options to control what information websites store on your device. Managing cookies and site data helps protect your privacy and can free up storage space.
Managing Cookies
Cookies are small files that websites save on your computer to remember your preferences and login information. To manage cookies in Chrome:
- Click the three dots menu in the top right corner
- Select “Settings”
- Click “Privacy and security” on the left
- Select “Cookies and other site data”
From here, you can choose how Chrome handles cookies. Options include:
- Block third-party cookies – Prevents sites from tracking you across the web
- Block all cookies – Most secure but breaks many websites
- Allow all cookies – Convenient but less private
You can also see which sites have stored cookies and delete them selectively. This is helpful if you want to stay logged into certain sites while clearing others.
Managing Site Data
Site data includes cached images, databases, and other information stored by websites. This data can take up space and potentially track your activities.
To control site data in Chrome:
- Go to Settings > Privacy and security
- Click “Site Settings”
- Select “View permissions and data stored across sites”
You can see how much space each website uses and remove data from specific sites. For a quick cleanup:
- Press Ctrl+Shift+Delete (Windows/Linux) or Command+Shift+Delete (Mac)
- Check “Cookies and other site data”
- Select a time range
- Click “Clear data”
Regularly clearing site data helps maintain privacy and keeps Chrome running smoothly. Some sites may load slower initially after clearing, as they need to rebuild their cached data.
Automating Privacy Tasks
Chrome offers ways to handle your privacy automatically so you don’t have to remember to clear your history manually. These features save time and help keep your browsing data private without extra effort.
Setting Up Automatic Deletion
Google Chrome lets you set up automatic deletion of your browsing data. To enable this:
- Open Chrome and click the three dots in the top-right corner
- Select “Settings”
- Click on “Privacy and Security”
- Choose “Clear browsing data”
- Select “Advanced” tab
- Click on “Auto-delete” option
You can choose how often Chrome clears your data – every time you close the browser or on a schedule (like every week or month). This feature removes history, cookies, and site data based on your settings.
Chrome also offers control over which types of data get deleted. You might want to keep passwords and sign-in info while clearing your browsing history and cookies. The settings let you pick exactly what stays and what goes.
Using Extensions for Privacy Management
Chrome’s Web Store offers several extensions that enhance privacy management beyond the built-in options. The “Auto Clear Browsing Data” extension is particularly useful for users who want more control.
This extension allows you to:
- Set specific data types to clear automatically
- Create rules for when data should be deleted
- Manage exceptions for trusted websites
Another helpful feature in Chrome is the “Delete last 15 minutes” option. This quick-clear function removes recent browsing activity without affecting older data. It’s perfect for when you need to quickly erase recent searches.
Some privacy extensions also offer scheduling options. They can clear your data at specific times or after certain actions. This automation helps maintain privacy without interrupting your browsing experience.
Frequently Asked Questions
Here are answers to common questions about deleting search and browsing history in Google Chrome across different devices.
What steps are required to clear the browsing history in Google Chrome on a computer?
To clear browsing history on a computer, press Ctrl+H to open the History page in Chrome. Click “Clear browsing data” on the left side of the screen. Select the time range you want to clear (such as “All time” to erase everything). Check the box for “Browsing history” and any other data types you want to remove. Click the “Clear data” button to finish.
You can also access this feature through the Chrome menu. Click the three dots in the top-right corner, select “History,” and then click “Clear browsing data.”
How can I remove specific items from my search history in Google Chrome?
To delete individual search items, open Chrome and press Ctrl+H to view your history. Find the specific item you want to remove. Hover your mouse over that item and click the three dots that appear on the right side. Select “Remove from history” to delete just that entry.
If you want to delete multiple specific items, you can click the checkboxes next to each entry and then click the “Delete” button that appears at the top of the screen.
What is the process to delete the search history on Google Chrome on an iPhone?
On an iPhone, open the Chrome app and tap the three dots in the bottom-right corner. Select “History” from the menu. To clear all history, tap “Clear browsing data” at the bottom of the screen. Check “Browsing history” and any other data you want to remove. Tap “Clear browsing data” and confirm by tapping it again in the pop-up window.
To delete individual items, go to History, find the entry, swipe left on it, and tap “Delete.”
How do I clear Google Chrome’s search history on an Android device?
Open Chrome on your Android device and tap the three dots in the top-right corner. Select “History” from the menu. Tap “Clear browsing data” at the bottom or top of the screen, depending on your version of Chrome. Select the time range and check “Browsing history” plus any other data types you want to erase. Tap “Clear data” to complete the process.
For removing specific items, go to History, find the entry you want to delete, tap the “X” icon next to it or use the three dots menu beside the entry.
Is there a way to prevent my search history from syncing to other devices when using Google Chrome?
Yes, you can stop Chrome from syncing your history across devices. Open Chrome and click on your profile picture in the top-right corner. Select “Turn off sync” or “Sync is on” to access sync settings. Turn off the toggle for “History” to prevent sharing your browsing history with other devices where you’re signed in.
Alternatively, you can use Incognito mode by pressing Ctrl+Shift+N. Chrome won’t save your browsing history, cookies, or site data while in this mode.
What should be done to permanently erase all browsing data in Google Chrome across multiple devices?
To permanently erase browsing data across all devices, sign in to your Google Account at myaccount.google.com. Go to “Data & Privacy” and find “Web & App Activity.” Click “Manage history” and select “Delete” to remove your history from Google’s servers.
In Chrome, make sure you’re signed in with the same account on each device. Clear browsing data on each device by following the steps for that specific platform. Set the time range to “All time” and check all the boxes for complete removal.
For ongoing privacy, consider turning off history syncing in your Google Account settings or regularly clearing your data on a schedule.


