Is your Lenovo laptop not turning on? This frustrating problem happens to many laptop owners and can be caused by various issues. The good news is that in most cases, you can fix a Lenovo laptop that won’t turn on without needing expensive repairs. A simple power drain often solves many Lenovo laptop power issues by holding down the power button for 20-30 seconds after removing the battery and unplugging the power adapter.
Before panicking about potential data loss or expensive repairs, try some basic troubleshooting steps. Check that your power source, adapter, and cable are all working properly. Sometimes the problem is as simple as a loose connection or a faulty power outlet. If your laptop shows charging lights but won’t boot up, the issue might be with the display rather than the power system.
For more stubborn cases, try recharging the battery for at least an hour before attempting to turn on the laptop again. Hardware components can occasionally get stuck in unusual states, and performing a power drain helps reset these components to their normal working condition.
Step-by-Step Fixes for a Lenovo Laptop That Won’t Power On
When your Lenovo laptop refuses to turn on, it can be frustrating—especially if you rely on it for work or school. The good news is that many of these issues stem from common causes that can often be resolved at home without needing to visit a technician. Follow the steps below in order, and you’ll increase your chances of getting your laptop back up and running.
🧪 Step 1: Check the Power Source
Start with the basics. Make sure your charger is properly connected to both the laptop and a working power outlet. If you’re using a power strip, try plugging directly into the wall. Also:
- Inspect the power cable and adapter for visible damage.
- Try using a different compatible charger if you have one available.
- Check for any flickering lights on the charging LED—no light could mean the battery isn’t receiving power.
🔋 Step 2: Perform a Hard Reset (Drain Residual Power)
A simple power reset can fix many startup issues:
- Unplug the charger.
- Remove the battery (if it’s removable).
- Hold the power button for about 30 seconds.
- Reconnect the battery and charger, then try turning it on again.
If your model has a pinhole reset button (usually labeled as the Novo button), use a paperclip to press and hold it for 10–15 seconds.
💡 Step 3: Look for Signs of Life
Before assuming it’s dead, look for signs of minimal activity:
- Does the keyboard backlight flash?
- Do any LEDs (power, charging, etc.) turn on?
- Can you hear the fan spin or a startup chime?
If there’s some sign of life, it’s more likely a display, boot, or BIOS issue rather than total hardware failure.
🖥️ Step 4: Test the Display
Sometimes the laptop is turning on, but the screen stays black. Here’s how to check:
- Shine a flashlight directly at the screen to see if there’s a very faint image (this suggests a backlight failure).
- Connect your laptop to an external monitor via HDMI or USB-C.
- If the external monitor works, your issue is likely tied to the internal display or GPU.
🧰 Step 5: Boot with Minimum Peripherals
Disconnect everything:
- Unplug all USB devices, SD cards, dongles, etc.
- Try booting with only the power cord and internal components.
External devices can sometimes prevent a successful boot if one is faulty or drawing too much power.
🔧 Step 6: Try the Novo Button for BIOS or Recovery
Many Lenovo laptops come with a Novo button, often located near the power button or on the side of the laptop.
- Turn off the laptop completely.
- Insert a paperclip into the Novo hole and press gently.
- When the menu appears, try entering BIOS Setup or System Recovery.
If your laptop boots into these menus, your issue might be with the operating system, not the hardware.
💽 Step 7: Reseat or Replace the RAM
Faulty or loose memory can stop a system from booting:
- Power off the laptop and remove the battery.
- Open the back panel (if your model allows).
- Carefully remove and reinsert the RAM modules.
- Try booting again. If the problem persists, test with different RAM if available.
🧱 Step 8: Check for Motherboard or Power Button Issues
If absolutely nothing happens—no lights, sounds, or reaction to any steps—your motherboard or power button could be faulty. In rare cases, the power button itself can fail. You can:
- Use the Novo button to try to power on as an alternative.
- Have a technician test the motherboard and internal connections.
🆘 When To Seek Professional Help
If none of the steps above revive your Lenovo laptop, it’s time to consider a repair shop or Lenovo’s official support. Especially if you suspect:
- A fried motherboard
- A failed BIOS update
- Internal component damage due to a spill or drop
- Or if you’re within warranty and don’t want to risk voiding it
📝 Final Thoughts
A Lenovo laptop that won’t turn on can seem like a lost cause, but in many cases, the fix is surprisingly simple. Whether it’s a drained battery, static buildup, or a loose RAM stick, going through these steps methodically can save you time and money. Always rule out the obvious before jumping to worst-case scenarios.
Key Takeaways
- Check power connections and try a power drain by holding the power button for 20-30 seconds with the battery removed and power unplugged.
- Battery issues often cause startup problems, so ensure your battery is properly charged or try running from AC power only.
- Hardware problems like faulty RAM or display issues can mimic power failures but have different solutions than true power problems.
Identifying the Issue
When your Lenovo laptop won’t turn on, finding the exact problem is the first critical step toward fixing it. Most power issues stem from either the power supply, the power button, or display problems.
Check the Power Supply
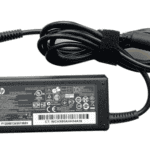
Start by examining your laptop’s power connection. Unplug the power adapter from both the wall outlet and your Lenovo laptop. Look for any visible damage to the cable, especially near the ends where fraying commonly occurs.
Try using a different wall outlet to rule out problems with your power source. Many Lenovo power issues happen because of loose connections. Make sure the adapter is firmly plugged into both the wall and your laptop.
If your laptop has a removable battery, take it out and try running the laptop on AC power only. This helps determine if the battery is causing the problem. For models with built-in batteries, allow the laptop to charge for at least 10 minutes before attempting to power it on again.
The power indicator light can give you clues too. If it lights up when plugged in but the laptop still won’t turn on, your power supply is working, but there might be another issue.
Inspect the Power Button
The power button can sometimes be the culprit when your Lenovo laptop won’t start. Check if the button feels stuck or unresponsive when pressed.
Try the long-press method: unplug your laptop from power, remove the battery if possible, then hold down the power button for about 15-30 seconds. This discharges any remaining electricity in the system. After this, reconnect the power and try turning on your laptop again.
Some Lenovo models have a tiny reset hole near the power button. If your model has this feature, use a paperclip to gently press this reset button.
Notice how the power button behaves when pressed. Does it light up momentarily? This indicates the button is working but something else prevents startup. If there’s no response at all, the button itself or its connection might be faulty.
Screen Examination on Lenovo Laptops
Your Lenovo might actually be turning on but not displaying anything on screen. Look carefully at your laptop when you press the power button. Do you hear fans spinning or see any lights?
Check the screen brightness settings. Sometimes the screen is on but set to minimum brightness. Try pressing Fn + up arrow several times to increase brightness levels.
Connect your Lenovo to an external monitor using an HDMI or VGA cable. If the external monitor displays your computer screen, you’re facing a laptop screen issue rather than a power problem.
Listen for beep codes when starting up your laptop. These patterns of beeps can indicate specific hardware problems. For Lenovo laptops, one long beep followed by two short beeps often indicates a graphics card problem.
The black screen issue is common in Lenovo laptops. If your computer seems to power on (lights, fan noise) but shows a black screen, try the hard reset option by holding the power button for 10 seconds.
Basic Troubleshooting Steps
When your Lenovo laptop won’t turn on, several simple fixes might solve the problem before you need professional help. Try these solutions in order, as they progress from the simplest to more complex options.
Performing a Hard Reset
A hard reset can fix many power issues by draining residual electricity. For most Lenovo laptops including ThinkPad and IdeaPad models, follow these steps:
Disconnect all power sources
- Unplug the AC adapter
- Remove the battery (if possible)
- If your laptop has a built-in battery, skip to step 3
Press and hold the power button for at least 20 seconds to discharge any stored electricity.
Reconnect power in this order:
- Insert the battery (if removed)
- Connect the AC adapter
- Try powering on the laptop
Some Lenovo models have a tiny reset button or hole on the bottom. Check your user manual to locate it. Use a paperclip to press this button if available.
Testing with an External Monitor
If your laptop powers on (fans spin or lights appear) but shows no display, the screen might be the issue.
Steps to test with external monitor:
- Connect your Lenovo laptop to an external monitor using HDMI or DisplayPort
- Turn on both the monitor and laptop
- Press the function key (often Fn + F4, F5, or F7) to switch display output
If the external monitor shows your desktop, your laptop screen or display adapter might be faulty. Check if brightness settings are turned down by pressing Fn + up arrow.
For ThinkPad models, look for the display output button (monitor icon) on the function keys. IdeaPad models typically use Fn + F1-F12 for display switching.
Advanced Troubleshooting Techniques
When basic solutions fail to revive your Lenovo laptop, it’s time to try more technical approaches. These methods can help identify and fix underlying issues that prevent your device from turning on.
Booting Into Safe Mode
Safe Mode starts Windows with minimal drivers and services, which can help troubleshoot startup problems. To access Safe Mode on a Lenovo laptop that won’t fully boot:
- Force shutdown your laptop by holding the power button for 10 seconds
- Power on and immediately press F8 repeatedly (on some models, try Shift+F8)
- Select “Safe Mode” from the Advanced Boot Options menu
If your laptop boots in Safe Mode but not normally, the issue might be with a driver or program that loads during regular startup. Try uninstalling recently added software or updating drivers once in Safe Mode.
For Windows 10 devices that won’t respond to F8, try powering on and off three times in a row. This often triggers Windows 10’s automatic repair environment where you can select Safe Mode.
Running the Lenovo Diagnostics Tool
Lenovo provides built-in diagnostic tools that can identify hardware issues preventing startup.
To access the Lenovo Diagnostics Tool:
- Turn off your laptop completely
- Press and hold the Novo Button (a small button near the power button on many Lenovo models)
- Select “System Recovery” or “Diagnostics” from the menu
The tool will run tests on key components like the processor, memory, and storage. Pay close attention to any error codes displayed during testing. These codes can pinpoint exactly which part is failing.
Write down any error messages that appear. These specific codes will help you or a technician determine whether you need a repair or replacement part.
Utilizing the Startup Repair Function
Windows 10 includes a built-in Startup Repair tool that can fix common problems preventing your Lenovo laptop from booting normally.
To access Startup Repair:
- Create a Windows 10 recovery USB using another computer if possible
- Insert the recovery media and boot from it (you may need to press F12 during startup to select boot device)
- Select “Repair your computer” instead of “Install now”
- Choose “Troubleshoot” > “Advanced options” > “Startup Repair”
If you can’t access recovery media, try the power button method: turn on your laptop, wait 5 seconds, then hold the power button to force shutdown. Repeat this process three times, and Windows should automatically enter repair mode on the fourth attempt.
Startup Repair works by replacing corrupted system files and fixing boot configuration issues without affecting your personal files.
Using Windows Recovery Options
When your Lenovo laptop won’t turn on properly, Windows recovery options can help fix software-related issues. These built-in tools can repair system files, reset your computer, or provide advanced troubleshooting through command line tools.
Accessing Automatic Repair
If your laptop attempts to start but fails, Windows 10 will often enter Automatic Repair mode on its own. If it doesn’t, you can force this option.
Turn off your computer by holding the power button for at least 5 seconds. Then, turn it on and immediately turn it off again when you see the Windows logo. Repeat this process 2-3 times.
Windows should detect the startup problem and launch Automatic Repair. If this doesn’t work, try holding the power button for at least 30 seconds while the laptop is off but plugged in.
From the Automatic Repair screen, select “Advanced options” to access other recovery tools. You can try the “Startup Repair” option first, which automatically scans and fixes issues preventing Windows from loading.
Performing a Factory Reset
If repairs don’t work, resetting your Lenovo laptop can solve persistent software problems.
From the recovery screen, select “Troubleshoot” > “Reset this PC.” You’ll have two options:
- Keep my files: Reinstalls Windows while preserving your personal files
- Remove everything: Completely wipes the laptop and restores factory settings
The second option provides a fresh start and is more effective for solving serious issues. Make sure you’ve backed up important files before choosing this option.
The reset process may take 30 minutes to 2 hours depending on your laptop model. Don’t turn off your laptop during this time, and keep it plugged in to avoid power loss.
Using Command Prompt for Recovery
For advanced users, Command Prompt provides powerful recovery tools when standard options fail.
Access Command Prompt from the recovery environment by selecting “Troubleshoot” > “Advanced options” > “Command Prompt.” This gives you a text-based interface to run repair commands.
Some useful commands include:
sfc /scannow– Scans system files and repairs corrupted oneschkdsk C: /f /r– Checks your hard drive for errorsbootrec /rebuildbcd– Rebuilds the boot configuration data
If Windows is completely unresponsive, create bootable recovery media on another computer. Use a USB drive and the Windows Media Creation Tool from Microsoft’s website to make recovery media. Set your laptop to boot from this USB in BIOS/UEFI settings by pressing F12, F2, or Fn+F2 during startup.
Software and Driver Issues
Sometimes your Lenovo laptop won’t turn on because of problems with software or drivers. These issues can make your computer seem dead even when the hardware is fine.
Updating the Graphics Driver
Outdated or corrupted graphics drivers can prevent your Lenovo laptop from booting properly. The screen might stay black while the power light turns on, making you think the laptop isn’t starting at all.
To fix this problem:
- Boot in Safe Mode – Turn on the laptop while pressing F8 repeatedly until advanced boot options appear
- Access Device Manager – Right-click on Start > Device Manager
- Update Graphics Driver – Find “Display adapters,” right-click your graphics card, and select “Update driver”
- Choose automatic update – Let Windows find the correct driver online
If you can’t boot into Windows at all, try using another computer to download the latest graphics driver from Lenovo’s support website. Save it to a USB drive and install it after getting your laptop to start in Safe Mode.
Considering a System Restore or Factory Resetting
When software corruption prevents your Lenovo laptop from turning on, a system restore or factory reset might be necessary.
For System Restore:
- Boot into Windows Recovery Environment by pressing F11 during startup
- Select Troubleshoot > Advanced options > System Restore
- Choose a restore point from before the problem started
If that doesn’t work, a factory reset might be your last option:
- Press and hold the Novo button (small hole on the side of newer Lenovo laptops)
- Select “System Recovery” from the menu
- Choose “Restore from initial backup”
This process will erase your personal files, so only use it as a last resort. Before trying a factory reset, back up your data if possible by connecting your laptop’s hard drive to another computer.
Windows 10 has built-in reset options that might be more accessible than Lenovo’s recovery system if you can at least get to the login screen.
Comparative Analysis with Other Brands
When laptops won’t turn on, different brands have varying reliability and troubleshooting approaches. Understanding these differences can help users make informed decisions about repairs and future purchases.
Lenovo Laptops vs. HP Laptop Power Issues
Lenovo laptops typically offer more accessible power troubleshooting options compared to HP models. For instance, Lenovo ThinkPad series features power reset buttons and clear power indicators that make diagnosing problems easier. HP laptops often require more complex troubleshooting steps when they won’t power on.
Lenovo’s service guides are generally more detailed about power issues. They provide specific instructions for different model lines like Yoga, ThinkPad, and IdeaPad.
HP laptops commonly experience battery connection issues that require opening the case, while many Lenovo models allow for external battery troubleshooting. This makes Lenovo repairs more user-friendly for beginners.
Repair difficulty varies significantly between brands. Lenovo’s repairability ranges from “acceptable to excellent” depending on the product line. HP laptops often have more integrated components that make DIY repairs challenging.
Both brands offer online troubleshooting resources, but Lenovo’s guided tutorials specifically for power issues are more comprehensive and easier to follow.
Frequently Asked Questions
Here are answers to common questions about Lenovo laptops that won’t turn on. These solutions address issues from blinking power lights to black screens and charging problems.
How can I troubleshoot a Lenovo laptop that won’t turn on despite the power light blinking?
A blinking power light usually indicates that your laptop is receiving power but can’t complete the startup process. First, disconnect all external devices like USB drives, printers, and external monitors. These peripherals might interfere with the normal boot sequence.
Next, try a hard reset by unplugging the power adapter, removing the battery (if possible), and holding the power button for 30 seconds. This discharges any remaining electricity in the system.
If the problem continues, the blinking light might indicate a hardware issue like faulty RAM or a problematic motherboard. Try reseating the RAM modules if you feel comfortable opening your laptop.
What steps should I take if my Lenovo laptop does not power on, and there is no indication from the power lights?
Check the basics first. Make sure your power cord is securely connected to both the laptop and wall outlet. Try a different wall outlet to rule out power supply problems.
Inspect your power adapter for damage. Look for frayed wires, bent connectors, or other visible issues. If possible, test with another compatible power adapter.
Try removing the battery and connecting only the AC adapter. Press and hold the power button for 20 seconds, then connect the adapter and try powering on.
If nothing works, disconnect everything, hold the power button for a full minute, wait 30 minutes, and try again. This extended power drain sometimes resolves stubborn startup issues.
What could be the cause of a Lenovo laptop not turning on even when it shows that it is charging?
A charging indicator with no power could mean several things. The most common cause is a faulty battery that can receive a charge but can’t hold enough power to start the system.
The display might also be the problem. Try connecting an external monitor to check if your laptop is actually running but the screen isn’t working.
Sometimes the issue lies with the power button itself. Look for physical damage or try pressing it multiple times.
System overheating can trigger protective shutdowns. Let your laptop cool down completely before trying again.
How do I perform a forced start on my Lenovo laptop when it doesn’t power up normally?
To perform a forced start, unplug all power sources including the AC adapter and battery (if removable). Press and hold the power button for at least 30 seconds.
After the 30 seconds, reconnect the AC adapter only (leave the battery out if removable) and try turning on the laptop.
If that doesn’t work, try the “power drain” method. Disconnect all power sources, press the power button for 60 seconds, wait 30 minutes, reconnect power, and try again.
For laptops with non-removable batteries, look for a tiny reset hole on the bottom of the case. Insert a paperclip and hold for 10 seconds to reset the internal hardware.
What is the Lenovo Black Screen of Death and how can it be fixed?
The “Black Screen of Death” happens when your Lenovo powers on (fans spinning, lights on) but displays nothing on screen. This is different from a laptop that won’t turn on at all.
Start by brightening your screen using the brightness keys. Sometimes the display is on but set to minimum brightness.
Try the key combination Fn + F7 to switch display modes. Your laptop might be set to output to an external monitor that isn’t connected.
Boot in Safe Mode by turning on the laptop and immediately pressing F8 repeatedly. This can help identify if the issue is with Windows or the hardware.
If you see a faint image on the screen, the backlight might be failing. In this case, repair or replacement is needed.
What is the correct procedure to follow if a Lenovo laptop shows a black screen but the power light remains on?
First, perform a hard reset. Turn off the laptop, disconnect all peripherals and power sources, hold the power button for 30 seconds, then reconnect and try again.
Check for display issues by connecting to an external monitor. If the external monitor works, your laptop’s screen or graphics settings may be the problem.
Listen for sounds of normal operation. If you hear fans spinning and disk activity, the computer might be working with just a display problem.
Try booting into BIOS by pressing F1, F2, or the appropriate key during startup. If BIOS appears, the problem is likely with your operating system rather than hardware.