Is your Chromebook touchpad acting up? Nothing can slow down your work like a touchpad that doesn’t respond. Whether it’s completely frozen or just behaving strangely, there are several quick fixes you can try before seeking professional help.
A malfunctioning touchpad is one of the most common Chromebook issues, but fortunately, most touchpad problems can be solved with simple troubleshooting steps like cleaning the surface, restarting your device, or performing a hard reset. These quick fixes often resolve tracking issues, unresponsiveness, or erratic cursor movement without requiring technical expertise.
If you’re struggling with your Chromebook touchpad, don’t worry. From simple solutions like drumming your fingers on the touchpad to more advanced fixes like checking touchpad settings, we’ve got you covered. Keep reading to learn how to get your Chromebook touchpad working properly again.
How to Fix Chromebook Touchpad Issues
If your Chromebook’s touchpad isn’t responding or feels glitchy, you’re not alone. It’s a common problem that can be incredibly frustrating, especially if you rely on your touchpad for navigation. The good news? Most Chromebook touchpad issues are easy to fix with a few troubleshooting steps.
Whether your touchpad is unresponsive, lagging, jumping around, or acting like it has a mind of its own, here’s a complete guide to getting things back on track.
Common Chromebook Touchpad Problems
Before we jump into solutions, let’s identify the most common touchpad issues:
- Touchpad not responding at all
- Cursor jumping or moving erratically
- Laggy or delayed touchpad response
- Two-finger scrolling not working
- Clicking or tapping issues
These problems can be caused by anything from software glitches and outdated settings to hardware malfunctions or simple user errors.
Quick Fixes to Try First
1. Reboot Your Chromebook
It sounds basic, but restarting your Chromebook can fix temporary glitches.
- Click the Time in the bottom right corner.
- Select Power and shut down the device completely.
- Wait a few seconds, then power it back on.
2. Perform a Hard Reset
If a normal restart doesn’t help, try a hard reset:
- Turn off your Chromebook.
- Press and hold the Refresh button and tap the Power button.
- Release the Refresh button when the Chromebook starts up.
This resets the hardware components (including the touchpad) without erasing your data.
Adjust Touchpad Settings
Sometimes the settings need tweaking to improve responsiveness.
- Click the Time in the bottom right corner.
- Go to Settings (gear icon).
- Scroll down to Device and select Touchpad.
Here, you can adjust:
- Touchpad speed
- Tap-to-click settings
- Scrolling direction
If Tap-to-click is turned off, you’ll need to physically press the touchpad to click. Turning this feature back on can solve what seems like a clicking issue.
Clean the Touchpad Surface
Dirt, grease, and moisture can cause the touchpad to behave unpredictably. Use a soft, lint-free cloth (slightly damp if needed) to clean the surface. Make sure your fingers are clean and dry when using the touchpad.
Test in Guest Mode
Guest Mode runs without any of your extensions or settings, making it perfect for diagnosing problems.
- Sign out of your account.
- Click Browse as Guest.
- Test the touchpad.
If it works fine in Guest Mode, the problem is likely with your profile settings, extensions, or apps. Try disabling extensions one by one to find the culprit.
Update ChromeOS
An outdated system can cause touchpad problems.
- Click the Time in the bottom right.
- Open Settings.
- Scroll down and click About ChromeOS.
- Select Check for updates.
Install any available updates and restart your Chromebook.
Perform a Powerwash (Factory Reset)
If nothing else works, you can reset your Chromebook to factory settings. This will erase all local data, so back up anything important first.
- Click the Time.
- Go to Settings > Advanced > Reset settings.
- Select Powerwash and follow the on-screen instructions.
After the reset, test the touchpad before signing back into your account or adding extensions.
Hardware Troubleshooting
If you’ve tried everything and your touchpad still doesn’t work, it could be a hardware issue. Here’s how to check:
- Plug in a USB mouse. If the mouse works but the touchpad doesn’t, it’s likely a hardware fault.
- Check for physical damage. Any cracks or warping in the trackpad area may indicate it’s time for professional repair.
- If your Chromebook is under warranty, contact the manufacturer or the retailer for service.
Final Tips to Avoid Future Touchpad Problems
- Keep your Chromebook clean, especially around the touchpad.
- Avoid pressing too hard on the touchpad.
- Keep your system updated regularly.
- Use an external mouse when doing heavy tasks to reduce wear on the touchpad.
When to Seek Professional Help
If you’ve tried all of the above and your touchpad still isn’t responding, it might be time to contact Chromebook Support or visit an authorized repair center. Hardware failures aren’t common, but they can happen—especially if your Chromebook has taken a fall or suffered liquid damage.
Fixing a Chromebook touchpad issue is usually pretty straightforward once you know where to look. A little troubleshooting can go a long way toward getting your laptop back in working order.
Key Takeaways
- Clean your touchpad and try quick fixes like pressing the Esc key or drumming your fingers on the surface.
- Restart your Chromebook or perform a hard reset to resolve most common touchpad issues.
- Check your touchpad settings or connect an external mouse as a temporary solution while troubleshooting.
Understanding Your Chromebook Touchpad
Your Chromebook touchpad is a sensitive device that lets you control your cursor without needing a mouse. Knowing how it works and recognizing common problems can help you fix issues quickly.
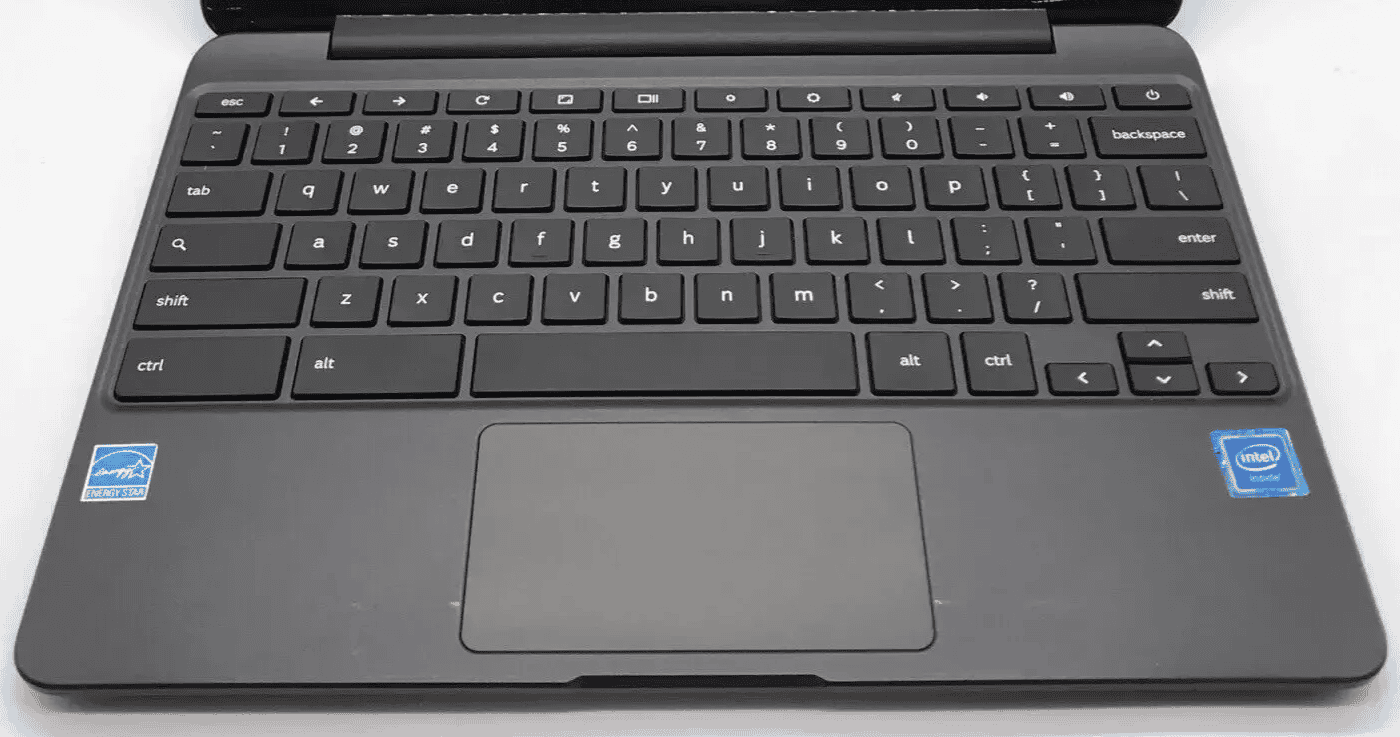
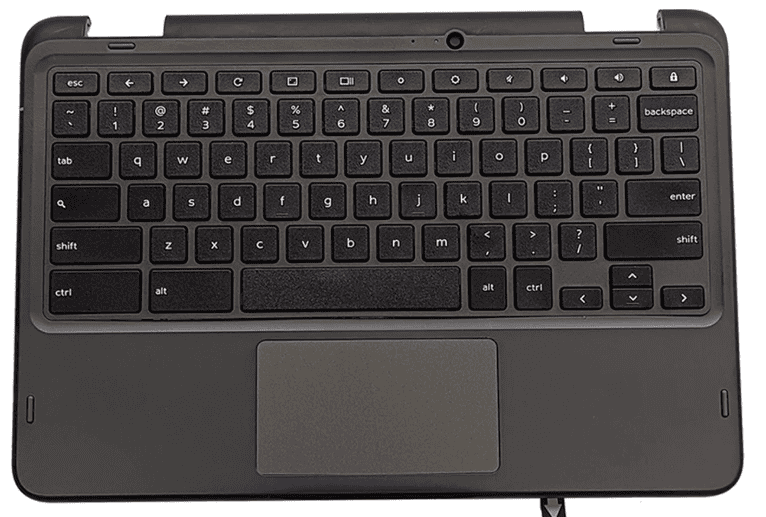
Anatomy of a Chromebook Touchpad
Most Chromebook touchpads are rectangular surfaces below the keyboard that respond to finger movements and gestures. They have no physical buttons but recognize clicks when you press down on the surface.
The touchpad has several key components:
- Surface area: The smooth panel where you move your fingers
- Pressure sensors: Detect when you press down to click
- Touch sensors: Track finger position and movement
- Controller: Processes input and sends signals to the computer
Chromebooks support various gestures like two-finger scrolling, pinch-to-zoom, and three-finger swipes. These gestures work through multi-touch technology that tracks several contact points at once.
Common Touchpad Issues
Touchpad problems on Chromebooks often fall into a few categories. Unresponsiveness is one of the most frequent issues – when your cursor doesn’t move or responds erratically.
Physical problems include:
- Dust or dirt blocking sensors
- Damage to the touchpad surface
- Liquid damage affecting internal components
Software issues are also common:
- Driver conflicts after updates
- Settings that need adjustment
- System glitches requiring a restart
Sometimes the touchpad freezes because of temporary system hiccups. Other times, it might stop working because of hardware problems that need deeper troubleshooting. Issues can also occur after system updates when software changes affect how the touchpad works.
Preliminary Checks and Fixes
Before diving into more complex solutions, there are several quick checks and fixes that can often resolve Chromebook touchpad issues. These simple steps frequently solve the problem without requiring technical expertise.
Ensuring Touchpad Enabled
First, verify that your touchpad is actually turned on. Some Chromebooks have a function key that can disable the touchpad. Look for a key with a touchpad icon (usually F3 or a key with a rectangular symbol). Press this key to toggle the touchpad on or off.
If you’re unsure which key controls the touchpad, try pressing the Search key + Shift + P, which is a keyboard shortcut that enables or disables the touchpad on many Chromebook models.
You can also check your touchpad settings. Click on the time in the bottom-right corner, select Settings, then Device, and finally Touchpad. Make sure the touchpad is enabled here.
Checking the Power and Connection
A simple restart can fix many touchpad issues. Press the power button and select Restart, or hold the power button for 3 seconds if the device is unresponsive.
Try cleaning your touchpad. Dirt, oils, and debris can interfere with touchpad function. Use a soft, lint-free cloth slightly dampened with water to gently wipe the surface. Avoid using cleaning chemicals as they may damage the touchpad.
Try the “drumroll” fix. Tap all your fingers rapidly on the touchpad for about 10 seconds. This sometimes resets the touchpad connections.
If you’re using an external mouse, disconnect it and see if that helps. Sometimes the connection conflicts can cause touchpad issues.
Adjusting Touchpad Settings
Your Chromebook touchpad can be customized to match your preferences. With a few simple changes, you can make your touchpad more comfortable to use and fix common problems.
Accessing Touchpad Settings
To access your Chromebook’s touchpad settings, click on the status bar in the bottom-right corner of your screen. This area shows the time and battery status. Click on the Settings icon (gear symbol) in the menu that appears.
In the Settings menu, scroll down and select “Device” from the left sidebar. Then click on “Touchpad” to see all available options for your touchpad. If you don’t see the Touchpad option, your device might list it as “Mouse and Touchpad” instead.
These settings control how your touchpad responds to your touch and movements. They’re important to adjust if your touchpad feels too fast, too slow, or too sensitive.
Modifying Tap-to-Click and Sensitivity
Chromebooks offer several ways to adjust how your touchpad responds. The most common settings include:
- Tap-to-Click: Turn this on or off depending on whether you want to tap the touchpad instead of clicking it.
- Touchpad Speed: Adjust how quickly the cursor moves when you slide your finger.
- Enable Touchpad Acceleration: This setting makes the cursor move faster when you move your finger quickly.
If your touchpad feels too sensitive, try turning off touchpad acceleration. For a touchpad that’s too slow, increase the speed setting.
Some users report that their brand new Chromebooks have overly sensitive touchpads. If this is happening to you, adjusting these settings can make a big difference in your daily use.
Enabling Accessibility Features
Chromebooks include several accessibility features that can help if you have trouble using the touchpad. To find these options, go to Settings and select “Advanced” at the bottom of the left sidebar. Then click on “Accessibility.”
In the Accessibility section, you’ll find options like:
- Automatic Clicks: The cursor will automatically click after stopping in one place
- Large Cursor: Makes the pointer easier to see
- On-screen Keyboard: Useful if the touchpad isn’t working at all
For users who find the touchpad difficult to use, you can connect an external mouse instead. Most USB and Bluetooth mice work with Chromebooks without extra setup.
If your touchpad stops working completely, you can also use keyboard shortcuts to navigate. Press Tab to move between elements and Enter to select items.
Software Solutions
Sometimes the problem with your Chromebook touchpad isn’t hardware-related but can be fixed through software adjustments. Chrome OS updates often contain fixes for touchpad issues and improve overall performance.
Updating Chrome OS
Keeping your Chrome OS updated is crucial for maintaining proper touchpad functionality. Google regularly releases patches that address touchpad sensitivity, responsiveness, and other common issues. If your touchpad suddenly stops working or behaves erratically, an outdated operating system might be the culprit.
To check if your Chrome OS needs updating, look for the update icon in the bottom right corner of your screen. It appears when an update is available. You can also manually check through Settings. After updating, restart your Chromebook to apply all changes properly.
Some updates specifically target touchpad drivers. These updates can fix problems like cursor jumping, unresponsive areas, or gestures not working correctly.
Checking for and Applying Updates
To manually check for Chrome OS updates, follow these steps:
- Click on the time display in the bottom-right corner
- Select the Settings icon (gear symbol)
- Scroll down and click “About Chrome OS”
- Click “Check for updates”
If an update is found, your Chromebook will download it automatically. Once downloaded, you’ll be prompted to restart your device to complete the installation process.
Updates typically take 5-10 minutes to complete. During this time, your Chromebook will restart at least once. Don’t turn off your device during the update process as this could cause problems.
After updating, test your touchpad to see if the issues are resolved. If problems persist, you might need to try additional troubleshooting steps.
Utilizing an External Mouse
When your Chromebook touchpad stops working, an external mouse offers a practical solution. This allows you to keep using your device while you troubleshoot the touchpad issues.
Connecting an External Mouse
Most external mice connect easily to your Chromebook through a USB port or Bluetooth. For a wired mouse, simply plug it into an available USB port on your Chromebook. The device should recognize it automatically without needing additional drivers.
For Bluetooth mice, turn on Bluetooth in your Chromebook settings. Put your mouse in pairing mode according to its instructions. Then select the mouse when it appears in the Bluetooth devices list on your Chromebook.
After connecting, test the mouse by moving it and clicking. If it doesn’t work right away, try restarting your Chromebook while the mouse is connected.
Switching to External Mouse as a Temporary Solution
Using an external mouse gives you time to fix your touchpad without losing productivity. Many users find that external mice offer better precision for certain tasks anyway.
Keep your external mouse in your laptop bag as a backup. This ensures you’re never stuck if your touchpad suddenly stops working away from home.
Remember that some touchpad issues fix themselves after a system update. While using your external mouse, check for Chrome OS updates by going to Settings > About Chrome OS > Check for updates.
If you need to use your Chromebook for an extended period without a working touchpad, consider adjusting the mouse settings. You can customize pointer speed and button functions in Settings > Device > Mouse.
Advanced Troubleshooting
When simple fixes don’t solve your Chromebook touchpad problems, it’s time to try more powerful solutions. These methods might take a bit more time but often resolve stubborn touchpad issues.
Performing a Powerwash
A Powerwash resets your Chromebook to factory settings, removing any software problems that might be affecting your touchpad. Before starting, back up important files since this process erases all local data.
To Powerwash your Chromebook:
- Sign out of your Chromebook
- Press Ctrl + Alt + Shift + r simultaneously
- Select “Restart”
- When prompted, click “Powerwash”
- Click “Continue”
- Follow the instructions to set up your device again
This process clears corrupted settings or software conflicts that might be interfering with your touchpad function. After the Powerwash completes, test your touchpad to see if it works properly.
Identifying Hardware Issues
Sometimes touchpad problems stem from hardware rather than software issues. Physical damage or internal connection problems require different approaches.
Signs of hardware issues include:
- Touchpad works intermittently
- Only certain areas of the touchpad respond
- Strange clicking sounds when using the touchpad
- Visible physical damage
Try connecting an external mouse to verify if the problem is touchpad-specific. If the external mouse works fine, your touchpad likely has a hardware issue.
For serious hardware problems, consider consulting a professional repair service. Opening your Chromebook yourself might void the warranty and cause more damage if you’re not experienced with electronics repair.
Seeking Professional Support
Sometimes touchpad issues on your Chromebook can’t be fixed with simple troubleshooting. When this happens, it’s time to look for expert help.
If your Chromebook is still under warranty, contact the manufacturer directly. Most Chromebooks come with a one-year warranty that covers hardware defects. The manufacturer may repair or replace your device for free.
For school Chromebooks, talk to your IT department. They deal with these problems often and might have quick solutions or replacement devices available.
When to seek professional help:
- Touchpad physically damaged (cracked or broken)
- Internal connection problems
- Issues that persist after trying all troubleshooting steps
- Water damage affecting the touchpad
Many electronics repair shops can fix Chromebook touchpads. Before paying for repairs, compare the cost with buying a new device. Some repairs might cost almost as much as a replacement.
Questions to ask repair professionals:
- How long will the repair take?
- Is there a diagnostic fee?
- What’s the warranty on repairs?
- Do they use genuine parts?
For older Chromebooks, consider using an external mouse as a cost-effective alternative to expensive repairs. This workaround lets you keep using your device without fixing the touchpad.
Remember that some touchpad issues might indicate other internal problems. A professional can properly diagnose whether it’s just the touchpad or something more serious.
Frequently Asked Questions
Chromebook touchpad issues can be fixed through various methods depending on the specific problem. Here are answers to common questions about troubleshooting touchpad problems.
How can I enable the touchpad on my Chromebook if it’s been disabled?
To enable a disabled touchpad, press the Search key + Shift + P together. This keyboard shortcut toggles the touchpad on and off.
If that doesn’t work, check your settings. Click on the time in the bottom right corner, select Settings, and then go to Device > Touchpad to make sure it’s enabled.
Sometimes a simple restart fixes the problem. Turn off your Chromebook completely, wait about 30 seconds, and turn it back on.
What steps should I take to troubleshoot an HP Chromebook with a non-responsive touchpad?
First, try a hard reset on your HP Chromebook. Turn it off, then hold the Refresh key and tap the Power button.
Clean the touchpad surface with a microfiber cloth to remove any dirt or oils that might be interfering with its function.
Check for updates by going to Settings > About Chrome OS > Check for updates. Outdated software can sometimes cause touchpad issues.
Try drumming your fingers on the touchpad for about ten seconds. This sometimes resets the connection between the touchpad and the system.
Where can I find the touchpad driver for my Chromebook?
Chromebooks don’t require separate driver installations like Windows computers. Chrome OS automatically includes and updates the necessary drivers.
If you’re experiencing touchpad issues, updating your Chrome OS to the latest version will ensure you have the most current drivers. Go to Settings > About Chrome OS > Check for updates.
How do I resolve touchpad issues on a Chromebook when using Windows 10?
Chromebooks aren’t designed to run Windows 10 natively. If you’ve installed Windows using a workaround, touchpad problems are common.
Try installing third-party touchpad drivers that are compatible with your Chromebook hardware. Search for drivers specific to your Chromebook model.
Consider using an external mouse as a more reliable alternative when running Windows on a Chromebook.
What are common solutions for an Acer Chromebook touchpad that isn’t functioning?
Reset your Acer Chromebook by pressing Refresh + Power. This often resolves temporary system glitches affecting the touchpad.
Check if accessibility features are accidentally enabled. Go to Settings > Advanced > Accessibility and ensure that no features are interfering with normal touchpad operation.
Try logging in as a guest user. If the touchpad works in guest mode, the issue may be with your profile settings rather than hardware.
In case of an unresponsive touch screen, what troubleshooting methods should be applied on a Chromebook?
Clean the screen with a microfiber cloth and a small amount of screen cleaner to remove any dirt or smudges that might be affecting touch response.
Check if the touchscreen is accidentally disabled. Press Search + Shift + T to toggle it on or off.
Restart your Chromebook in case of a temporary system glitch. If that doesn’t work, try a hard reset by turning off the device, then holding Refresh while pressing Power.
Update your Chrome OS to the latest version to ensure you have all current touchscreen drivers and fixes.