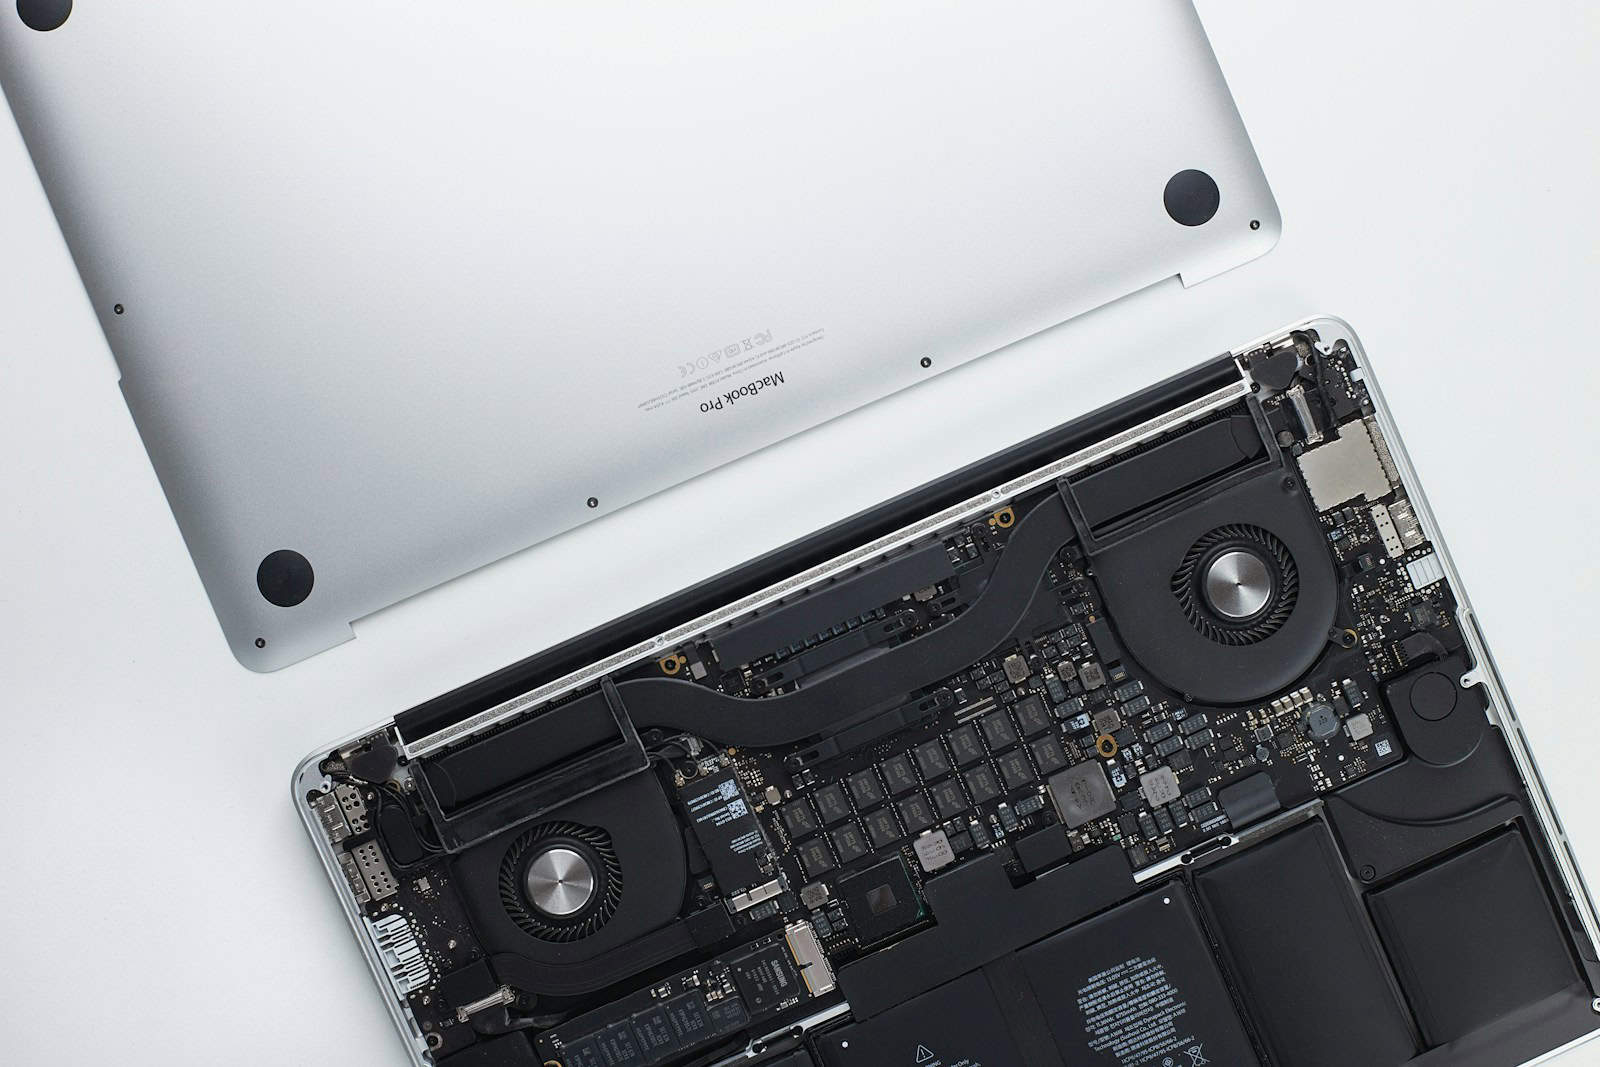
When your laptop keyboard starts acting up, it can throw a wrench in your day. Keys might stop responding, or perhaps a coffee spill has left several keys sticky or unresponsive. Before you consider hauling your laptop to a repair shop, know that replacing a laptop keyboard is something you can do at home. This guide will walk you through identifying common keyboard issues, deciding when it’s time for a replacement, and the steps to successfully replace your laptop keyboard.
DIY Laptop Keyboard Replacement Guide
Has your laptop keyboard seen better days? Sticky keys, missing letters, or unresponsive buttons can seriously hamper productivity. Luckily, replacing a laptop keyboard is often a DIY-friendly task. Here’s a general guide to help you through the process:
Before You Start: Gather Your Tools and Information
- Tools: Phillips head screwdriver (various sizes may be needed), flat head screwdriver or spudger, anti-static wrist strap (optional), tweezers or needle-nose pliers.
- Information:
- Laptop model number: You’ll need this to find the correct replacement keyboard.
- Replacement keyboard: Order the correct keyboard compatible with your laptop model.
- Service manual or online guide: Refer to these for detailed instructions specific to your laptop model.

Step-by-Step Replacement Process
- Power Off and Disconnect:
- Shut down your laptop completely.
- Unplug the power adapter and remove the battery.
- Access the Keyboard:
- Consult your service manual or online guide to locate the screws securing the keyboard.
- Carefully remove the screws, usually found on the bottom or around the keyboard bezel.
- Use a flat head screwdriver or spudger to gently pry open any clips or latches holding the keyboard in place.
- Disconnect the Keyboard Cable:
- Locate the ribbon cable connecting the keyboard to the motherboard.
- Carefully lift the locking tab on the connector and gently slide the cable out.
- Remove the Old Keyboard:
- Lift the old keyboard out of the laptop.
- If necessary, remove any additional screws or clips securing the keyboard.
- Install the New Keyboard:
- Align the new keyboard with the mounting points in the laptop.
- Connect the ribbon cable to the motherboard, ensuring it’s securely seated and the locking tab is engaged.
- Secure the keyboard with any screws or clips.
- Reassemble and Test:
- Replace any screws or covers removed earlier.
- Reinsert the battery and power on your laptop.
- Test all keys to ensure the new keyboard is functioning correctly.
Tips for a Successful Replacement
- Work in a clean, static-free environment: Static electricity can damage delicate electronic components.
- Take your time and be gentle: Avoid forcing any parts or connectors.
- Reference your laptop’s service manual or online guides: These provide specific instructions for your model.
- Consider professional help if you’re unsure: If you’re not comfortable with the process, seek assistance from a qualified technician.
Potential Challenges and Solutions
| Challenge | Solution |
|---|---|
| Difficulty finding the correct replacement keyboard | Double-check your laptop model number and search for a compatible keyboard from a reputable seller. |
| Stuck or broken screws | Use a precision screwdriver or seek professional help if needed. |
| Damaged ribbon cable | Replace the cable or seek professional repair. |
| Keyboard not functioning after replacement | Ensure the cable is properly connected and seated. If the problem persists, the keyboard may be defective or there could be another underlying issue with your laptop. |
With patience and attention to detail, replacing your laptop keyboard can be a rewarding DIY project, giving your trusty machine a new lease on life.
How to Replace Your Laptop Keyboard Yourself
| Step | Description | Difficulty |
|---|---|---|
| Preparation | 1. Identify your laptop model: Knowing the exact model is crucial for finding a compatible replacement keyboard. Look for a sticker on the underside of your laptop or search your laptop’s manual. 2. Backup your data: In case anything goes wrong during the process, it’s wise to back up your important files. 3. Gather your tools: You’ll typically need a small Phillips head screwdriver, a flat-head screwdriver or prying tool (like a plastic card), and possibly tweezers. | Easy |
| Safety First | 1. Turn off your laptop and unplug it from the power source. 2. Remove the battery if your laptop has a removable battery. | Easy |
| Opening the Laptop | 1. Locate the keyboard screws: These are usually on the bottom of the laptop case. Consult your laptop model’s specific instructions or online resources for screw placement. 2. Unscrew the keyboard: Carefully remove all the screws holding the keyboard in place. 3. Pry open the keyboard bezel (the frame around the keyboard): Use the prying tool or flat-head screwdriver gently to release the clips holding the bezel. Be careful not to damage the plastic. | Medium |
| Disconnecting the Keyboard | 1. Locate the ribbon cable: This flat cable connects the keyboard to the motherboard. 2. Identify the locking mechanism: There might be a small latch or flip lock securing the ribbon cable. Carefully unlock it with your fingernail or a tool. 3. Disconnect the ribbon cable: Gently pull the ribbon cable out of its socket on the motherboard. | Medium |
| Installing the New Keyboard | 1. Position the new keyboard: Align it carefully with the mounting points and screw holes. 2. Connect the ribbon cable: Insert the ribbon cable back into its socket on the motherboard and secure the locking mechanism. 3. Screw the keyboard back into place: Tighten the screws carefully and evenly to avoid warping the keyboard frame. | Medium |
| Closing Up | 1. Snap the keyboard bezel back into place: Ensure all clips are secure. 2. Replace the battery (if applicable). 3. Reconnect the power cord and turn on your laptop. | Easy |
| Testing | 1. Test all the keys: Make sure all the keys are working properly. You can use a typing test website or a word processor to check each key. | Easy |

Important Notes:
- Replacing a laptop keyboard can be delicate. If you’re not comfortable doing it yourself, consider taking your laptop to a professional repair shop.
- Online resources like repair manuals and video tutorials can be very helpful for specific laptop models.
- This table is a general guide, and the specific steps may vary depending on your laptop model.
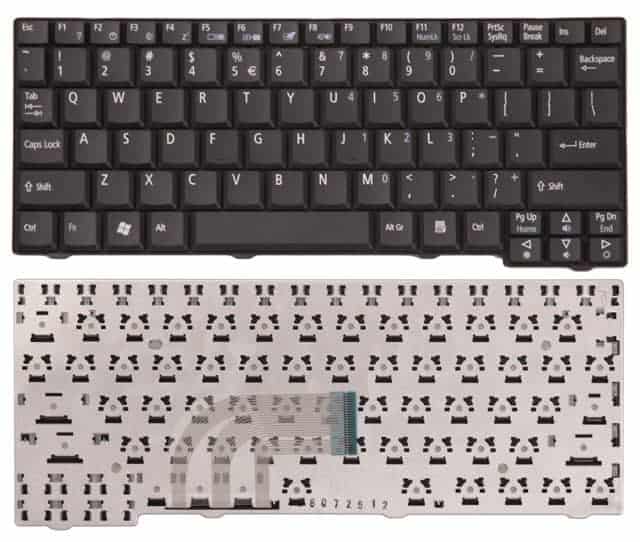
Troubleshooting is the first step. Sometimes, the problem isn’t as severe as it seems and can be fixed with a simple restart or driver update. But if the issues persist, it might be time to look into replacing the keyboard. This process requires a bit of preparation, including gathering the right tools and ensuring you’ve got a compatible replacement keyboard. Let’s dive into how you can bring your laptop back to life with a new keyboard.
Key Takeaways
- Identify Keyboard Issues: Recognize common laptop keyboard problems such as unresponsive keys, missing keys, liquid spills, and outdated drivers, as these are indicators that a replacement might be necessary.
- Troubleshoot First: Before opting for a replacement, attempt simpler solutions like restarting the laptop, updating keyboard drivers, or cleaning out debris and spills with compressed air and a damp cloth.
- Decide When to Replace: A replacement becomes necessary when keys are physically damaged or unresponsive even after troubleshooting, especially for older laptops where an upgrade can significantly enhance performance.
- Preparation is Key: Ensure the laptop is powered down and disconnected, gather necessary tools (e.g., a small screwdriver set), and create a clean, clutter-free workspace before beginning the replacement process.
- Follow a Detailed Replacement Process: Carefully remove the old keyboard by unscrewing and disconnecting it, then install the new one by attaching the ribbon cable to the motherboard and securing the keyboard in place.
- Patience and Attention to Detail: Approach the keyboard replacement process with patience, closely following instructions specific to your laptop model to avoid any damage and ensure a successful upgrade.
Identifying Common Keyboard Issues
When it comes to laptop problems, keyboard issues are at the top of the list. They can range from keys not responding to complete failure. Knowing how to spot these problems is the first step in fixing them.
One common issue is unresponsive keys. This means when you press a key, nothing happens. Sometimes, this can be fixed by restarting your laptop. Other times, it might mean there’s a deeper problem.
Missing keys are another problem. Keys can break off or wear out over time. This makes typing difficult and frustrating. If you’re missing keys, it’s clear you might need a replacement.
Spills are a laptop’s worst enemy. Liquids can cause keys to stick or stop working entirely. If you’ve spilled something on your keyboard, quick action is necessary. Dry it out and clean it as best as you can.
Lastly, software issues can also cause keyboard problems. These aren’t as obvious because the keyboard itself looks fine. Updating your keyboard’s drivers can sometimes fix these issues.
Each of these problems has a different solution. Knowing what you’re dealing with helps you choose the right fix.
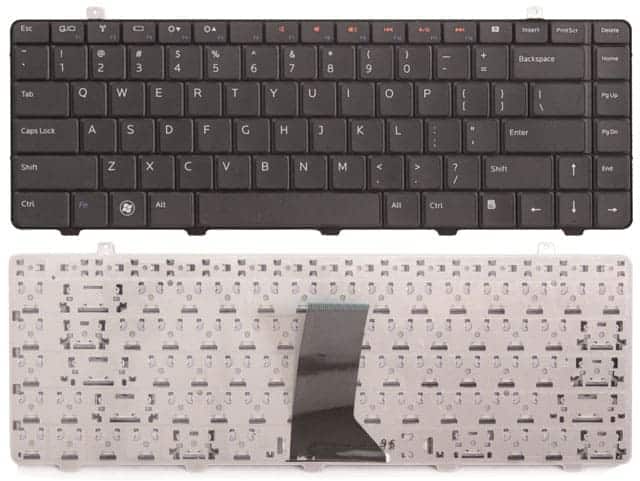
Troubleshooting Steps
Before you jump into replacing your laptop’s keyboard, it’s smart to try a few troubleshooting steps. Sometimes, the issue might be easier to fix than you think. Let’s dive into these steps to see if we can solve the problem without needing a new keyboard.
First off, restart your laptop. It sounds simple, but restarting can fix many small glitches, including keyboard woes. If keys are still stuck or not responding post-restart, it’s time to check the keyboard’s drivers. Drivers are like little guides that help your laptop’s brain understand its parts. Go to your laptop’s settings, find the device manager, and look for keyboard drivers. If they’re outdated, an update could bring your keyboard back to life.
Got a keyboard that’s physically dirty? Cleaning can help. Use a can of compressed air to blow away dust and crumbs. If certain keys got sticky from a spill, gently remove the key caps—if you can—and wipe underneath with a damp cloth. Be sure to use water or rubbing alcohol, not harsh chemicals. And don’t soak the cloth; a light wipe will do.
If these steps don’t help, the problem might be bigger, like liquid damage. This is tougher to fix at home. Liquid can harm the electronic parts under the keys, leading to more serious issues. If you spilled a drink on your laptop recently, and now keys aren’t working, it might be time for professional help or a replacement.
Remember, every laptop is different. What works for one might not work for another. If you’re unsure, check the manual for your laptop or search online for advice specific to your model. Troubleshooting can be a process of trial and error, but it’s worth trying these steps before deciding on a new keyboard.
Deciding When to Replace Your Keyboard
Deciding to replace a laptop keyboard isn’t always straightforward. However, a few clear signs can guide this decision. If keys no longer respond or do so inconsistently, it’s a significant indicator. Sometimes, restarting the laptop or updating drivers can fix minor issues. But if these steps don’t work, replacement may be the next option.
Physical damage is another crucial factor. Keys that are broken, missing, or stuck due to spills may require a new keyboard. While cleaning with compressed air or a damp cloth can help, severe spill damage often leads to the need for a complete replacement. It’s important not to ignore these signs as they can affect the laptop’s functionality and user experience.
Lastly, consider the age and condition of the laptop. Older models might benefit from a keyboard upgrade to improve performance and usability. However, if the laptop itself is nearing the end of its useful life, investing in a new device could be more cost-effective. Balancing the cost of replacement versus repair is key.
Before deciding, check if the keyboard is under warranty or if the laptop model has known issues that could be fixed by the manufacturer. Sometimes, specific models have recalls or free repair services for known defects. Checking forums, manufacturer announcements, and official support channels can provide valuable information.

Replacing a laptop keyboard might seem daunting, but it’s often a necessary step to ensure the device remains functional and efficient. Whether it’s due to physical damage, unresponsive keys, or just to enhance an older laptop’s performance, knowing when to replace the keyboard is critical. Remember, a well-functioning keyboard is essential for efficient laptop use.
Preparing for the Replacement
Before diving into the process of replacing a laptop keyboard, there are several key steps to take. First off, ensure the laptop is powered down. It’s not just about clicking ‘shut down’. Also, disconnect the charger and any other cables connected to the laptop. This prevents any chances of electrical damage to you or the device.
Next, gather the right tools. A small screwdriver set, typically a Phillips #0 or #00, will be crucial. For laptops that have delicate clips holding the keyboard in place, a plastic prying tool might come in handy. Not having the right tools could lead to unnecessary damage, so double-check what’s required for your specific laptop model.
Another important step is creating a clean workspace. A clutter-free, well-lit area will make keeping track of small screws and parts easier. It also reduces the risk of losing anything or making a mistake during the replacement process.
For those who haven’t done something like this before, doing a bit of homework is wise. Look up a guide or a video tutorial specific to the laptop model. This provides a clearer idea of what to expect and helps in avoiding common pitfalls.
Finally, it’s a good idea to ground oneself to avoid static electricity from damaging the laptop’s internal components. Simply touching a metal object or using an anti-static wrist strap can make a difference.
With these steps covered, moving on to the actual replacement process should be smoother and more straightforward. Remember, patience and attention to detail are key in successfully replacing a laptop keyboard.
Steps to Replace Your Laptop Keyboard
Replacing a laptop keyboard might feel like a tech-challenge, but it’s actually something you can do on your own with a bit of guidance. First things first, gather your tools. You’ll need a small screwdriver set and an antistatic wrist strap to protect your laptop from static damage.
Before diving into the replacement, make sure the laptop is off and unplugged from any power source. Remove the battery if it’s removable. Next, locate the screws that secure the keyboard. These are often found on the bottom of the laptop or under small plastic covers that you’ll gently pry open.
Once you’ve located and removed the screws, gently lift the keyboard from its position. Be careful, as it will still be connected to the motherboard by a ribbon cable. This cable usually clips in place, so look for the clip to release it.
With the old keyboard removed, it’s time to position the new one. Attach the ribbon cable to the connector on the motherboard, ensuring it’s secure. Then, place the keyboard back into its seat. Press down gently around the edges and across the middle to snap any clips or tabs into place. Finally, replace the screws or covers that hold the keyboard.
Remember, patience is key throughout this process. Take your time to understand each step and proceed carefully. When done correctly, replacing your laptop keyboard can give your device a fresh start, improving its usability and extending its life.
Conclusion
Replacing a laptop keyboard might seem daunting at first but with the right tools and a bit of patience, it’s a task that can breathe new life into an aging device. Remember, the key to a successful replacement lies in careful preparation and following each step meticulously. Whether it’s to fix a malfunctioning keyboard or to upgrade to a more advanced one, the effort put into replacing it can significantly enhance your laptop’s functionality and extend its lifespan. So, take your time, follow the guidance provided, and soon you’ll have a laptop that feels as good as new.
Frequently Asked Questions
Can I replace my laptop keyboard myself?
Replacing a laptop keyboard can be a doable task for those who are comfortable with disassembling and reassembling laptop parts. It requires careful handling and following a guide specific to your laptop brand and model. Ensure you have the necessary tools and follow safety precautions like grounding yourself to avoid static damage.
What tools do I need to replace my laptop keyboard?
To replace a laptop keyboard, you’ll typically need a small screwdriver set, a prying tool to safely lift the keyboard without damaging the laptop, and possibly a pair of tweezers for managing small screws. It’s also advisable to work on a clean, well-lit surface.
How do I know if my laptop keyboard needs to be replaced?
Signs that your laptop keyboard needs replacement include unresponsive keys, keys that stick or repeat, physical damage, or if troubleshooting methods like cleaning or updating drivers don’t resolve the issue. Consider replacement if the keyboard significantly hinders usability.
What should I do before starting the keyboard replacement process?
Before replacing your laptop keyboard, power down the laptop and disconnect all cables. Gather the proper tools, clear a workspace, and ground yourself to avoid static electricity damage. It’s also crucial to refer to specific guides or tutorials for your particular laptop model.
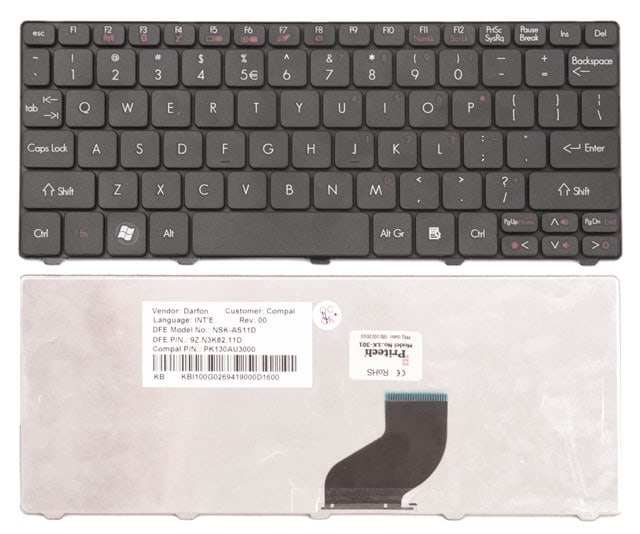
How do I remove the old keyboard from my laptop?
Typically, you will have to locate and remove screws securing the keyboard (often found on the bottom of the laptop or under trim pieces), and then carefully pry up the keyboard. After that, you’ll need to gently detach the ribbon cable connecting the keyboard to the motherboard. Refer to a guide specific to your laptop for detailed instructions.
Is it possible to only replace certain keys instead of the whole keyboard?
Yes, it’s possible to replace individual keys if they are damaged or lost. Replacement keys can be purchased from specialized online retailers. These kits usually come with the key cap, retainer clips, and a cup. Installing them involves fitting the retainer clip first, then the cup, and finally, snapping the key cap on top.
How long does it take to replace a laptop keyboard?
The time it takes to replace a laptop keyboard can vary depending on your experience and familiarity with the process, but generally, it can take anywhere from 30 minutes to an hour. It’s important to take your time and handle components gently to avoid damage.

