Changing DNS settings in Windows can improve your internet speed and security. The Domain Name System (DNS) translates domain names into IP addresses, allowing your computer to connect to websites. To change DNS in Windows 10 or 11, you can use the Settings app or Control Panel to modify your network adapter properties.
You might want to switch to a different DNS server for faster browsing, enhanced privacy, or to bypass content restrictions. Popular alternatives include Google DNS, Cloudflare DNS, and OpenDNS. These services often offer improved performance and additional features compared to your default Internet Service Provider’s DNS.
Before making changes, it’s wise to note down your current DNS settings. This allows you to revert if needed. The process to change DNS settings in Windows 10 is similar for both wired and wireless connections. For Windows 11 users, the steps are nearly identical, with slight differences in the Settings app layout.
Taking Control of Your Connection: Changing DNS Settings in Windows
Understanding DNS
Before diving into the how-to, let’s briefly cover what DNS is and why you might want to change it. DNS, or Domain Name System, is like the internet’s phone book. It translates human-readable domain names (like google.com) into the numerical IP addresses that computers use to communicate.
Usually, your internet service provider (ISP) automatically assigns you DNS servers. However, using third-party DNS servers can sometimes offer benefits like improved speed, enhanced security, or access to content that might be restricted by your ISP’s DNS.
Methods for Changing DNS Settings
There are a couple of ways to change your DNS settings in Windows: through the Control Panel or through the Settings app. Both methods achieve the same result, so choose the one you’re most comfortable with.
Method 1: Using the Settings App (Windows 11)

- Open Settings: You can search for “Settings” in the Windows search bar, or use the keyboard shortcut Windows Key + I.
- Network & internet: Click on “Network & internet.”
- Wi-Fi or Ethernet: Select “Wi-Fi” if you’re using a wireless connection, or “Ethernet” if you’re using a wired connection.
- Manage known networks (for Wi-Fi): If you’re on Wi-Fi, click on the network you’re connected to and then “Properties.” For Ethernet, click on the connection name.
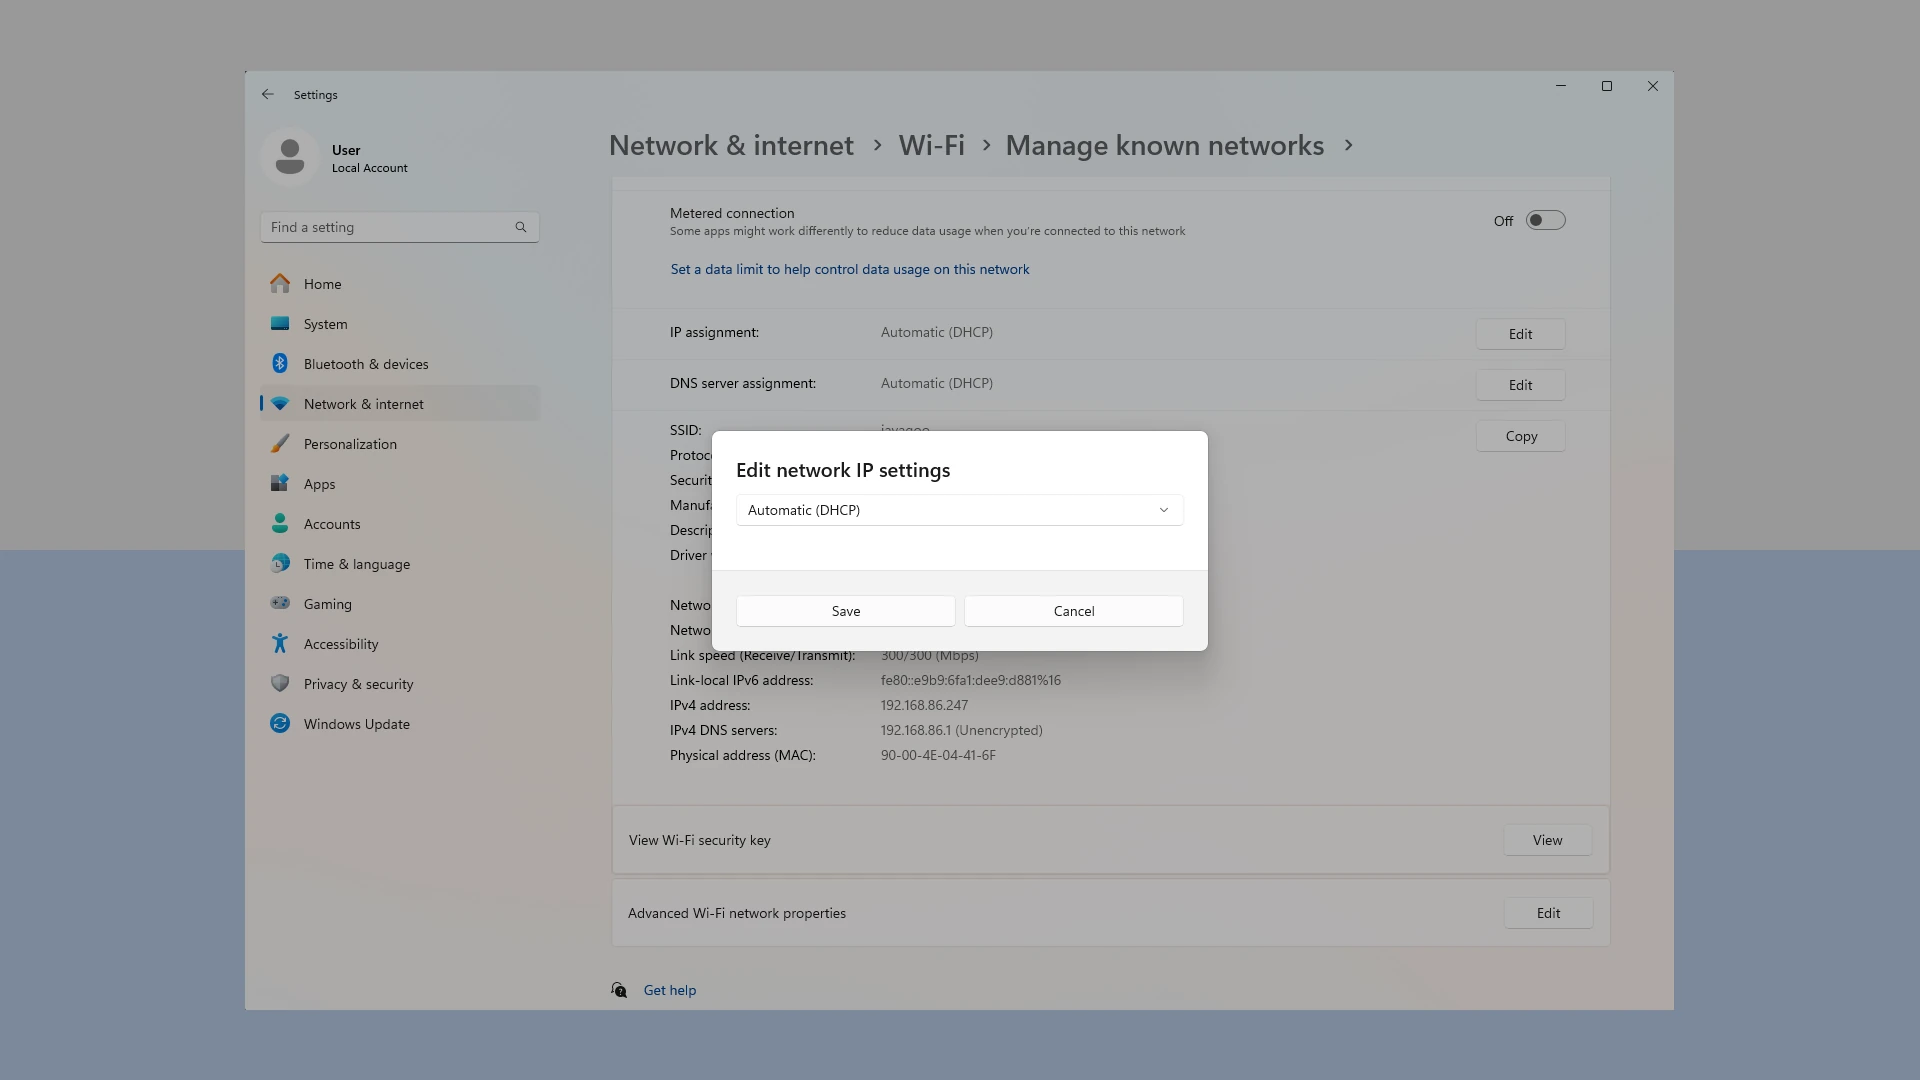
- IP assignment: Find “IP assignment” and click “Edit.”
- Change to Manual: Change the IP settings to “Manual.”
- Enter DNS server addresses: Enter your preferred primary and secondary DNS server addresses.
- Save: Click “Save” to apply your changes.

Method 2: Using the Control Panel (Windows 10 or Older)
- Open Control Panel: You can search for “Control Panel” in the Windows search bar.
- Network and Internet: Click on “Network and Internet.”
- Network and Sharing Center: Click on “Network and Sharing Center.”
- Change adapter settings: In the left-hand menu, click on “Change adapter settings.”
- Select your network adapter: Right-click on the network adapter you’re currently using (usually Wi-Fi or Ethernet) and select “Properties.”
- Internet Protocol Version 4 (TCP/IPv4): Select “Internet Protocol Version 4 (TCP/IPv4)” and click on “Properties.”
- Use the following DNS server addresses: Select the radio button that says “Use the following DNS server addresses:”
- Enter DNS server addresses: Enter your preferred primary and secondary DNS server addresses. (See the section below for some popular options.)
- Click OK: Click “OK” on all open windows to save your changes.
Popular Public DNS Servers
Here are some popular and reliable public DNS servers you can consider:
| Provider | Primary DNS | Secondary DNS |
|---|---|---|
| Google Public DNS | 8.8.8.8 | 8.8.4.4 |
| Cloudflare DNS | 1.1.1.1 | 1.0.0.1 |
| Quad9 | 9.9.9.9 | 149.112.112.112 |
| OpenDNS | 208.67.222.222 | 208.67.220.220 |
Troubleshooting
If you encounter any issues after changing your DNS settings, try the following:
- Flush your DNS cache: Open Command Prompt (search for “cmd” in the Windows search bar) and type
ipconfig /flushdnsand press Enter. - Restart your router: Sometimes, restarting your router can resolve DNS-related issues.
- Check your internet connection: Make sure your internet connection is stable.
- Revert to your ISP’s DNS: If all else fails, you can always revert back to your ISP’s default DNS settings by selecting “Obtain DNS server address automatically” in the network adapter properties.
Enhancing Your Online Experience: VPNs
While changing DNS settings can offer some benefits, a Virtual Private Network (VPN) provides a broader range of advantages, including enhanced privacy, security, and the ability to bypass geo-restrictions. A VPN encrypts your internet traffic and routes it through a server in a location of your choice, masking your IP address and making it appear as if you’re browsing from that location. This can be particularly useful for accessing content that’s not available in your region or for protecting your privacy on public Wi-Fi networks.
While a VPN can impact your internet speed slightly, the added security and flexibility often outweigh this minor drawback. If you’re concerned about online privacy or frequently access geo-restricted content, a VPN is a worthwhile investment. Many reputable VPN providers offer a variety of subscription plans to suit different needs and budgets. It’s important to research and choose a VPN provider with a strong track record of security and privacy.
Key Takeaways
- Changing DNS can improve internet speed and security
- Windows allows DNS changes through Settings or Control Panel
- Note your original DNS settings before making modifications
Preparing to Change DNS Settings
Changing DNS settings requires understanding DNS functionality and identifying your current configuration. These steps ensure a smooth transition to new DNS servers.
Understanding DNS and Its Importance
DNS (Domain Name System) acts as the internet’s phonebook. It translates human-readable domain names into IP addresses. This system is crucial for browsing websites and accessing online services.
DNS impacts internet speed, security, and privacy. Fast DNS servers can reduce page load times. Secure DNS providers offer protection against phishing and malware. Some DNS services block ads or inappropriate content.
Your Internet Service Provider (ISP) typically assigns default DNS servers. However, you can choose alternative DNS providers for better performance or added features.
Identifying Current DNS Configuration
Before changing DNS settings, you need to know your current configuration. Windows offers multiple ways to view this information.
To check your DNS settings:
- Open Command Prompt
- Type “ipconfig /all” and press Enter
- Look for “DNS Servers” under your network adapter
The Settings app also displays DNS information:
- Open Settings > Network & Internet
- Select your connection (Wi-Fi or Ethernet)
- Click “Properties”
- Find “DNS server assignment”
Changing DNS servers can be done through the Control Panel or Settings app. Both IPv4 and IPv6 DNS settings can be modified.
Write down your current DNS servers. This allows you to revert changes if needed.
Modifying DNS Server Settings
Changing DNS server settings in Windows can enhance internet performance and security. This process involves accessing network adapter options, configuring DNS addresses, and applying the new settings.
Accessing Network Adapter Options
To modify DNS settings, users need to access the network adapter options in Windows. This can be done through the Control Panel or Settings app.
In Windows 10 and 11, open the Settings app by pressing Windows+I. Navigate to “Network & Internet” and select the active connection. Click on “Change adapter options” to view available network adapters.
For older Windows versions, open the Control Panel and go to “Network and Sharing Center”. Click on “Change adapter settings” to see the list of network connections.
Right-click on the active connection (Ethernet or Wi-Fi) and select “Properties” to open the configuration window.
Configuring DNS Server Addresses
After accessing the adapter properties, users can input custom DNS server addresses. This step allows for the use of public DNS services or specific servers provided by an organization.
In the connection properties window, select “Internet Protocol Version 4 (TCP/IPv4)” and click “Properties”. Choose “Use the following DNS server addresses” to manually enter DNS settings.
Google Public DNS (8.8.8.8 and 8.8.4.4) and Cloudflare DNS (1.1.1.1 and 1.0.0.1) are popular options for primary and secondary DNS servers. These services often provide faster resolution and enhanced security features.
Users can also configure IPv6 DNS settings if their network supports it. The process is similar to IPv4, but uses different address formats.
Applying and Testing New DNS Settings
Once new DNS addresses are entered, click “OK” to save the changes. Close all network-related windows to apply the settings.
To verify the new configuration, open Command Prompt as an administrator. Type “ipconfig /flushdns” and press Enter to clear the DNS cache. This ensures the system uses the new DNS servers immediately.
Test the connection by browsing websites or using the “ping” command in Command Prompt. If issues occur, users can revert to automatic DNS assignment or try alternative DNS providers.
For advanced users, PowerShell commands offer a quick way to change DNS settings without navigating through menus. This method is useful for managing multiple network adapters or automating DNS changes.