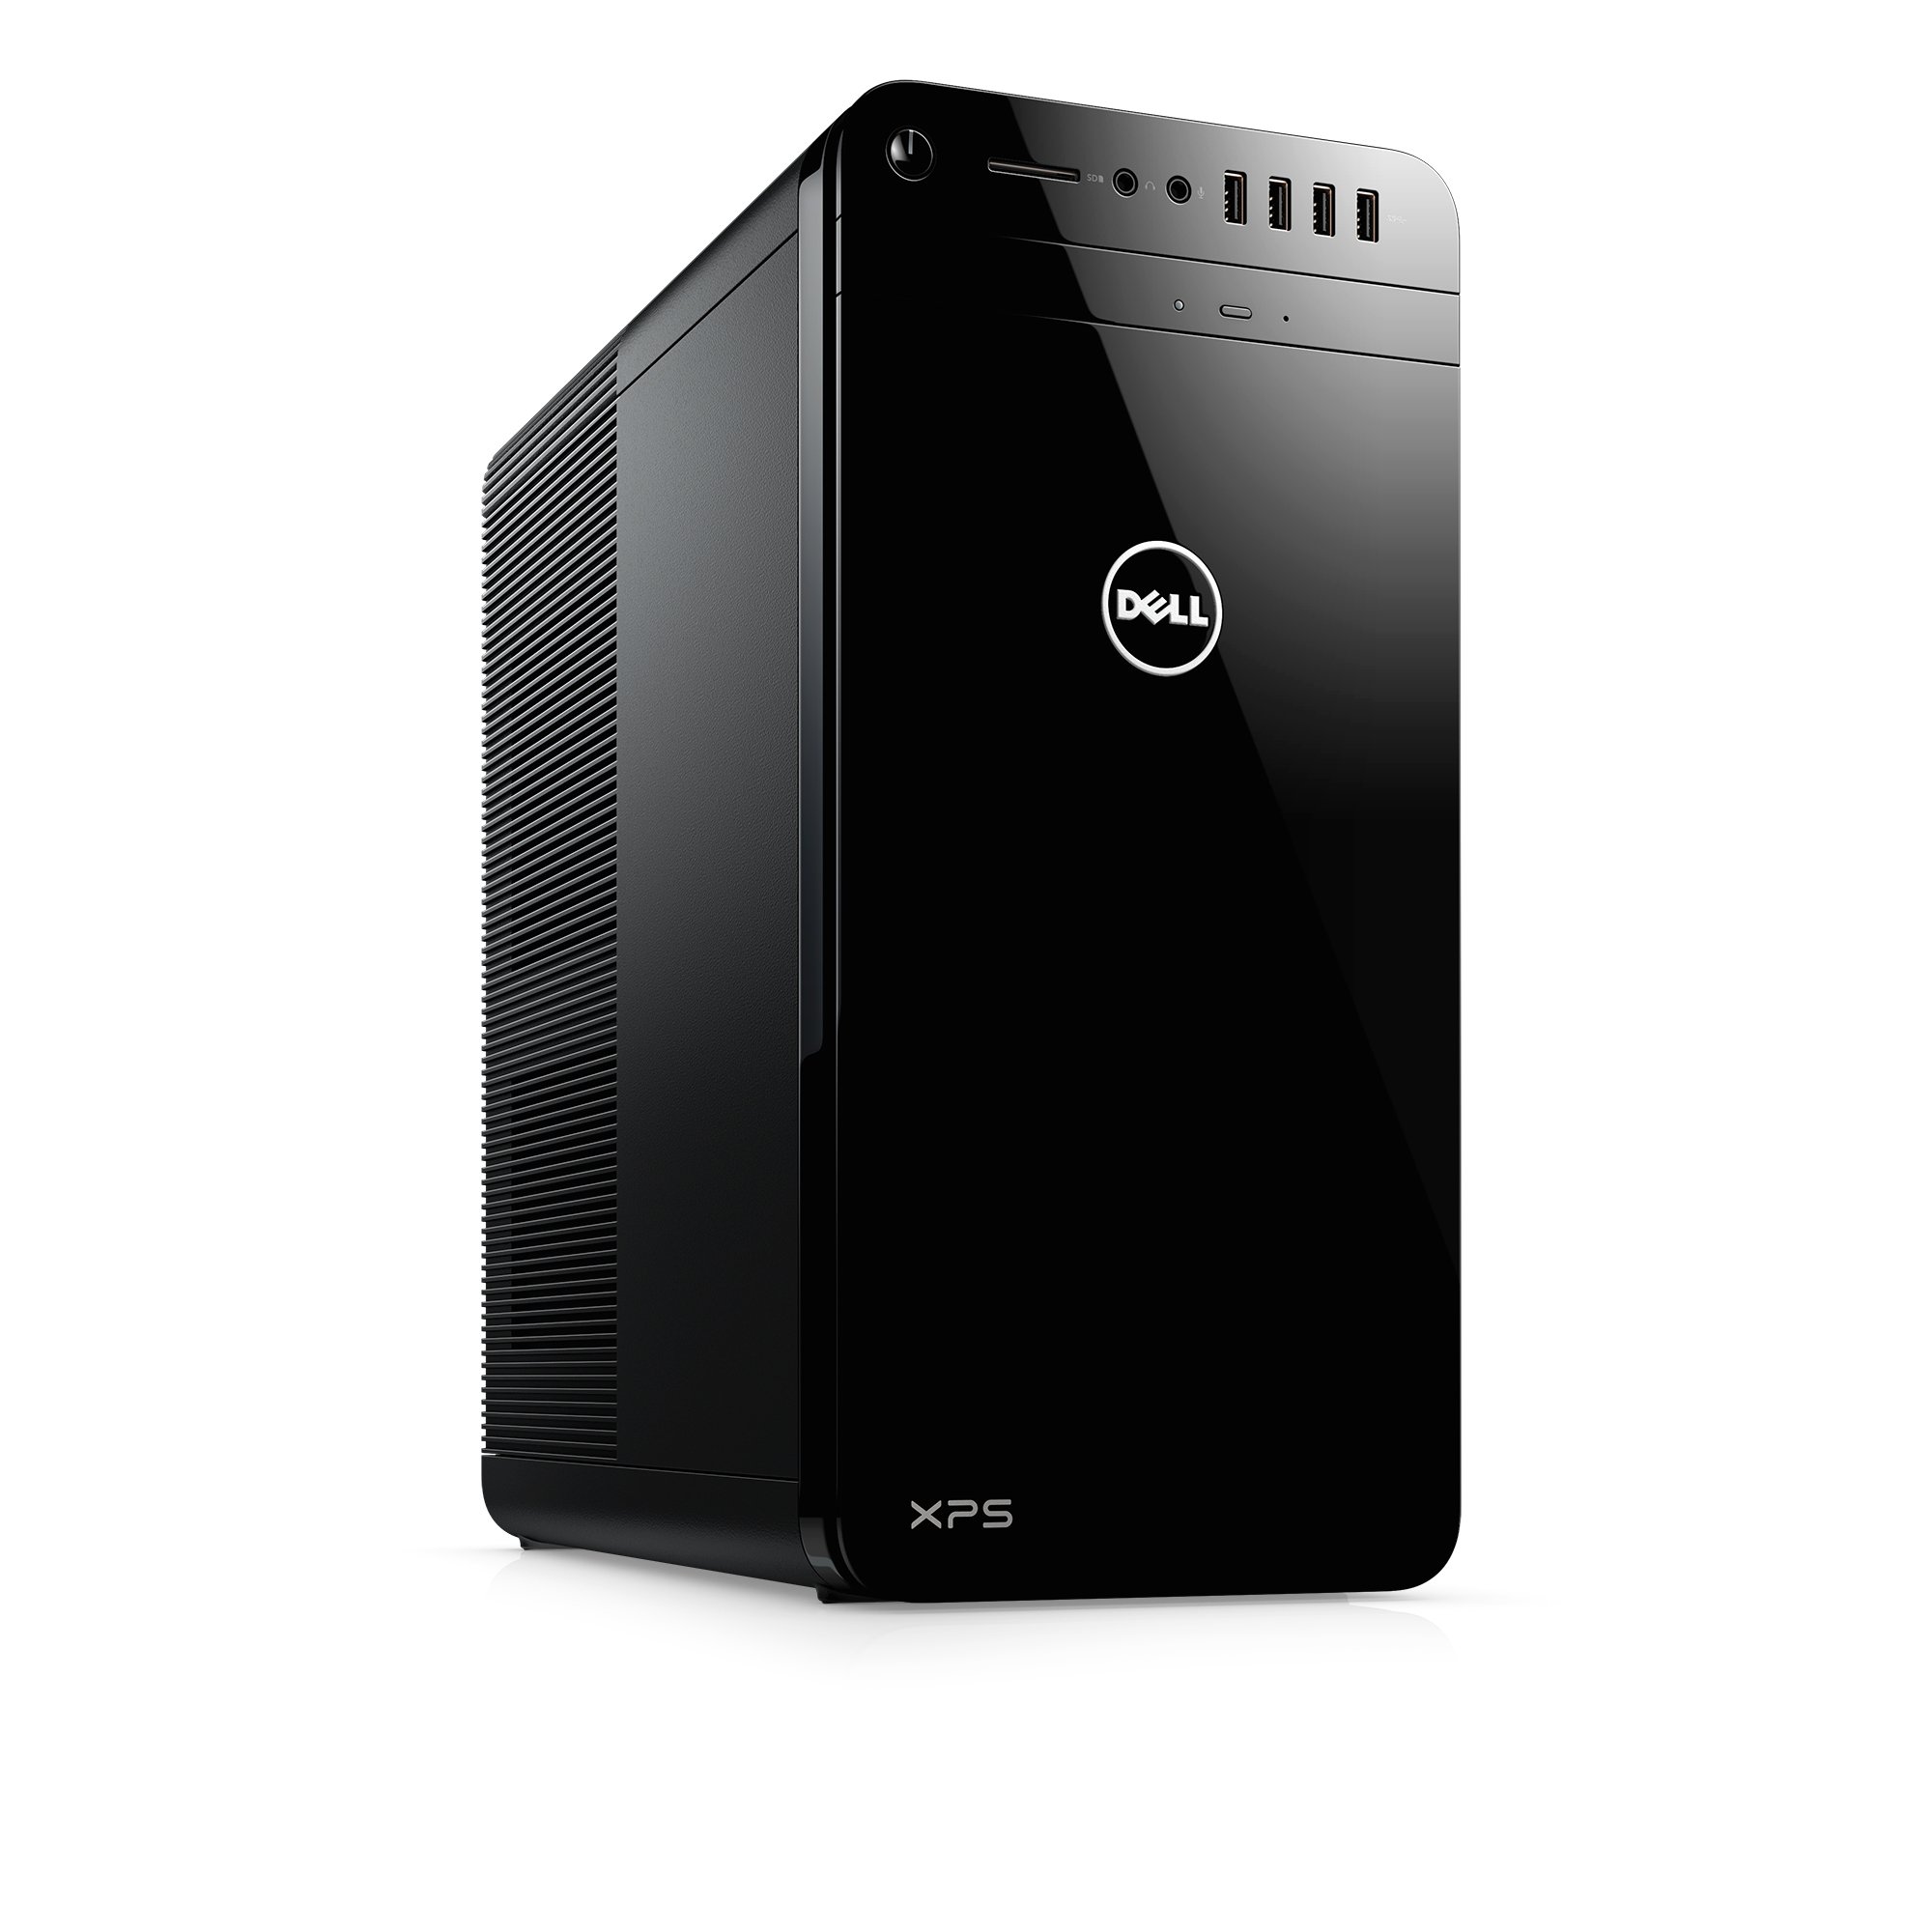
Dell XPS desktop troubleshooting can be simple when you know where to look. These powerful machines often have easy fixes for common issues. You can solve many XPS desktop problems by checking diagnostic lights, updating drivers, and performing basic power checks.
Dell provides helpful tools for XPS owners. The diagnostic indicators guide lets you interpret LED lights and beeps to pinpoint errors. For software issues, the Dell support website offers driver updates that can fix audio problems and other glitches.
Power troubles? Start with the basics. Inspect cables, test wall outlets, and drain residual power. These steps often restore function to a non-starting XPS desktop.
| Common XPS Issue | Quick Fix |
|---|---|
| No power | Check cables and outlet |
| Strange beeps | Consult diagnostic guide |
| Audio problems | Update drivers |
| Black screen | Test monitor connection |

Dell XPS Desktop Troubleshooting: Quick Fixes
Encountering problems with your Dell XPS desktop? Before contacting support, try these quick fixes for common issues:
1. No Power or Startup Issues
- Check Power Connections: Ensure the power cable is securely plugged into both the computer and a working outlet.
- Inspect Power Button: Make sure the power button is not stuck or obstructed.
- Reseat Components: Open the case and reseat the RAM modules and graphics card (if applicable).
- Run Diagnostics: Power on the computer and repeatedly press F12 to access the boot menu. Select “Diagnostics” to run hardware tests.
2. Display Problems
- Check Connections: Ensure the monitor cable is properly connected to both the computer and the monitor.
- Test with Different Cable/Monitor: Try a different cable or monitor to rule out a faulty display or cable.
- Adjust Brightness/Contrast: Make sure the brightness and contrast settings are not too low.
- Update Graphics Drivers: Download and install the latest graphics drivers from Dell’s support website.
3. Operating System Errors
- Restart Your Computer: A simple restart can often resolve temporary software glitches.
- Run System Restore: Restore your system to a previous point when it was working correctly.
- Check for Updates: Ensure Windows is up-to-date with the latest patches and updates.
- Run Startup Repair: If Windows fails to load, use the Startup Repair tool to fix boot errors.
4. Performance Issues
- Close Unnecessary Programs: Close any programs you’re not actively using to free up system resources.
- Run Disk Cleanup: Remove temporary files and unnecessary data to free up disk space.
- Scan for Malware: Run a full system scan with your antivirus software to detect and remove malware.
- Defragment Hard Drive: Defragment your hard drive to improve file access times.
5. Peripheral Problems
- Check Connections: Ensure the peripheral (keyboard, mouse, printer, etc.) is properly connected to the computer.
- Try Different USB Port: Test the peripheral on a different USB port to rule out a faulty port.
- Update Drivers: Download and install the latest drivers for the peripheral from the manufacturer’s website.
- Reinstall Device: Uninstall and reinstall the device in Device Manager.
6. Overheating
- Clean Vents: Ensure the computer’s vents are free from dust and debris.
- Improve Airflow: Make sure the computer has adequate ventilation and is not placed in an enclosed space.
- Monitor Temperatures: Use a hardware monitoring tool to check CPU and GPU temperatures.
- Reapply Thermal Paste: If necessary, reapply thermal paste to the CPU and GPU heatsinks.
| Issue | Quick Fix |
|---|---|
| No Power | Check connections, power button, reseat components |
| Display Problems | Check connections, try different cable/monitor, adjust settings, update drivers |
| Operating System Errors | Restart, system restore, check for updates, startup repair |
| Performance Issues | Close programs, disk cleanup, malware scan, defragment |
| Peripheral Problems | Check connections, try different port, update drivers, reinstall device |
| Overheating | Clean vents, improve airflow, monitor temperatures, reapply thermal paste |
Additional Troubleshooting Resources
- Dell Support Website: Access drivers, manuals, and troubleshooting guides for your specific XPS desktop model.
- Dell SupportAssist: Use the pre-installed SupportAssist tool for diagnostics, driver updates, and automated troubleshooting.
- HP Community Forums: Connect with other Dell XPS users and find solutions to common problems.
Overview of Dell XPS Systems
Dell XPS systems offer powerful performance and sleek design for both laptops and desktops. These premium devices cater to users who need high-end computing capabilities for work or play.
Understanding the Dell XPS Series
The Dell XPS series represents the company’s premium line of computers. It includes both laptops and desktops designed for users who demand top-tier performance. XPS stands for “Xtreme Performance System,” reflecting the powerful hardware inside these machines.
XPS devices feature:
- High-quality displays
- Premium build materials
- Latest processors
- Dedicated graphics options
Dell positions the XPS line as a blend of performance and style. These systems often incorporate cutting-edge technologies before they appear in other Dell product lines.
Dell XPS 13 and 15 Models
The XPS 13 and XPS 15 are Dell’s flagship laptops. The XPS 13 offers portability, while the XPS 15 provides more power in a larger form factor.
Key features of XPS laptops:
| Feature | XPS 13 | XPS 15 |
|---|---|---|
| Screen Size | 13.4″ | 15.6″ |
| Max Resolution | 3840 x 2400 | 3840 x 2400 |
| Processor | Up to Intel Core i7 | Up to Intel Core i9 |
| Graphics | Intel Iris Xe | Up to NVIDIA RTX 3050 Ti |
| Battery Life | Up to 14 hours | Up to 13 hours |
Both models offer options for touch screens and high-resolution displays. They feature slim bezels and compact designs that maximize screen real estate.
XPS 8950 Desktop Specifications
The XPS 8950 desktop delivers high performance for demanding tasks like video editing and gaming. This tower PC offers customizable configurations to suit various needs.
Key specifications:
- Processor: Up to 12th Gen Intel Core i9
- Graphics: Up to NVIDIA GeForce RTX 3090
- Memory: Up to 128GB DDR5
- Storage: Multiple SSD and HDD options
The XPS 8950’s chassis allows for easy upgrades. You can access and replace components without special tools. This desktop supports liquid cooling options for better thermal management under heavy loads.
Starting the Troubleshooting Process
Effective troubleshooting for your XPS desktop requires a systematic approach. You’ll need to identify the issue, interpret diagnostic signals, and update critical system components.
Identifying the Issue
Start by pinpointing the specific problem your XPS desktop is experiencing. Common issues include failure to power on, unusual noises, or software errors. Check all cable connections and ensure the power outlet works. If your computer turns on but doesn’t boot, listen for any beep codes or watch for LED patterns.
Run Dell diagnostics to test hardware components. This built-in tool can detect faulty parts. To access it, restart your computer and press F12 repeatedly when the Dell logo appears. Select “Diagnostics” from the boot menu.
Keep a record of any error messages or unusual behavior. This information will be valuable if you need to contact technical support.
Diagnostic LEDs and Beep Codes
XPS desktops use LED lights and beep codes to communicate hardware issues during the Power-On Self-Test (POST). These signals can help you identify problems quickly.
LED patterns:
- Solid amber: Power supply issue
- Blinking amber: Motherboard problem
- Solid white: Normal operation
Beep codes:
- 1 beep: BIOS corruption
- 2 beeps: Memory failure
- 3 beeps: Motherboard error
Consult your XPS manual for a complete list of codes. If you hear multiple beeps or see unusual LED patterns, check Dell’s troubleshooting guide for specific solutions.
Performing a BIOS Update
Updating your BIOS can resolve many system issues and improve performance. Before starting, connect your XPS to a reliable power source to prevent interruptions.
Steps to update BIOS:
- Visit Dell’s support website
- Enter your service tag or select your model
- Download the latest BIOS version
- Run the update file and follow on-screen instructions
Caution: Incorrect BIOS updates can cause serious problems. If you’re unsure, contact Dell support for guidance. After the update, your XPS may restart several times. This is normal. Don’t interrupt the process.
Regular BIOS updates can prevent future issues and keep your XPS running smoothly. Set a reminder to check for updates every few months.
Power-Related Troubleshooting
Power issues can be frustrating when troubleshooting your XPS desktop. Identifying the root cause often involves checking key components and connections. Let’s explore the main areas to focus on.
Checking the Power Supply Unit
The Power Supply Unit (PSU) is crucial for your XPS desktop’s operation. Start by inspecting the power cable for damage. Ensure it’s securely plugged into both the wall outlet and your computer.
Try a different power outlet to rule out electrical issues. If possible, test with another compatible PSU to isolate the problem.
Many Dell desktops have a built-in self-test feature. Disconnect the power cable, wait 15 seconds, then reconnect it. Look for the LED light to stay on for 3 seconds before turning off. This indicates the PSU can deliver power to the system board.
| PSU Test Result | Meaning |
|---|---|
| LED stays on | PSU functioning |
| LED doesn’t light | Possible PSU failure |
If the PSU fails this test, it may need replacement.
Testing the Power Button and Cables
A faulty power button or loose internal cables can prevent your XPS desktop from turning on. Inspect the power button for any visible damage or sticking.
Open your desktop case and check all internal power connections. Ensure cables are firmly seated in their sockets on the motherboard and other components.
Try unplugging all non-essential devices like USB drives, printers, and external hard drives. Sometimes these can interfere with the boot process.
Perform a power drain by unplugging the computer and holding the power button for 15 seconds. This can reset the power state and sometimes resolve issues.
Diagnosing System Board and Power Issues
If basic troubleshooting doesn’t work, the problem might lie with your system board. Look for signs of physical damage or swollen capacitors on the motherboard.
Try resetting the CMOS battery. This small battery maintains BIOS settings and can cause power issues when it fails. Remove it for a few minutes, then reinsert it.
Listen for any beep codes when attempting to power on. These can indicate specific hardware failures. Consult your XPS manual to interpret the beeps.
If you’ve tried all these steps and your XPS desktop still won’t power on, you may need professional repair. The issue could be a failed system board or another complex component.
Hardware and Software Issues
XPS desktop troubleshooting often involves addressing both hardware and software problems. Common issues include memory conflicts, device connection troubles, and outdated drivers.
RAM and DIMM Related Problems
RAM issues can cause system instability and poor performance. Check if your XPS desktop recognizes all installed memory. Open System Information by pressing Windows + R and typing “msinfo32”. Look under “Installed Physical Memory (RAM)” to verify.
If RAM is not fully detected, try these steps:
- Power off the computer and unplug it
- Open the case and reseat the memory modules
- Ensure DIMMs are in matched pairs if using dual-channel mode
- Test each memory stick individually to identify faulty modules
Run the Dell built-in diagnostics tool to check for memory errors. If problems persist, you may need to replace faulty RAM sticks.
Resolving USB and Device Connectivity
USB connectivity issues can prevent devices from working properly. Start by unplugging and reconnecting the device. Try different USB ports to rule out port-specific problems.
If issues continue:
- Update USB drivers through Device Manager
- Check for loose internal USB header connections
- Disable USB selective suspend in Power Options
- Use the Windows troubleshooter for USB issues
For other device connectivity problems, ensure you have the latest device drivers installed. Check the manufacturer’s website for updates. Dell’s support page offers driver downloads specific to your XPS model.
Updating Dell Drivers and Firmware
Keeping drivers and firmware up-to-date is crucial for optimal performance and stability. Dell provides several methods to update your XPS desktop:
- SupportAssist: Automatically detects and installs updates
- Dell Update: Manual tool for downloading latest drivers
- Dell Support website: Browse and download specific drivers
To use Dell Update:
- Download from Dell’s support site
- Install and run the application
- Select “Check” to scan for updates
- Choose which updates to install
Regularly updating drivers can resolve many software-related issues and improve system stability. Pay special attention to graphics, chipset, and network driver updates for best results.
| Update Method | Pros | Cons |
|---|---|---|
| SupportAssist | Automatic, easy to use | May miss some updates |
| Dell Update | User control, reliable | Requires manual checks |
| Support Website | Most comprehensive | Time-consuming, technical |
Frequently Asked Questions
Dell XPS desktops may encounter various issues. These common questions address power problems, error codes, and screen failures to help you troubleshoot effectively.
What steps are needed to reset a Dell XPS desktop?
To reset your Dell XPS desktop:
- Turn off the computer.
- Unplug all cables except the power cord.
- Press and hold the power button for 15 seconds.
- Reconnect all cables.
- Turn on the computer.
This process can resolve many software-related issues.
How can one troubleshoot a Dell XPS desktop not powering on?
If your Dell XPS desktop won’t turn on:
- Check the power cable connections.
- Try a different power outlet.
- Remove and reseat the RAM.
- Disconnect all peripherals.
- Press the power button for 60 seconds with the system unplugged.
If these steps fail, the issue may be hardware-related.
What do the blinking light codes on a Dell XPS desktop indicate?
Blinking light codes on Dell XPS desktops signal various issues:
- 2 blinks: Memory problem
- 3 blinks: Motherboard failure
- 4 blinks: Power supply issue
- 5 blinks: CMOS battery failure
- 6 blinks: Video card or chip failure
Consult your model’s manual for specific meanings and solutions.
How can I interpret the Dell XPS desktop beep codes during startup?
Dell XPS desktop beep codes indicate startup issues:
- 1 beep: BIOS corruption
- 2 beeps: RAM failure
- 3 beeps: Motherboard failure
- 4 beeps: Timer failure
- 5 beeps: Processor failure
Count the beeps carefully to identify the problem area.
What should be done if the LCD screen on a Dell XPS fails?
For a failed LCD screen on your Dell XPS:
- Check cable connections.
- Test with an external monitor.
- Update graphics drivers.
- Run Dell’s built-in diagnostics.
- Contact Dell support if the issue persists.
A screen replacement may be necessary for hardware failures.
How can I force a Dell desktop to turn on if it appears unresponsive?
To force an unresponsive Dell desktop to turn on:
- Unplug the power cord.
- Hold the power button for 30 seconds.
- Plug the power cord back in.
- Press the power button once.
This method can reset the power state and often resolves startup issues.
| Issue | Quick Fix |
|---|---|
| No Power | Check connections, try different outlet |
| Beep Codes | Count beeps, check manual for meaning |
| Screen Failure | Test external monitor, update drivers |
| Unresponsive | Perform power cycle (30-second hold) |


