Remember these instructions when installing a motherboard in your computer: First, gather all the tools and components you’ll need, like the motherboard, compatible screws, and standoffs. Make sure your work area is clean and free of static electricity. Next, align the motherboard with the mounting holes in the computer case and attach the I/O shield, ensuring that all ports are accessible. Then, connect the power, audio, and USB cables to the correct headers on the motherboard for everything to work properly.
Installing Your Motherboard: A Guide for All
The motherboard is the heart of your computer. It connects everything and makes it all work together. Installing one might seem scary, but with a bit of care and our guide, it’s easy. Just remember to be patient and take your time.
Get Ready
First, gather your tools. You’ll need:
- Phillips head screwdriver
- Anti-static wrist strap or gloves (to protect your parts)
- Thermal paste (if not pre-applied to your CPU cooler)
- Your motherboard manual
Now, prepare your workspace. Find a clean, flat surface with good lighting.
Open Up Your Computer
- Unplug your computer and lay it on its side.
- Remove the side panel of your case.
- If your case has a motherboard tray, remove it.
Prepare the Case
- Locate the standoffs (small metal posts) inside the case.
- Make sure the standoffs align with the mounting holes on your motherboard. Add or remove standoffs as needed.
Install the I/O Shield
- Find the I/O shield that came with your motherboard.
- Align it with the rectangular opening on the back of the case.
- Gently press it in until it snaps into place.
Place the Motherboard
- Carefully align the motherboard with the standoffs and the I/O shield.
- Lower the motherboard onto the standoffs, making sure the ports line up with the I/O shield.
Secure the Motherboard
- Use the screws that came with your motherboard to secure it to the standoffs.
- Don’t overtighten the screws, just make them snug.
Connect the CPU (if not already installed)
- Open the CPU socket lever.
- Align the CPU with the socket, matching the triangle marking on the CPU with the one on the socket.
- Gently lower the CPU into the socket.
- Close the socket lever.
Apply Thermal Paste (if not pre-applied)
- Place a small pea-sized amount of thermal paste in the center of the CPU.
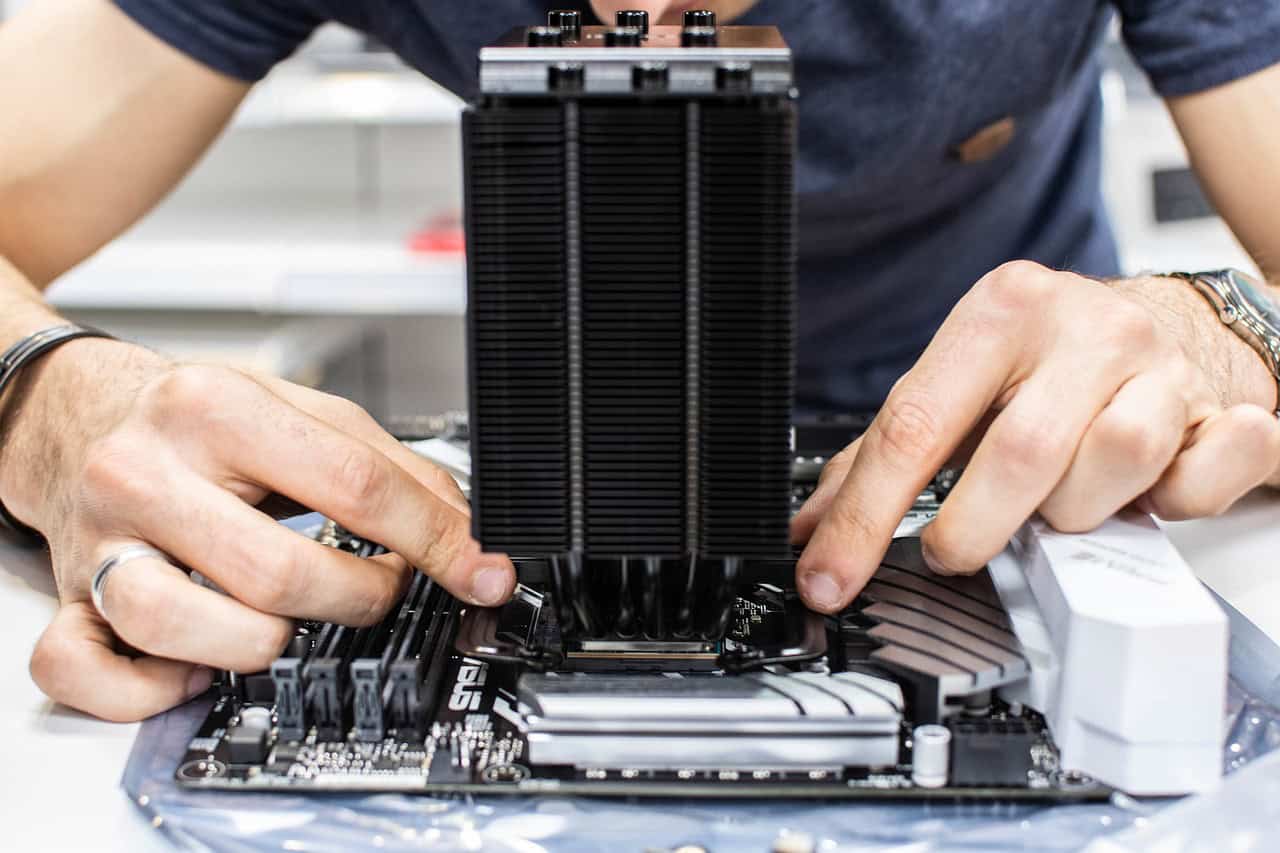
Install the CPU Cooler
- Follow the instructions that came with your CPU cooler to install it.
Connect the Case Cables and Power Supply
- Connect the case’s front panel connectors (power button, reset button, LED lights, etc.) to the motherboard. Refer to your motherboard manual for the correct locations.
- Connect the 24-pin ATX power connector from your power supply to the motherboard.
- If your CPU requires it, connect the 8-pin (or 4+4 pin) EPS power connector.
Install Additional Components
- Install your RAM modules, graphics card, and other expansion cards.
- Connect any storage drives (SSD or HDD) and optical drives.
Double-Check Everything
- Make sure all cables are securely connected.
- Ensure no loose screws or components are inside the case.
Close Your Computer
- Reattach the side panel of your case.
Congratulations! You’ve successfully installed your motherboard. Now it’s time to plug in your peripherals and power on your computer.
Remember to consult your motherboard manual if you encounter any issues.
Troubleshooting Tips
| Problem | Possible Solution |
|---|---|
| Computer won’t turn on. | Check power connections, ensure the power supply switch is on. |
| No display on monitor. | Check monitor connection, reseat graphics card if applicable. |
| Error beeps at startup. | Refer to your motherboard manual for beep code meanings. |
| Operating system not found. | Check boot order in BIOS settings, ensure the storage drive is connected. |
Key Takeaways
- Proper preparation and a clean workspace are crucial for motherboard installation.
- Correct placement of the motherboard prevents future hardware conflicts.
- Attaching all required cables securely enhances the PC’s performance and usability.
Preparing for Installation
Before installing a motherboard, it is essential to carry out certain preparatory steps. These will ensure the process is smooth and the hardware functions correctly once assembled.
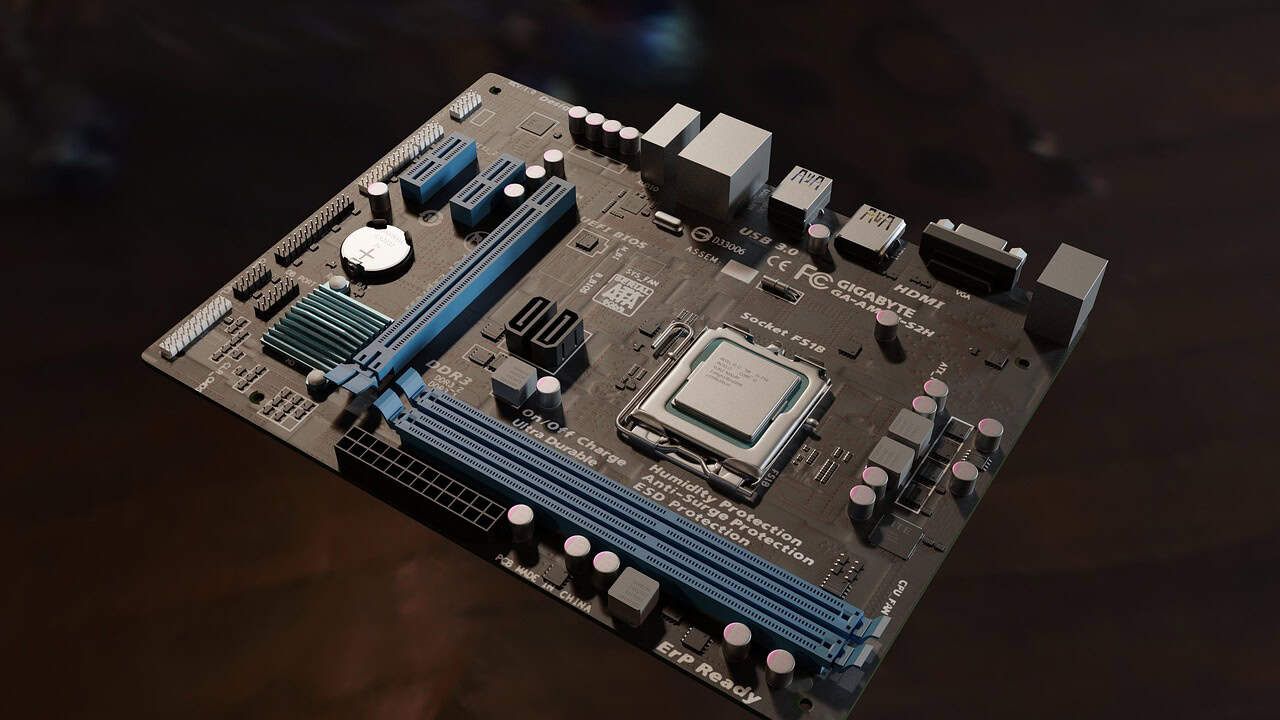
Understanding Motherboard Form Factors
Motherboards come in various sizes known as form factors. The most common are ATX, microATX (mATX), and mini-ITX. Each has a specific size and layout which must match the PC case and ensure compatibility with other components.
Gathering Necessary Tools and Equipment
Required tools typically include a Phillips-head screwdriver for the screws and an anti-static wristband to prevent damage from electrostatic discharge. It’s also useful to have all screws and standoffs ready.
Preparation of the Case
Clear out the PC case and position the standoffs matching the form factor of the motherboard. Place the I/O shield provided with the motherboard into the back of the case.
Installing the CPU and RAM Beforehand
It’s often easier to install the CPU, CPU cooler, and RAM modules onto the motherboard before placing it in the case. This provides better access to the socket and RAM slots.
Reviewing the Motherboard Manual
Review the motherboard manual thoroughly. It contains vital information about the installation process, component placement, and any motherboard-specific instructions like connector locations.
Assessing Additional Components and Connectors
Identify any additional components like SSDs, GPUs, or hard drives that will connect to the motherboard. Verify how they align with available slots and power supply connectors.
Grounding and Safety Protocols
Make use of an anti-static wristband or mat. One should always be grounded when dealing with sensitive PC components to avoid damage from static electricity.
Organizing and Planning Cable Management
Plan where to route cables for both aesthetics and airflow. Organize cables neatly and ensure they do not obstruct fans or cooling devices to maintain optimal performance and heat management.