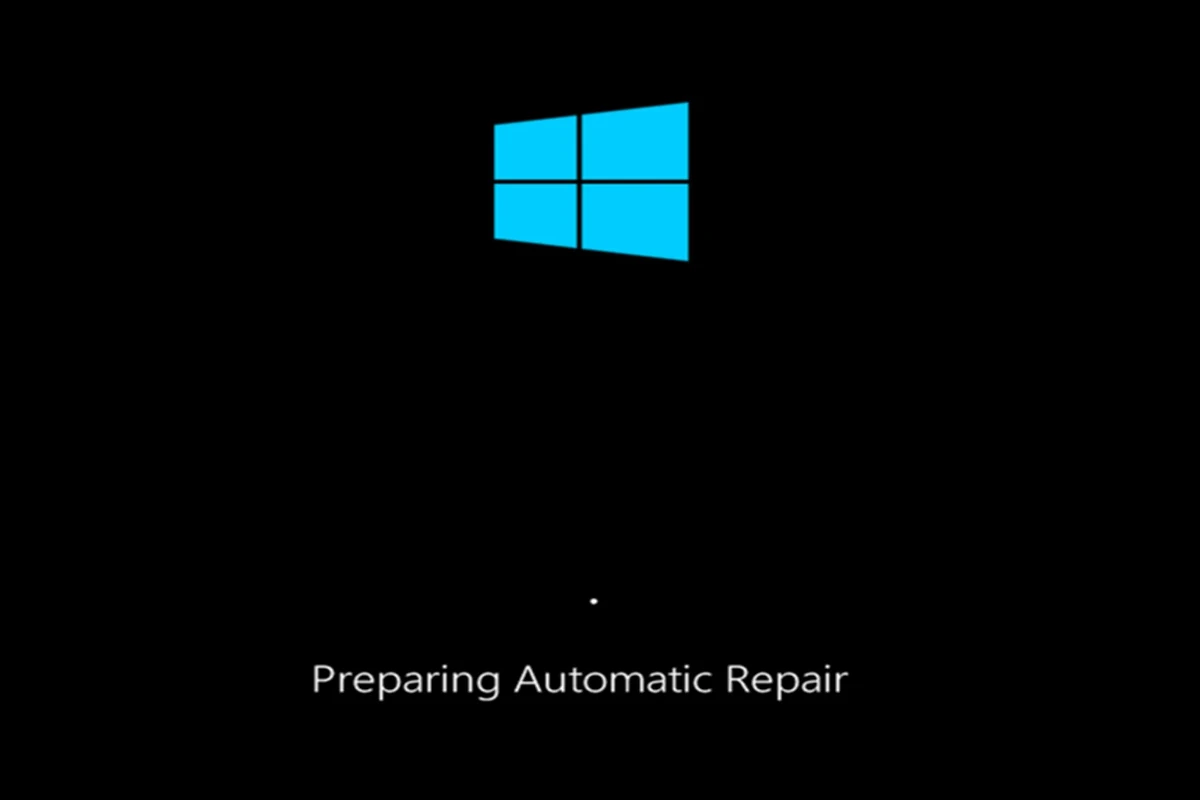
Windows users sometimes face a frustrating issue where their computer gets stuck in a loop during startup. This problem is known as the “preparing automatic repair” loop. It happens when Windows tries to fix startup issues but can’t complete the process.
The automatic repair loop can prevent your computer from booting properly and leave you unable to access your files or use your PC. This problem often occurs after Windows updates, hardware changes, or software conflicts. It can be scary to see your computer stuck on the same screen, but there are ways to fix it.
Breaking out of the automatic repair loop usually involves using advanced startup options or the command prompt. These methods can help you restore your system, check for file corruption, or bypass the automatic repair process. With some patience and the right steps, you can often get your computer working again.
Breaking Free from the ‘Preparing Automatic Repair’ Loop
Windows users occasionally encounter the dreaded ‘Preparing Automatic Repair’ loop. It’s a frustrating situation where your computer gets stuck in an endless cycle of trying to fix itself, but failing. Let’s explore some effective ways to escape this loop and get your PC back on track.
Understanding the Causes
Before we jump into solutions, it’s helpful to know why this loop happens. Some common culprits include:
- Corrupted System Files: Damaged or missing system files can prevent Windows from starting properly.
- Hard Drive Errors: Problems with your hard drive, such as bad sectors or file system errors, can trigger the repair loop.
- Boot Configuration Issues: Incorrect boot settings or a corrupted Boot Configuration Data (BCD) store can lead to startup problems.
- Recent Updates or Changes: Sometimes, recent software updates, driver installations, or system changes can cause instability and trigger the repair loop.

Effective Solutions
- Startup Repair: Let Windows try to fix itself first. If the ‘Preparing Automatic Repair’ screen eventually leads to ‘Startup Repair,’ choose that option and let it run.
- System Restore: If Startup Repair doesn’t work, try restoring your system to a previous point when it was working correctly. This can undo any recent changes that might be causing the issue.
- Access Advanced Options: You might need to interrupt the startup process a few times to get to the ‘Advanced Options’ menu.
- Choose System Restore: Select ‘Troubleshoot’ > ‘Advanced options’ > ‘System Restore.’
- Command Prompt Repairs: For more technical users, the Command Prompt offers powerful tools to fix boot errors.
- Access Command Prompt: Go to ‘Troubleshoot’ > ‘Advanced options’ > ‘Command Prompt.’
- Run Commands: Use commands like
bootrec /fixmbr,bootrec /fixboot, andbootrec /rebuildbcdto repair boot configuration issues.
- Check Your Hard Drive: A failing hard drive can cause all sorts of problems.
- Run CHKDSK: In Command Prompt, use the command
chkdsk /rto check for and repair hard drive errors.
- Run CHKDSK: In Command Prompt, use the command
- Uninstall Recent Updates: If you suspect a recent update is the culprit, try uninstalling it.
- Access Safe Mode: Boot into Safe Mode (usually by repeatedly pressing F8 during startup).
- Uninstall Updates: Go to ‘Settings’ > ‘Update & Security’ > ‘Windows Update’ > ‘View update history’ and choose to uninstall recent updates.
- Reinstall Windows: As a last resort, you might need to reinstall Windows. This will erase your data, so back up important files first.
- Use Installation Media: You’ll need a bootable USB drive or DVD with the Windows installation files.
Preventive Measures
- Keep Windows Updated: Regular updates often include fixes for known issues.
- Create System Restore Points: Create restore points before making significant system changes.
- Maintain Your Hard Drive: Regularly defragment your hard drive and check for errors.
Additional Tips
- Disconnect Peripherals: Unplug any unnecessary external devices that might be interfering with startup.
- Check BIOS Settings: Ensure your BIOS settings are correct, especially the boot order.
By systematically trying these solutions, you can often break free from the ‘Preparing Automatic Repair’ loop and restore your Windows PC to working order.
Fix Preparing Automatic Repair By Manufacturer
Whatever your laptop manufacturer or desktop builder, we have recovery steps for you to fix your PC and get back into Windows.
Dell Preparing Automatic Repair Steps
- Access BIOS Setup: Power on your Dell laptop and repeatedly press F2 during startup to enter BIOS Setup.
- Disable Secure Boot: Navigate to the “Boot” tab and disable Secure Boot.
- Enable Legacy Boot: If available, enable Legacy Boot mode.
- Save Changes: Save the changes and exit BIOS Setup.
- Boot from Installation Media: Insert a Windows installation USB drive or DVD and restart your laptop.
- Access Advanced Options: In the Windows Setup screen, select “Repair your computer.”
- Troubleshoot: Follow the on-screen prompts to access the “Troubleshoot” menu.
- Choose an Option: Select “Startup Repair” or “System Restore” to attempt to fix the issue.
HP Preparing Automatic Repair Steps
- Access Startup Menu: Power on your HP laptop and repeatedly press Esc during startup to access the Startup Menu.
- Select System Diagnostics: Choose “System Diagnostics.”
- Run Tests: Perform a “Startup Test” and a “Hard Disk Test” to check for hardware problems.
- Access Advanced Options: If no hardware issues are found, select “Advanced options.”
- Troubleshoot: Choose “Troubleshoot” to access recovery options.
- Choose an Option: Select “Startup Repair” or “System Restore” to attempt to fix the issue.
Lenovo Preparing Automatic Repair Steps

- Access Boot Menu: Power on your Lenovo laptop and repeatedly press F12 during startup to access the Boot Menu.
- Select Boot Device: Choose the Windows installation media (USB drive or DVD).
- Access Advanced Options: In the Windows Setup screen, select “Repair your computer.”
- Troubleshoot: Follow the on-screen prompts to access the “Troubleshoot” menu.
- Choose an Option: Select “Startup Repair” or “System Restore” to attempt to fix the issue.
Asus Preparing Automatic Repair Steps
- Access BIOS Setup: Power on your Asus laptop and repeatedly press F2 or Del during startup to enter BIOS Setup.
- Disable Fast Boot: Navigate to the “Boot” tab and disable Fast Boot.
- Save Changes: Save the changes and exit BIOS Setup.
- Boot from Installation Media: Insert a Windows installation USB drive or DVD and restart your laptop.
- Access Advanced Options: In the Windows Setup screen, select “Repair your computer.”
- Troubleshoot: Follow the on-screen prompts to access the “Troubleshoot” menu.
- Choose an Option: Select “Startup Repair” or “System Restore” to attempt to fix the issue.
Acer Preparing Automatic Repair Steps
- Access Boot Menu: Power on your Acer laptop and repeatedly press F12 during startup to access the Boot Menu.
- Select Boot Device: Choose the Windows installation media (USB drive or DVD).
- Access Advanced Options: In the Windows Setup screen, select “Repair your computer.”
- Troubleshoot: Follow the on-screen prompts to access the “Troubleshoot” menu.
- Choose an Option: Select “Startup Repair” or “System Restore” to attempt to fix the issue.
Toshiba Preparing Automatic Repair Steps
- Access Boot Menu: Power on your Toshiba laptop and repeatedly press F12 during startup to access the Boot Menu.
- Select Boot Device: Choose the Windows installation media (USB drive or DVD).
- Access Advanced Options: In the Windows Setup screen, select “Repair your computer.”
- Troubleshoot: Follow the on-screen prompts to access the “Troubleshoot” menu.
- Choose an Option: Select “Startup Repair” or “System Restore” to attempt to fix the issue.
Sony Preparing Automatic Repair Steps
- Access BIOS Setup: Power on your Sony laptop and repeatedly press F2 or Assist during startup to access BIOS Setup or the VAIO Care recovery environment.
- Disable Quick Boot: Navigate to the “Boot” tab and disable Quick Boot.
- Save Changes: Save the changes and exit BIOS Setup.
- Boot from Installation Media: Insert a Windows installation USB drive or DVD and restart your laptop.
- Access Advanced Options: In the Windows Setup screen, select “Repair your computer.”
- Troubleshoot: Follow the on-screen prompts to access the “Troubleshoot” menu.
- Choose an Option: Select “Startup Repair” or “System Restore” to attempt to fix the issue.
Samsung Preparing Automatic Repair Steps
- Access Boot Menu: Power on your Samsung laptop and repeatedly press F4 during startup to access the Recovery Environment.
- Select Troubleshoot: Choose “Troubleshoot” to access recovery options.
- Choose an Option: Select “Startup Repair” or “System Restore” to attempt to fix the issue.
Note: These steps might vary slightly depending on your specific laptop model and Windows version. If you encounter difficulties, consult your laptop’s user manual or the manufacturer’s support website.
Key Takeaways
- The automatic repair loop stops Windows from starting normally
- This issue often happens after updates or hardware changes
- You can fix it using advanced startup options or the command prompt
Understanding Automatic Repair in Windows
Automatic Repair is a built-in Windows tool that helps fix startup issues. It runs when Windows can’t boot properly and tries to fix problems without user input.
Exploring ‘Preparing Automatic Repair’ and Its Function
Preparing Automatic Repair is the first step in the repair process. It shows up as a message on a blue or black screen when Windows starts.
This tool scans the system for issues that might stop Windows from loading. It checks for:
- Corrupt system files
- Bad drivers
- Disk errors
If it finds problems, it tries to fix them on its own. This can take a few minutes or longer, based on the issue.
Sometimes, Automatic Repair can’t fix the problem. In these cases, it offers options like System Restore or Advanced Startup.
Common Scenarios Leading to Automatic Repair
Several things can trigger Automatic Repair:
- Failed Windows updates
- Corrupt system files
- Bad drivers
- Hardware issues
- Power outages during updates
Sudden shutdowns can also cause this. If a computer turns off while saving important files, it might need repair.
Viruses or malware can damage Windows files. This often leads to startup issues and triggers Automatic Repair.
Disk errors are another common cause. Bad sectors or file system corruption can stop Windows from booting normally.
Distinguishing Between Windows 10 and Windows 11 Repair Processes
Windows 10 and 11 have similar repair processes, but there are some differences.
Windows 11 has a more advanced Early Launch Anti-Malware Protection. This helps catch malware before it can interfere with the boot process.
Both versions use Safe Mode for troubleshooting. But Windows 11’s Safe Mode has a sleeker look and more options.
Windows 11 has better integration with Microsoft accounts. This can help with some repair options, like resetting the PC.
System File Checker works the same in both versions. It’s a useful tool for fixing corrupt system files.
Both systems can get stuck in repair loops. But Windows 11 has some extra steps to try breaking out of these loops.


