Ever dreamed of creating your own Roblox game? You’re not alone. Millions of players want to move from simply playing games to making their own virtual worlds. With Roblox Studio, you can turn your game ideas into reality without needing years of coding experience. Creating a Roblox game starts with downloading Roblox Studio, learning the basic tools, and developing a unique concept that players will enjoy.
Getting started is easier than you might think. First, you’ll need a Roblox account and the free Roblox Studio software. This powerful platform gives you everything needed to build 3D games. You can create simple obstacle courses or complex role-playing adventures. The best part? You don’t need to be a programming expert to begin.
What makes Roblox game creation special is the potential to earn Robux (the platform’s currency) if your game becomes popular. Many successful developers started with simple ideas that they improved over time. Focus on making something fun and unique rather than copying existing games. Your creativity is your biggest advantage in the Roblox universe.
How to Create a Roblox Game: The Ultimate Beginner’s Guide for 2025
Roblox has transformed from a simple gaming platform into a global phenomenon, empowering millions of users to create, share, and monetize their own games. In 2025, Roblox remains one of the most accessible and rewarding platforms for aspiring game developers of all ages.
If you’ve ever dreamed of building your own virtual world, designing exciting gameplay mechanics, or launching a hit game that millions can enjoy, this guide will walk you through how to create a Roblox game step-by-step — from setting up Roblox Studio to publishing your creation.
Why Create a Game on Roblox?
- Massive Audience: Roblox boasts over 250 million monthly active users worldwide as of 2025, providing a ready-made audience.
- Free and Accessible Tools: Roblox Studio is free and designed for beginners and pros alike.
- Monetization Opportunities: Developers can earn real money through in-game purchases and premium payouts.
- Community and Resources: A vast ecosystem of tutorials, forums, and assets supports creators at every level.
Step 1: Set Up Roblox Studio
Roblox Studio is the official game development environment for Roblox. It’s available for Windows and Mac and integrates powerful tools with an intuitive interface.
- Download Roblox Studio: Visit roblox.com/create and install Roblox Studio.
- Sign In: Use your Roblox account or create one if you don’t have it.
- Familiarize Yourself: Explore the interface — the Explorer window, Properties panel, Toolbox, and the viewport where you build.
Step 2: Learn the Basics of Roblox Studio
Before jumping into building, get comfortable with:
- Parts and Models: Learn how to insert and manipulate basic shapes (blocks, spheres, wedges).
- Terrain Editor: Create natural environments like hills, rivers, and forests.
- Scripting with Lua: Roblox uses Lua scripting language to add interactivity and game logic.
- User Interface (UI): Design menus, health bars, and other HUD elements.
Tip: Start with simple tutorials on Roblox Developer Hub or YouTube channels like AlvinBlox, which offer beginner-friendly guides.
Step 3: Plan Your Game Concept
Successful games start with a clear idea. Consider:
- Game Genre: Obstacle courses (obby), simulators, role-playing games (RPG), tycoons, or shooters?
- Target Audience: Kids, teens, or general players?
- Core Mechanics: What makes your game fun? Jumping challenges, collecting items, combat?
- Monetization Strategy: Will you sell game passes, cosmetics, or premium access?
Step 4: Build Your Game World
- Use the Toolbox to add free models, but be cautious — many models contain scripts or assets that can cause issues.
- Design your own assets or customize free ones to keep your game unique.
- Pay attention to lighting, sound, and atmosphere to enhance immersion.
- Use collisions and physics to make gameplay realistic.
Step 5: Add Interactivity with Scripting
Lua scripting allows you to:
- Create player controls and camera behavior.
- Program game rules like scoring, health, and levels.
- Design NPCs (non-player characters) and enemies.
- Implement UI interactions.
If you’re new to coding, Roblox’s official tutorials and community forums are invaluable. Platforms like Codecademy also offer Lua programming courses.
Step 6: Test Your Game
- Use the Play button in Roblox Studio to test your game in real-time.
- Check for bugs, gameplay balance, and user experience.
- Invite friends or beta testers for feedback.
- Use Roblox’s Analytics tools post-launch to monitor player behavior.
Step 7: Publish and Share Your Game
- When ready, click File > Publish to Roblox As… and set your game’s title, description, and genre.
- Configure privacy settings — public or private.
- Share your game link on social media, Roblox groups, and gaming forums.
- Engage with players and update your game regularly to keep it fresh.
Step 8: Monetize Your Game
Roblox offers several monetization options:
- Game Passes: Sell special abilities or access.
- Developer Products: One-time purchases like in-game currency.
- Premium Payouts: Earn based on the time Roblox Premium subscribers spend in your game.
- Ads and Sponsorships: Promote your game within Roblox.
Pro Tips for Success in Roblox Game Development
- Focus on User Experience: Smooth controls, clear objectives, and rewarding progression keep players engaged.
- Learn from Top Games: Study popular Roblox titles to understand what works.
- Join Developer Communities: The Roblox Developer Forum is a great place to get advice and showcase your work.
- Keep Iterating: Use player feedback to improve gameplay and fix bugs.
- Stay Updated: Roblox regularly updates its engine and policies; staying informed ensures your game remains compatible and compliant.
The Future of Roblox Game Development
With Roblox’s ongoing investments in AI tools, cloud computing, and VR integration, the platform is evolving rapidly. In 2025, creators have access to powerful new features like AI-assisted scripting and enhanced physics engines, making game development more accessible and sophisticated than ever.
Key Takeaways
- Download Roblox Studio and explore its tools to start building your first game quickly
- Focus on creating a unique concept that stands out from other games on the platform
- Test your game thoroughly and gather player feedback to improve and potentially earn Robux
Understanding Roblox Platform
Before you can create your own Roblox game, you need to understand what Roblox is and how its development environment works. Roblox offers powerful tools that even beginners can learn to use with some practice.
What Is Roblox?
Roblox is an online platform where users can play games created by other users. It’s more than just a game – it’s a creation system that lets people build and share their own games and experiences.
The platform has millions of users worldwide who play and create games every day. Roblox uses its own currency called Robux, which creators can earn when players spend money in their games.
What makes Roblox special is that anyone can make games on it, even if they’re just starting to learn programming. The platform uses a coding language called Lua, which is easier to learn than many other programming languages.
Games on Roblox can be almost anything – from obstacle courses and racing games to role-playing adventures and tycoon simulations. This variety is why Roblox appeals to so many different players.
The Basics of Roblox Studio
Roblox Studio is the official tool for creating Roblox games. You can download it for free from the Roblox website. This powerful software lets you build 3D environments, program game mechanics, and test your creations.
When you first open Roblox Studio, you’ll see templates to help you start. These templates give you basic game structures that you can modify instead of starting from scratch.
The main components of Roblox Studio include:
- 3D Workspace: Where you build and arrange your game world
- Explorer Panel: Shows all objects in your game
- Properties Panel: Lets you change settings for selected objects
- Toolbox: Contains free models and items you can use
Roblox Studio also includes built-in scripting tools where you can write code in Lua. This coding is what makes your game interactive and functional. You don’t need to be an expert coder right away – you can start with simple scripts and learn as you go.
Setting Up Roblox Studio
Before you can create your own Roblox game, you’ll need to get Roblox Studio installed and learn your way around its tools. Roblox Studio is a powerful but user-friendly platform that gives you everything you need to bring your game ideas to life.
Installing Roblox Studio
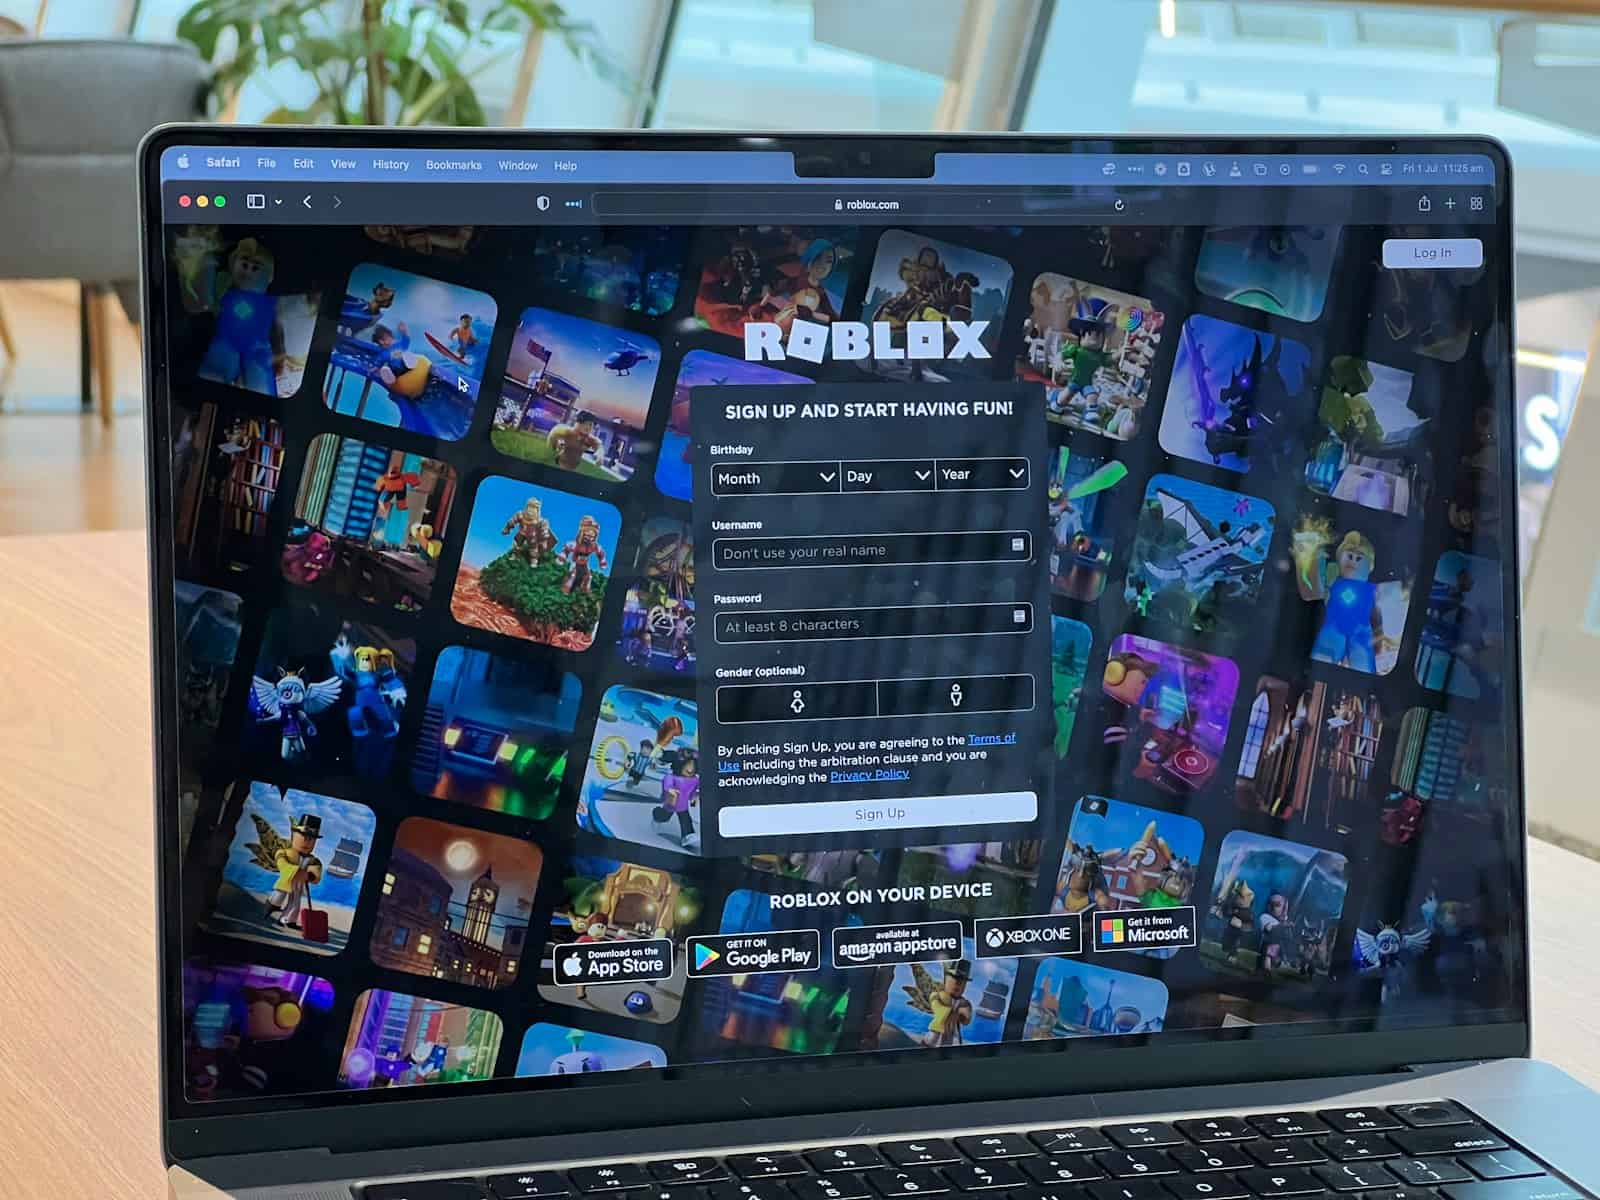
Getting Roblox Studio on your computer is simple. First, visit roblox.com and create an account if you don’t already have one. This account will be used for both playing games and creating them.
To download Roblox Studio:
- Go to roblox.com/create
- Click the “Launch Studio” button
- Sign in with your Roblox account
- The installer will automatically download
Once installed, Studio will appear in your applications. The first time you open it, you might need to sign in again. Make sure your computer meets the basic requirements – most modern computers can run Roblox Studio without problems.
Navigating the Interface
Roblox Studio’s interface might look complicated at first, but it’s organized logically. The main window shows your game world, called the workspace. This is where you’ll build and test your game.
At the top, you’ll find ribbons with different tabs like Home, Model, Test, and View. Each contains tools for specific tasks. The Explorer panel on the right shows all objects in your game organized in a tree structure. The Properties panel lets you modify settings for any selected object.
The Toolbox on the right side contains pre-made models, scripts, and assets you can use in your game. When starting a new project, you can choose from templates like “Baseplate” – an empty flat surface perfect for beginners.
Understanding Essential Tools
The basic tools you need to know appear in the Home tab. The Move tool lets you position objects in your game. The Scale tool changes object size, and the Rotate tool turns objects in different directions.
The Parts section contains basic building blocks like cubes, spheres, and cylinders. You combine these to create more complex structures. Color and material options let you customize how these parts look.
Scripts are what make your game interactive. The Script tool lets you add code to objects. For example, this simple initialization code makes a part change color when clicked:
script.Parent.Clicked:Connect(function()
    script.Parent.BrickColor = BrickColor.Random()
end)
Test your game regularly using the Play button in the Test tab. This lets you experience your game as players would.
Game Design Fundamentals
Good game design is the backbone of any successful Roblox game. It combines creativity with technical elements to create an experience players will enjoy and return to.
Defining Your Game Concept
Start by deciding what type of game you want to create. Will it be an adventure, role-playing game, simulator, or something entirely new? Choose a concept that excites you and that you’ll enjoy developing.
Your game should have a unique selling point that makes it stand out from other Roblox games. This could be an innovative gameplay mechanic, an interesting story, or a fresh take on a popular genre.
Write down your main ideas in a document. Include the core gameplay loop – the basic actions players will repeat while playing. For example, in an RPG, this might be: explore, battle monsters, collect rewards, upgrade character, repeat.
Test your concept by explaining it to friends. If they get confused or seem bored, you might need to refine your idea.
Building an Engaging World
Your game world needs to capture players’ attention from the moment they join. Create environments that support your game concept and make players want to explore.
Consider these key elements:
- Visual style: Consistent colors and designs that match your game theme
- Scale: Appropriate size for gameplay (not too big for few players)
- Navigation: Clear paths and landmarks so players don’t get lost
- Interest points: Special areas that reward exploration
Add details that tell a story without words. A broken bridge suggests danger ahead. A grand castle implies importance. These environmental storytelling elements make your world feel alive.
Use Roblox Studio’s terrain tools to create natural-looking landscapes. Mix flat areas for building with hills and valleys for visual interest. Balance open spaces with enclosed areas to create variety.
Creating Compelling Gameplay
Good gameplay keeps players engaged by offering the right mix of challenge and reward. Your controls should feel responsive and intuitive.
Focus on these aspects:
- Player feedback – Show players when they’ve done something right or wrong through sounds, animations, or visual effects
- Progression system – Give players a sense of accomplishment by letting them level up, unlock new areas, or earn new abilities
- Balance – Make sure the game isn’t too easy or too difficult
Test your gameplay frequently. If something feels frustrating or boring, be willing to change it. The best games often go through many revisions before release.
Make sure movement feels smooth. Jumpy or laggy controls will drive players away quickly. Use Roblox’s built-in character controllers as a starting point, then customize as needed.
Setting Game Objectives
Clear objectives give players purpose and direction. Without goals, players may quickly lose interest in your game.
Short-term objectives keep players engaged minute-to-minute: collecting coins, defeating enemies, or solving puzzles. Long-term objectives give reasons to keep coming back: leveling up a character, unlocking new areas, or completing a story.
Create a mix of:
- Main objectives: Central to game progression
- Side quests: Optional challenges for extra rewards
- Achievements: Recognition for special accomplishments
Make sure rewards match the difficulty of objectives. Players should feel their effort was worthwhile. For RPG elements, consider how character progression ties to objectives. Will completing quests earn experience points? Will defeating bosses unlock new abilities?
Display objectives clearly to players through a quest log, mission markers, or highlighted paths. Players should never wonder what they’re supposed to do next.
Creating Game Elements
Once you have your Roblox Studio set up, it’s time to create the actual elements that will make your game fun and engaging. These elements form the building blocks that players will interact with.
Building Game Structures
To build structures in your Roblox game, you’ll need to use the basic building tools in Roblox Studio. Start by selecting the Part tool from the toolbar. This lets you create simple shapes like blocks, spheres, and wedges.
You can resize parts by clicking and dragging the handles that appear when you select them. To move parts, use the Move tool or press Ctrl+D to duplicate them.
Group related parts together by selecting them and pressing Ctrl+G. This creates a “Model” that you can move and edit as one unit.
For more complex structures, try using the Terrain Editor. It allows you to create natural landscapes with hills, water, and caves. Access it by clicking on the Terrain tab in Studio.
Don’t forget to use materials and colors to make your structures look interesting. Right-click on a part to change its properties.
Designing Characters
Characters in Roblox games include both player avatars and non-player characters (NPCs). Players will use their own Roblox avatars, but you can customize how they function in your game.
To create NPCs, you can use Roblox’s built-in Humanoid models. Insert them by going to the Model tab and selecting “Humanoid.” These models come with basic movement capabilities.
You can customize your characters by:
- Changing body parts and colors
- Adding accessories like hats or tools
- Creating custom animations for different actions
- Setting up different clothing options
For more advanced character design, use the Animation Editor to create unique movements. Access it through the Plugins tab in Studio.
Remember to consider different player abilities based on character types if your game has different roles or classes.
Implementing Game Mechanics
Game mechanics define how players interact with your game. Start by determining what actions players can take, like jumping, fighting, or collecting items.
Use Roblox’s scripting language, Lua, to program these mechanics. Even simple scripts can create fun interactions. For example, this code makes a part give points when touched:
script.Parent.Touched:Connect(function(hit)
    if hit.Parent:FindFirstChild("Humanoid") then
        -- Add points here
    end
end)
Create a scoring system by using IntValue objects to track points. Place them in ServerStorage to keep them secure.
Add collectible items by making parts that disappear when touched. Design different levels or zones to keep gameplay interesting.
Test your mechanics frequently to ensure they work as expected and are fun to use.
Adding Visual and Sound Effects
Effects make your game more exciting and provide feedback to players. Add particle effects by inserting a ParticleEmitter into parts. You can customize particles for fire, smoke, sparkles, and more.
For lighting, use different light sources like PointLight or SpotLight to create atmosphere. Change the time of day using Lighting properties in the Explorer window.
Sound effects are crucial for immersion. Insert sounds by:
- Uploading audio files to Roblox
- Adding Sound objects to parts
- Triggering them with scripts when specific events happen
Add a background music track by placing a Sound object in the Workspace and setting it to loop.
Use camera effects like shaking or zooming during important moments. This can be done with simple TweenService scripts.
Coding in Roblox Studio
Coding is the backbone of any Roblox game, allowing creators to add functionality and interactive elements that make games engaging for players.
Understanding Lua Scripting
Roblox uses Lua as its programming language. Lua is relatively easy to learn, making it perfect for beginners who are just starting their game development journey. You don’t need prior coding experience to begin scripting in Roblox.
Scripts in Roblox Studio control how objects behave, how players interact with the game, and how game mechanics function. The basic structure of a Lua script includes variables, functions, and logic statements.
For example, variables store information like a player’s score:
local playerScore = 0
Functions perform specific tasks when called:
function increaseScore()
    playerScore = playerScore + 10
end
Conditional statements make decisions based on game conditions:
if playerHealth < 10 then
    displayWarning()
end
Writing Basic Scripts
To start writing scripts in Roblox Studio, right-click on an object in the Explorer panel and select “Insert Object” > “Script.” This creates a script attached to that object.
A common beginner script makes a part change color when touched:
local part = script.Parent

part.Touched:Connect(function(hit)
    if hit.Parent:FindFirstChild("Humanoid") then
        part.BrickColor = BrickColor.new("Bright red")
    end
end)
Initialization code runs when your game starts. Place this code at the beginning of your script:
-- This runs when the game starts
local function initialize()
    print("Game started!")
end

initialize()
Remember to test your scripts frequently. The Output window shows errors that help you fix problems in your code.
Adding Interactive Components
Interactive components make your game engaging. A simple button can be created with a part and a script:
local button = script.Parent

button.Touched:Connect(function(hit)
    if hit.Parent:FindFirstChild("Humanoid") then
        -- Make platforms appear
        platformGroup.Visible = true
    end
end)
Moving platforms add challenge to platforming games:
while true do
    platform.Position = platform.Position + Vector3.new(0, 5, 0)
    wait(2)
    platform.Position = platform.Position - Vector3.new(0, 5, 0)
    wait(2)
end
Collectibles can use similar touch detection:
coin.Touched:Connect(function(hit)
    local player = game.Players:GetPlayerFromCharacter(hit.Parent)
    if player then
        player.leaderstats.Coins.Value = player.leaderstats.Coins.Value + 1
        coin:Destroy()
    end
end)
Managing Game States and Events
Game states control the flow of your game. These include states like “waiting for players,” “playing,” and “game over.”
A basic game state manager might look like:
local GameState = {
    WAITING = "Waiting",
    PLAYING = "Playing",
    ENDED = "Ended"
}

local currentState = GameState.WAITING

function changeState(newState)
    currentState = newState
    -- Run code based on the new state
end
Events allow parts of your game to communicate. Use Remote Events for player interactions:
local ReplicatedStorage = game:GetService("ReplicatedStorage")
local coinCollectedEvent = ReplicatedStorage:CreateEvent("CoinCollected")

-- In a server script
coinCollectedEvent:FireClient(player, coinValue)

-- In a client script
coinCollectedEvent.OnClientEvent:Connect(function(value)
    playCollectionSound()
    updateCoinCounter(value)
end)
Using proper game state management helps your game run smoothly as it grows more complex.
Testing and Debugging
Testing and debugging are vital steps in creating a successful Roblox game. These processes help you find problems, fix them, and make sure your game works as intended before other players try it.
Running Your Game in Roblox Studio
Roblox Studio offers several ways to test your game during development. The simplest method is clicking the Play button in the top menu, which lets you test your game as a single player. This helps you check basic functionality from a player’s perspective.
For more advanced testing, use the Test tab. Here you can:
- Test with multiple players (up to 8 players in Local Server mode)
- Set up different testing scenarios
- Try your game in various device modes (PC, tablet, phone)
To start a multi-player test:
- Go to the Test tab
- Select “Local Server” in the dropdown
- Choose how many players you want
- Click “Start” to launch the test
This helps you spot issues that might only appear when multiple players interact with your game.
Identifying and Fixing Bugs
Finding and fixing bugs is easier with proper debugging tools. Roblox Studio includes a built-in debugger that helps track down issues in your code.
When your scripts aren’t working:
- Use
print()statements to show variable values in the Output window - Set breakpoints by clicking near line numbers in your script
- Use the Developer Console (press F9) to see detailed error messages
The Script Editor highlights syntax errors with red squiggly lines. Pay attention to these warnings.
For logic errors (when code runs but doesn’t work correctly), try stepping through your code line by line. In the debugger, you can:
- Check variable values
- See the call stack
- Understand how data changes as your code runs
Always test after making changes to make sure your fix didn’t create new problems.
Improving Game Performance
Performance issues can make players leave your game. Use Roblox Studio’s performance tools to identify and fix these problems.
The Developer Stats window (press Ctrl+F5) shows important metrics like:
- Frame rate (FPS)
- Memory usage
- Network activity
- Script performance
Look for parts of your game where FPS drops significantly. Common performance issues include:
- Too many detailed parts in one area
- Scripts that run too frequently
- Large or inefficient loops
- Unnecessary network calls
Test your game on different device types using Studio’s device emulation. A game that runs well on a powerful PC might struggle on mobile devices.
Break up complex calculations across multiple frames using task.wait(). Group similar objects using Model objects and folders to organize your workspace and improve performance.
Publishing Your Roblox Game
After creating your game, you need to share it with the world. Publishing makes your game visible and playable for other Roblox users.
Preparing for Game Launch
Before publishing, check your game thoroughly for bugs and errors. Play-test all features to make sure they work as intended. Fix any problems you find.
Consider adding these elements to make your game more appealing:
- A unique thumbnail that catches attention
- A clear description explaining what players will do
- Game tags that help others find your creation
- Age-appropriate content that follows Roblox guidelines
Make sure your game performs well on different devices. Test on mobile if possible, since many Roblox players use phones or tablets.
Ask friends to try your game and give feedback. This helps catch issues you might have missed. Polish your game based on their suggestions.
Publishing to the Roblox Platform
The publishing process is straightforward. Open Roblox Studio and click on the File menu. Select Save to Roblox first to save your work.
Once saved, go to the File menu again and choose Publish to Roblox. A window will appear asking for:
- Game name
- Description
- Genre tags
- Privacy settings
Choose if your game will be public (anyone can play) or private (only people you invite). You can change this setting later.
Click the Create button to finish. Your game now has its own page on Roblox! You can find it under the My Creations tab in your profile.
Marketing and Promotion Strategies
Getting players requires some effort. Share your game link on social media where appropriate. Many developers use Twitter, TikTok, or YouTube to showcase gameplay.
Create a simple trailer showing the best parts of your game. This gives potential players a quick look at what makes your game special.
Join Roblox developer communities for support and promotion opportunities. The Roblox Developer Forum is a good place to start.
Consider these promotion tactics:
- Host special events in your game
- Offer small rewards for early players
- Update your game regularly to keep it fresh
Listen to player feedback and make improvements based on what they say. Happy players often tell friends about games they enjoy, which helps your game grow naturally.
Growing Your Player Base
Building a fun Roblox game is only half the battle. Getting players to discover and stick with your game requires strategy and consistent effort.
Engaging with the Community
Community engagement is key to growing your Roblox game. Start by creating social media accounts for your game on platforms like Twitter, Discord, and Reddit. Post regular updates about your game to keep followers interested.
Join Roblox developer forums and groups to connect with other creators. They can offer advice and sometimes help promote your game.
Consider working with influencers who play Roblox. Even small YouTubers can bring new players to your game. Send them a private message with a brief description of your game and why their audience might enjoy it.
Host special events in your game like competitions or limited-time features. These give players reasons to return and bring friends along.
Gathering Feedback and Updates
Listen to your players! Create a feedback system in your game or Discord server where players can report bugs and suggest improvements.
Player feedback sources:
- In-game feedback buttons
- Discord channels
- Social media comments
- Roblox group wall posts
Watch how players use your game. Look at which features they enjoy most and which ones they ignore. This data helps you make smart updates.
Release updates regularly to keep your game fresh. Even small changes show players you care about improving their experience. Always test updates thoroughly before releasing them.
Fix bugs quickly. Players will leave if basic features don’t work properly. A stable game builds trust with your community.
Monetizing Your Game
Balance free play with smart monetization. Players should enjoy your game without feeling forced to spend money.
Create items that enhance the experience but aren’t required to have fun. Cosmetic items like custom outfits or decorations are popular since they don’t give unfair advantages.
Effective monetization options:
- Character customizations
- Special effects
- Game passes for bonus features
- Premium areas or items
- VIP servers
Offer limited-time items to create a sense of urgency. Players are more likely to buy something they might not be able to get later.
Price your items fairly. Study similar games to see what players expect to pay. Starting with lower prices helps build your player base before raising them gradually.
Frequently Asked Questions
Creating a Roblox game involves several steps and considerations. Here are answers to some common questions that new developers often have when starting their game creation journey.
What are the steps to develop a game in Roblox Studio?
Developing a Roblox game starts with downloading and installing Roblox Studio. Once installed, you can begin by selecting a template or starting from scratch. The basic development process includes:
- Planning your game concept and features
- Building the environment using blocks and models
- Adding objects and interactive elements
- Writing scripts using Lua to add functionality
- Testing your game frequently to fix bugs
Most developers start with programming using placeholder assets, then add detailed builds and polish later. This approach helps establish core gameplay before spending time on aesthetics.
Can you create a Roblox game on a mobile device, and if so, how?
Currently, Roblox Studio is not available on mobile devices. Game development requires the desktop version of Roblox Studio, which only works on Windows and Mac computers.
Mobile devices can be used to play and test games, but not to create them. Some basic edits might be possible through third-party apps, but full development needs a computer.
What is the cost associated with creating a game on Roblox?
Creating games on Roblox is completely free. Roblox Studio can be downloaded at no cost, and no payment is required to publish your game on the platform.
The Roblox business model allows developers to make money through in-game purchases rather than charging for development tools. Premium features like special effects or advanced tools are available in the platform itself without extra cost.
Are there any alternatives to using Roblox Studio for game creation?
While Roblox Studio is the official tool for creating Roblox games, some developers use supplementary software in their workflow:
- Blender for creating 3D models that can be imported into Roblox
- Paint.net or Photoshop for texture creation
- Visual Studio Code for writing Lua scripts outside of Studio
These tools can enhance your development process, but Roblox Studio remains necessary for final assembly and publishing.
What level of difficulty can beginners expect when making their first Roblox game?
Beginners can expect a moderate learning curve when making their first Roblox game. Simple games with basic functionality can be created with minimal programming knowledge using Studio’s built-in tools.
More complex games require learning Lua scripting, which takes time to master. Roblox provides tutorials, documentation, and community resources that help new developers learn the basics. Many successful developers started with no prior experience.
What software is required to start developing games on Roblox?
The only essential software needed is Roblox Studio, which is free to download from the Roblox website. Studio includes all the tools needed to create, test, and publish games.
Your computer should meet the minimum system requirements for Roblox Studio, which include Windows 10/11 or macOS 10.13 or newer. A computer with at least 4GB of RAM and a decent graphics card will provide a smoother development experience.