
Assessing the health of a computer’s power supply, or PSU, is a crucial task for maintaining stable system performance. The PSU is responsible for providing regulated power to all computer components, and any issues with it can lead to problems like system instability, random shut downs, or failure to start at all. It’s essential for users to understand how to check their PC’s power supply, especially before overclocking or upgrading, which can alter power demands.
To evaluate a PSU, users can start by inspecting the unit itself for any signs of damage, such as burn marks or unusual smells, which could indicate a failure. In Windows-based systems, users can navigate to the power settings to review power configurations and check for any system-reported inconsistencies. For more thorough testing, specialized equipment like a multimeter or power supply tester is required to measure output voltages and ensure they align with specified tolerances. Knowing how to conduct these checks helps to ensure that the computer remains functional and that component upgrades or replacements can be made safely.
Troubleshooting Your PC’s Power Supply
Is your computer not turning on or acting strangely? Your power supply might be the culprit. This step-by-step guide will help you check if it’s working properly.
Before You Start
- Safety First: Turn off your PC and disconnect the power cord before opening the case.
- Basic Tools: Have a Phillips-head screwdriver handy.
- Optional Tools: A multimeter or power supply tester can be helpful for more advanced testing.
Visual Inspection
- Check Connections: Ensure the power cord is securely plugged into the power supply and the wall outlet.
- Look for Damage: Inspect the power supply for any signs of damage, such as burnt components, leaking capacitors, or a burnt smell. If you spot any damage, replace the power supply immediately.
Listening for Clues
- Listen for Sounds: Turn on your PC and listen for the power supply’s fan. If it’s not spinning or making unusual noises, it could be a sign of trouble.
Testing the Power Supply with a Paperclip (Basic Test)
Warning: This method involves working with electricity. If you’re not comfortable, it’s best to skip this step or seek professional help.
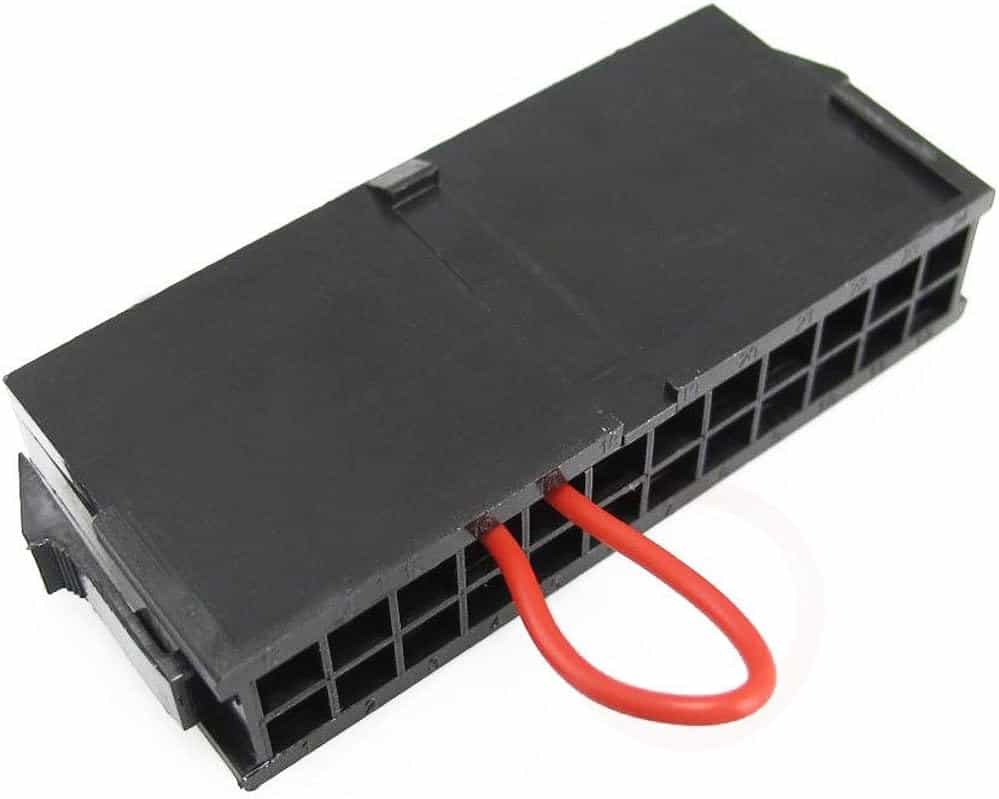
- Disconnect Cables: Unplug all cables from the power supply except the main 24-pin connector.
- Locate Pins: Find the green pin (PS_ON#) and a black pin (COM) on the 24-pin connector.
- Connect Pins: Use a paperclip to bridge the green and black pins. You can bend the paperclip into a U-shape to hold them together.
- Plug In and Power On: Plug the power cord back in and switch on the power supply.
- Observe the Fan: If the power supply fan spins, it’s a good sign that it’s working at a basic level.
Using a Multimeter or Power Supply Tester (Advanced Test)
If you have a multimeter or power supply tester, you can check the voltages on different rails to ensure they are within acceptable limits. Refer to the device’s manual for specific instructions.
Table of Power Supply Voltages
| Rail | Ideal Voltage | Acceptable Range |
|---|---|---|
| +3.3V | 3.3V | 3.135V – 3.465V |
| +5V | 5V | 4.75V – 5.25V |
| +12V | 12V | 11.4V – 12.6V |
When to Replace the Power Supply
If your power supply shows signs of damage, fails the paperclip test, or has voltages outside the acceptable range, it’s time to replace it. Consult your PC’s manual or manufacturer’s website for compatible power supplies.
Key Takeaways
- Power supply health is key to PC stability and performance.
- Physical inspection and system settings offer initial PSU diagnostics.
- Specialized equipment allows detailed power supply testing.
Diagnosing a Power Supply Unit
Ensuring your PC’s power supply unit (PSU) is functioning correctly is crucial for reliability and performance. This section offers practical steps to assess and diagnose your PSU’s condition.
Visual Inspections and Preliminary Checks
First, visually examine the power supply. Ensure the PSU is off and unplugged from the wall outlet before opening the computer case. Look for any signs of damage like burn marks or a faulty fan. Confirm that all cables, including the ATX connector, are firmly connected to the motherboard and peripherals.
Using a Multimeter or PSU Tester
A multimeter or a dedicated PSU tester can precisely measure the output voltages of a PSU to verify they’re within the expected range. Check the user manual for proper voltage ranges for your PSU model. Carefully insert the probes into the back of the PSU connectors to test the voltages on different rails.
Checking PSU Health and Performance in the OS
Some software within the operating system can report on PSU health and load. In Windows, use the Command Prompt and run ‘powercfg /energy’. This will create a report detailing power supply conditions, and flag any recognized issues.
Understanding PSU Specifications and Requirements
Examine the PSU’s label for the wattage, efficiency rating and model number. These specs should meet or exceed the needs of your computer’s hardware components like CPU and GPU. A PSU’s maximum power and efficiency dictate its capability to support the components without overloading.
Replacing or Upgrading a PSU
When a PSU fails or if you’re building a new PC, selecting the right replacement is crucial. Note the current PSU’s maximum power and dimensions. Ensure the new PSU satisfies the wattage requirements of the PC and has the right connectors for the motherboard and other components.
Troubleshooting Common Power Supply Issues
Watch for signs of PSU distress such as random restarts or shutdowns under heavy load, which may indicate a failing PSU. Also, a non-spinning fan or odd noises can reflect issues. Performing a ‘paper clip test‘, where the ATX PSU green and black wires are jumpered can test the PSU’s ability to power on.
Professional Tips for Maintaining PSU Longevity
To prolong PSU lifespan, keep it dust-free and ensure sufficient airflow in and around the PSU. Always use cables supplied by the manufacturer to prevent damage, and avoid overloading the PSU by running it near its maximum capacity consistently. Regular checks can preempt future problems.
Remember, safety is paramount when working with electronics, always turn off and unplug your PC before inspecting or testing the PSU.