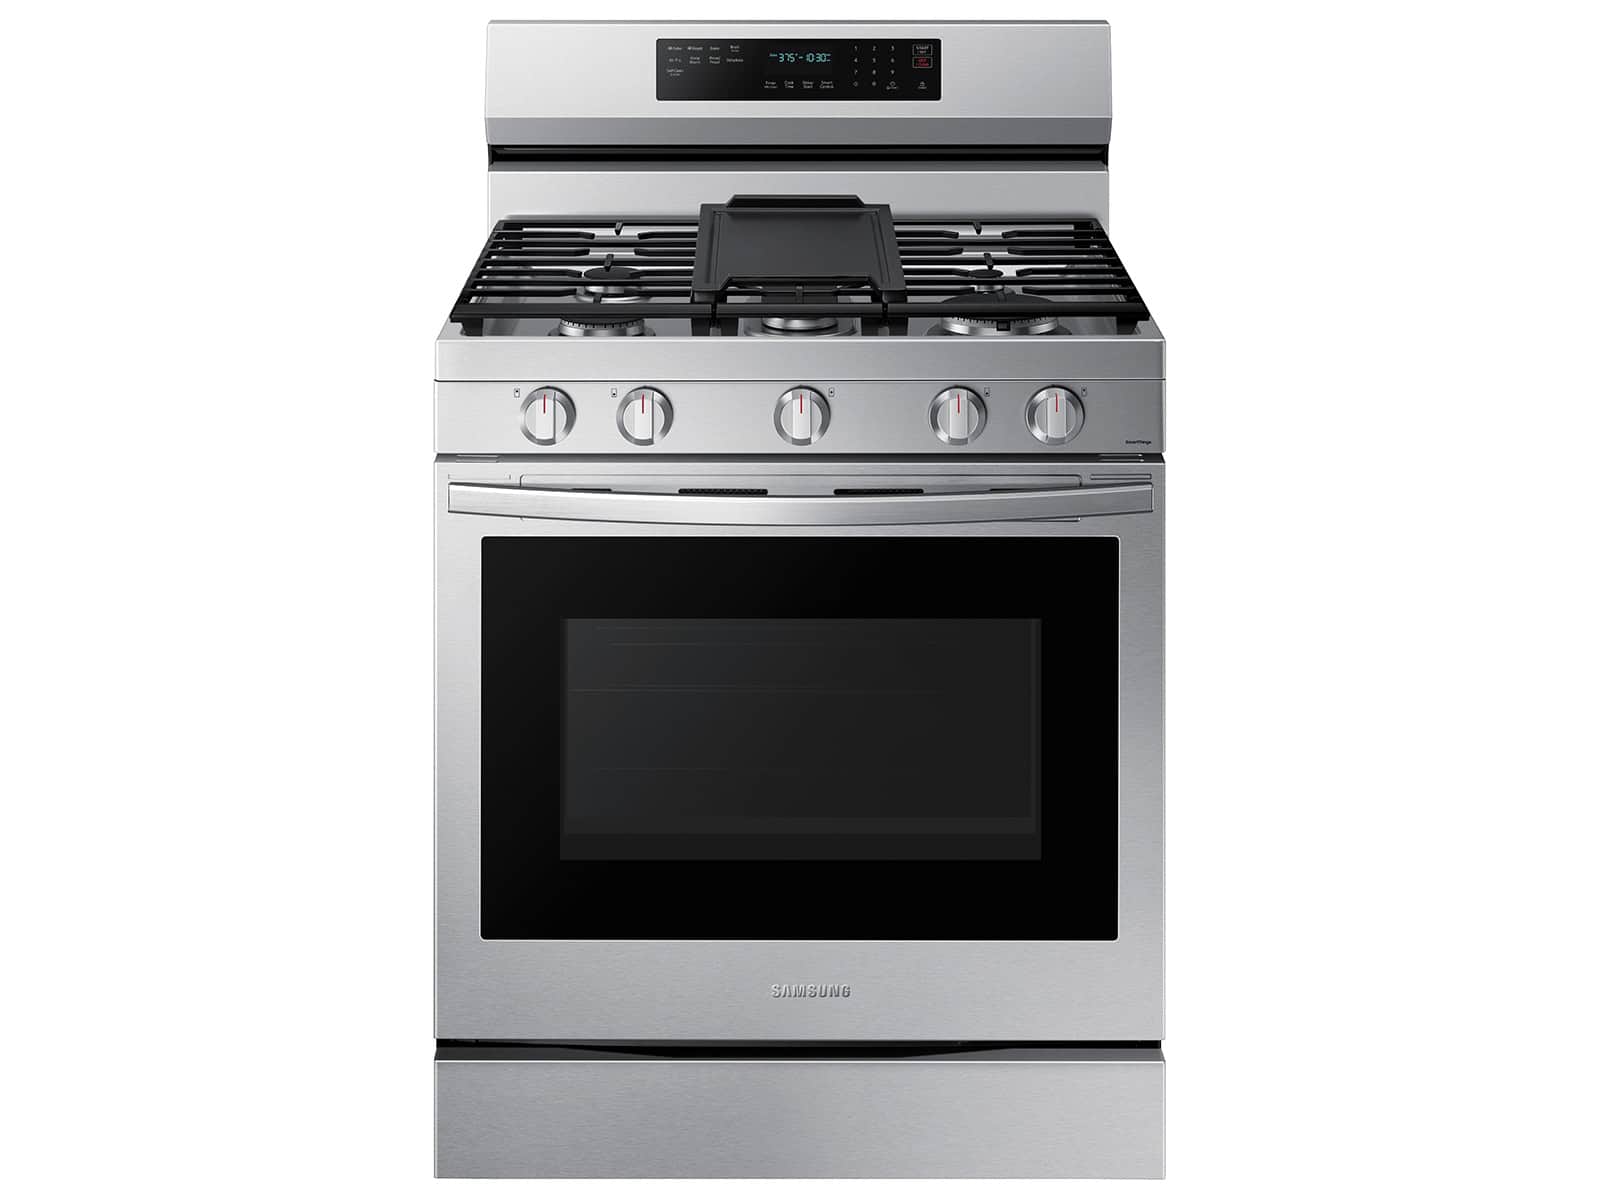
Gas appliance installation requires specialized expertise and certification. Professionals who work with gas equipment must hold certificates and insurance to ensure they meet the legal authority and have the necessary skills to safely handle gas appliances. Certified gas technicians possess the knowledge to install, repair, and maintain various gas appliances, including stoves, ranges, and ovens.
Gas Stove Installation: A Step-by-Step Guide for a Safe Setup
Installing a gas stove requires careful attention to safety. Gas leaks can lead to fires or explosions, so it’s crucial to follow proper procedures. If you’re unsure about any part of the process, consult a qualified professional.
Note: This guide provides general information. Always refer to the manufacturer’s instructions for your specific stove model.
1. Preparation and Safety
- Turn off the gas supply: Locate the gas shut-off valve for your kitchen and turn it to the “off” position.
- Ventilate the area: Open windows and doors to ensure proper ventilation.
- Gather necessary tools and materials: You’ll need a gas leak detector, pipe wrench, adjustable wrench, Teflon tape, flexible gas connector, and possibly new gas piping (depending on your existing setup).
2. Disconnect the Old Stove (if applicable)
- Disconnect the gas line: Use a pipe wrench to loosen the gas connector from the old stove.
- Cap the gas line: If you’re not installing the new stove immediately, cap the gas line with a gas line cap to prevent leaks.
- Disconnect the electrical supply: Turn off the circuit breaker for the stove and disconnect the electrical wiring.
3. Install the New Stove
- Position the new stove: Carefully place the new stove in the desired location, ensuring it’s level and has adequate clearance from combustible materials.
- Connect the gas line: Apply Teflon tape to the threads of the gas inlet on the stove. Connect the flexible gas connector to the stove and then to the gas supply line, using a pipe wrench to tighten the connections.
- Check for gas leaks: Use a gas leak detector to check all connections for leaks. If you detect a leak, tighten the connection or reapply Teflon tape as needed.
- Connect the electrical supply: Connect the electrical wiring according to the manufacturer’s instructions and turn on the circuit breaker.
4. Test the Stove
- Turn on the gas supply: Slowly turn the gas shut-off valve back to the “on” position.
- Light the burners: Follow the manufacturer’s instructions to light the burners and ensure they’re functioning properly.
- Test the oven: Set the oven to a low temperature and verify that it heats up correctly.
5. Final Checks and Safety Tips
- Double-check for leaks: After testing the stove, use the gas leak detector again to ensure there are no leaks.
- Install a carbon monoxide detector: Place a carbon monoxide detector near the stove to alert you of any carbon monoxide buildup.
- Regular maintenance: Have your gas stove inspected and serviced periodically by a qualified technician.
Additional Safety Considerations
- Proper ventilation: Ensure your kitchen has adequate ventilation to prevent carbon monoxide buildup.
- Clearance from combustibles: Maintain proper clearance between the stove and any combustible materials, such as curtains or cabinets.
- Child safety: If you have children, use stove knob covers or other safety devices to prevent accidental ignition.
- Fire extinguisher: Keep a fire extinguisher readily accessible in your kitchen.
By following these steps and prioritizing safety, you can successfully install your gas stove and enjoy its benefits with peace of mind.
Key Takeaways
- Gas appliance work requires TSSA certification for legal operation in the GTA
- Certified technicians can safely install, repair, and maintain gas stoves and ovens
- Local companies offer convenient gas appliance services across the GTA region
Safe Gas Appliance Setup
Gas stoves offer quick cooking times and precise temperature control. Setting up these appliances requires care and expertise. Homeowners should never attempt to install gas stoves themselves. Only qualified professionals should handle gas connections to ensure safety.
Key steps for proper gas stove installation:
- Check local building codes
- Clear the installation area
- Ensure a level surface
- Connect the gas line safely
- Test for leaks
Flexible gas connectors should not be reused. New connectors must be installed with each new appliance. This helps prevent dangerous gas leaks.
Professional installers will:
• Verify proper venting
• Adjust gas pressure
• Ensure adequate airflow
• Follow manufacturer instructions
After installation, homeowners should monitor their gas appliances. Signs of problems include:
- Yellow flames instead of blue
- Soot around burners
- No heat or overheating
- Unusual odors
If these issues arise, contact a qualified technician immediately.
| Appliance Type | Features |
|---|---|
| Gas range | Gas cooktop + gas oven |
| Electric range | Electric cooktop + electric oven |
| Dual fuel range | Gas cooktop + electric oven |
Ranges combine an oven and cooktop in one unit. Standalone cooktops and wall ovens are also options.
Safety is paramount with gas appliances. A gas leak detector is an essential safety device for homes with gas appliances. These detectors alert residents to dangerous gas buildups before they reach hazardous levels.
Regular maintenance helps prevent gas leaks. Homeowners should:
• Schedule annual inspections
• Replace flexible connectors when moving appliances
• Keep the area around gas appliances clear
• Learn to recognize the smell of gas
By following these guidelines and relying on qualified professionals, homeowners can safely enjoy the benefits of gas cooking appliances. Proper installation and maintenance are key to preventing hazards and ensuring optimal performance.
Installing a Gas Range
Gas ranges offer efficient cooking and precise temperature control. Before installation, ensure the kitchen has proper gas connections. Consult a professional for safe setup.
Key steps for gas range installation:
- Turn off gas supply
- Clean installation area
- Connect gas line to stove
- Check for leaks
- Secure range in place
Proper tools are essential:
- Adjustable wrench
- Pipe thread compound
- Gas line connector
- Leak detection solution
Safety is paramount. Use a flexible gas connector to prevent leaks. Apply pipe thread compound to all connections.
After installation, test all burners. Look for steady blue flames. Yellow flames indicate poor combustion.
Regular maintenance keeps gas ranges working safely. Clean burners and check connections yearly. Replace worn parts promptly.
Homeowners can choose between natural gas and propane models. Each fuel type requires specific fittings and pressure regulators.
Gas Oven Setup and Safety
Installing a gas oven requires careful planning and adherence to safety standards. While some may consider it a DIY project, professional installation is strongly recommended.
Gas ovens offer precise temperature control and quick heating. They come in various styles:
- Wall-mounted units
- Range-top combinations
- Built-in models
Proper installation is crucial to prevent gas leaks. A licensed gas-safe engineer should perform the following steps:
- Check existing gas lines
- Install new connections if needed
- Secure the oven in place
- Test for leaks
- Verify proper ventilation
Ventilation is key for gas oven safety. It removes combustion byproducts and excess heat. Options include:
- Range hoods
- Exhaust fans
- Window ventilation (for small spaces)
Homeowners should never attempt to connect gas lines themselves. Improper connections can lead to:
- Gas leaks
- Fire hazards
- Carbon monoxide buildup
Local building codes often require professional installation. This ensures compliance with safety regulations and manufacturer warranties.
After installation, regular maintenance is important. Annual inspections can catch potential issues early. Signs that warrant immediate professional attention include:
- Gas odors
- Unusual noises
- Inconsistent heating
Proper gas oven installation enhances kitchen safety and cooking efficiency. It’s an investment in both home value and peace of mind.
Connecting a Gas Range
Installing a gas range requires careful attention to safety and technical details. Proper hookup ensures efficient operation and minimizes risks associated with gas appliances.
Before starting, verify the type of gas supply in the home – either natural gas or propane. The range must match the available fuel source. Switching between gas types requires professional assistance.
Essential steps for gas range installation:
- Check electrical requirements
- Ensure a 120-volt grounded outlet is available
- If not grounded, consult an electrician
- Inspect gas valve
- Confirm presence of a range-quality gas valve
- Valve should be easily accessible
- Prepare installation area
- Clean floor thoroughly
- Measure width and depth for proper fit
- Level the appliance
- Adjust feet to ensure range sits flat
- Use a helper for accurate leveling
Key components for gas hookup:
• Black threaded pipe
• Teflon pipe-joint tape
• Gas valve
Proper use of these materials is crucial for a secure connection. Apply Teflon tape to pipe threads to prevent gas leaks.
Safety considerations:
- Install a range hood to remove cooking fumes and potential gas emissions
- Ensure carbon monoxide detectors are functioning properly
- Schedule regular maintenance checks
While some preliminary steps can be taken by homeowners, professional installation is strongly recommended. Certified gas fitters possess the expertise to:
• Assess gas line compatibility
• Perform necessary conversions
• Conduct leak tests
• Ensure compliance with local codes
Professional installation typically includes:
- Inspection of existing gas line
- Connection of range to gas supply
- Testing all connections for leaks
- Verification of proper range operation
Hiring a professional offers peace of mind and reduces the risk of gas-related accidents. Many service providers offer same-day installation and provide cost estimates upfront.
For those considering DIY installation, detailed guides are available online. However, working with gas carries inherent risks. Improper installation can lead to gas leaks, which pose serious health and safety hazards.
Maintaining a gas range:
• Clean burners regularly to prevent clogs
• Check gas connections annually
• Replace flexible gas lines every 10 years
By following these guidelines and prioritizing safety, homeowners can enjoy the benefits of a gas range while minimizing potential risks.


