Getting started with DaVinci Resolve for video editing can be overwhelming for beginners because of its many features. However, this guide aims to help you understand the basics and make the most of this powerful tool. It covers everything from importing footage to exporting your final project, focusing on the essential steps and features.
DaVinci Resolve is known for its comprehensive editing, color correction, visual effects, and audio post-production tools. Its user-friendly interface makes it accessible to newcomers. Mastering the basics early on can set you up for success and unleash your creativity.
Although the features may seem overwhelming at first, becoming familiar with the layout and main tools is the key.Starting with simple tasks like importing media and making basic edits can help build confidence quickly. As you progress, exploring the more advanced features will become natural. Learning fundamental skills such as marking in-points and out-points, and effectively using the timeline, ensures smoother editing workflows and leads to mastering more sophisticated techniques. Step-by-step, anyone can turn raw footage into polished, professional-grade videos.

Unlocking the Power of DaVinci Resolve: A Beginner’s Roadmap
The Interface: Your Creative Workspace
DaVinci Resolve’s interface is split into “pages,” each dedicated to a specific task. The main ones are Media, Cut, Edit, Fusion, Color, Fairlight, and Deliver. This layout streamlines your workflow, allowing you to focus on one aspect of your project at a time.
Media Page: Importing and Organizing
In the Media page, you import your footage, organize it into bins, and add metadata. Think of it as your project’s library. You can also create “smart bins” that automatically sort clips based on criteria like file type or camera settings.
Cut Page: Quick and Intuitive Editing
The Cut page is designed for fast-paced editing. It offers a simplified timeline and intuitive tools for trimming, splitting, and arranging clips. It’s perfect for rough cuts and quick edits.
Edit Page: Precision and Flexibility
The Edit page is where you fine-tune your project. It offers a more comprehensive set of editing tools, including multi-cam editing, keyframing, and effects. This is where you add transitions, titles, and refine your cuts.
Fusion Page: Visual Effects and Motion Graphics
Fusion is DaVinci Resolve’s built-in compositing software. It’s a powerful tool for creating visual effects, motion graphics, and 3D animations. You can use it to add elements like explosions, fire, and smoke to your videos.
Color Page: Grading and Correction
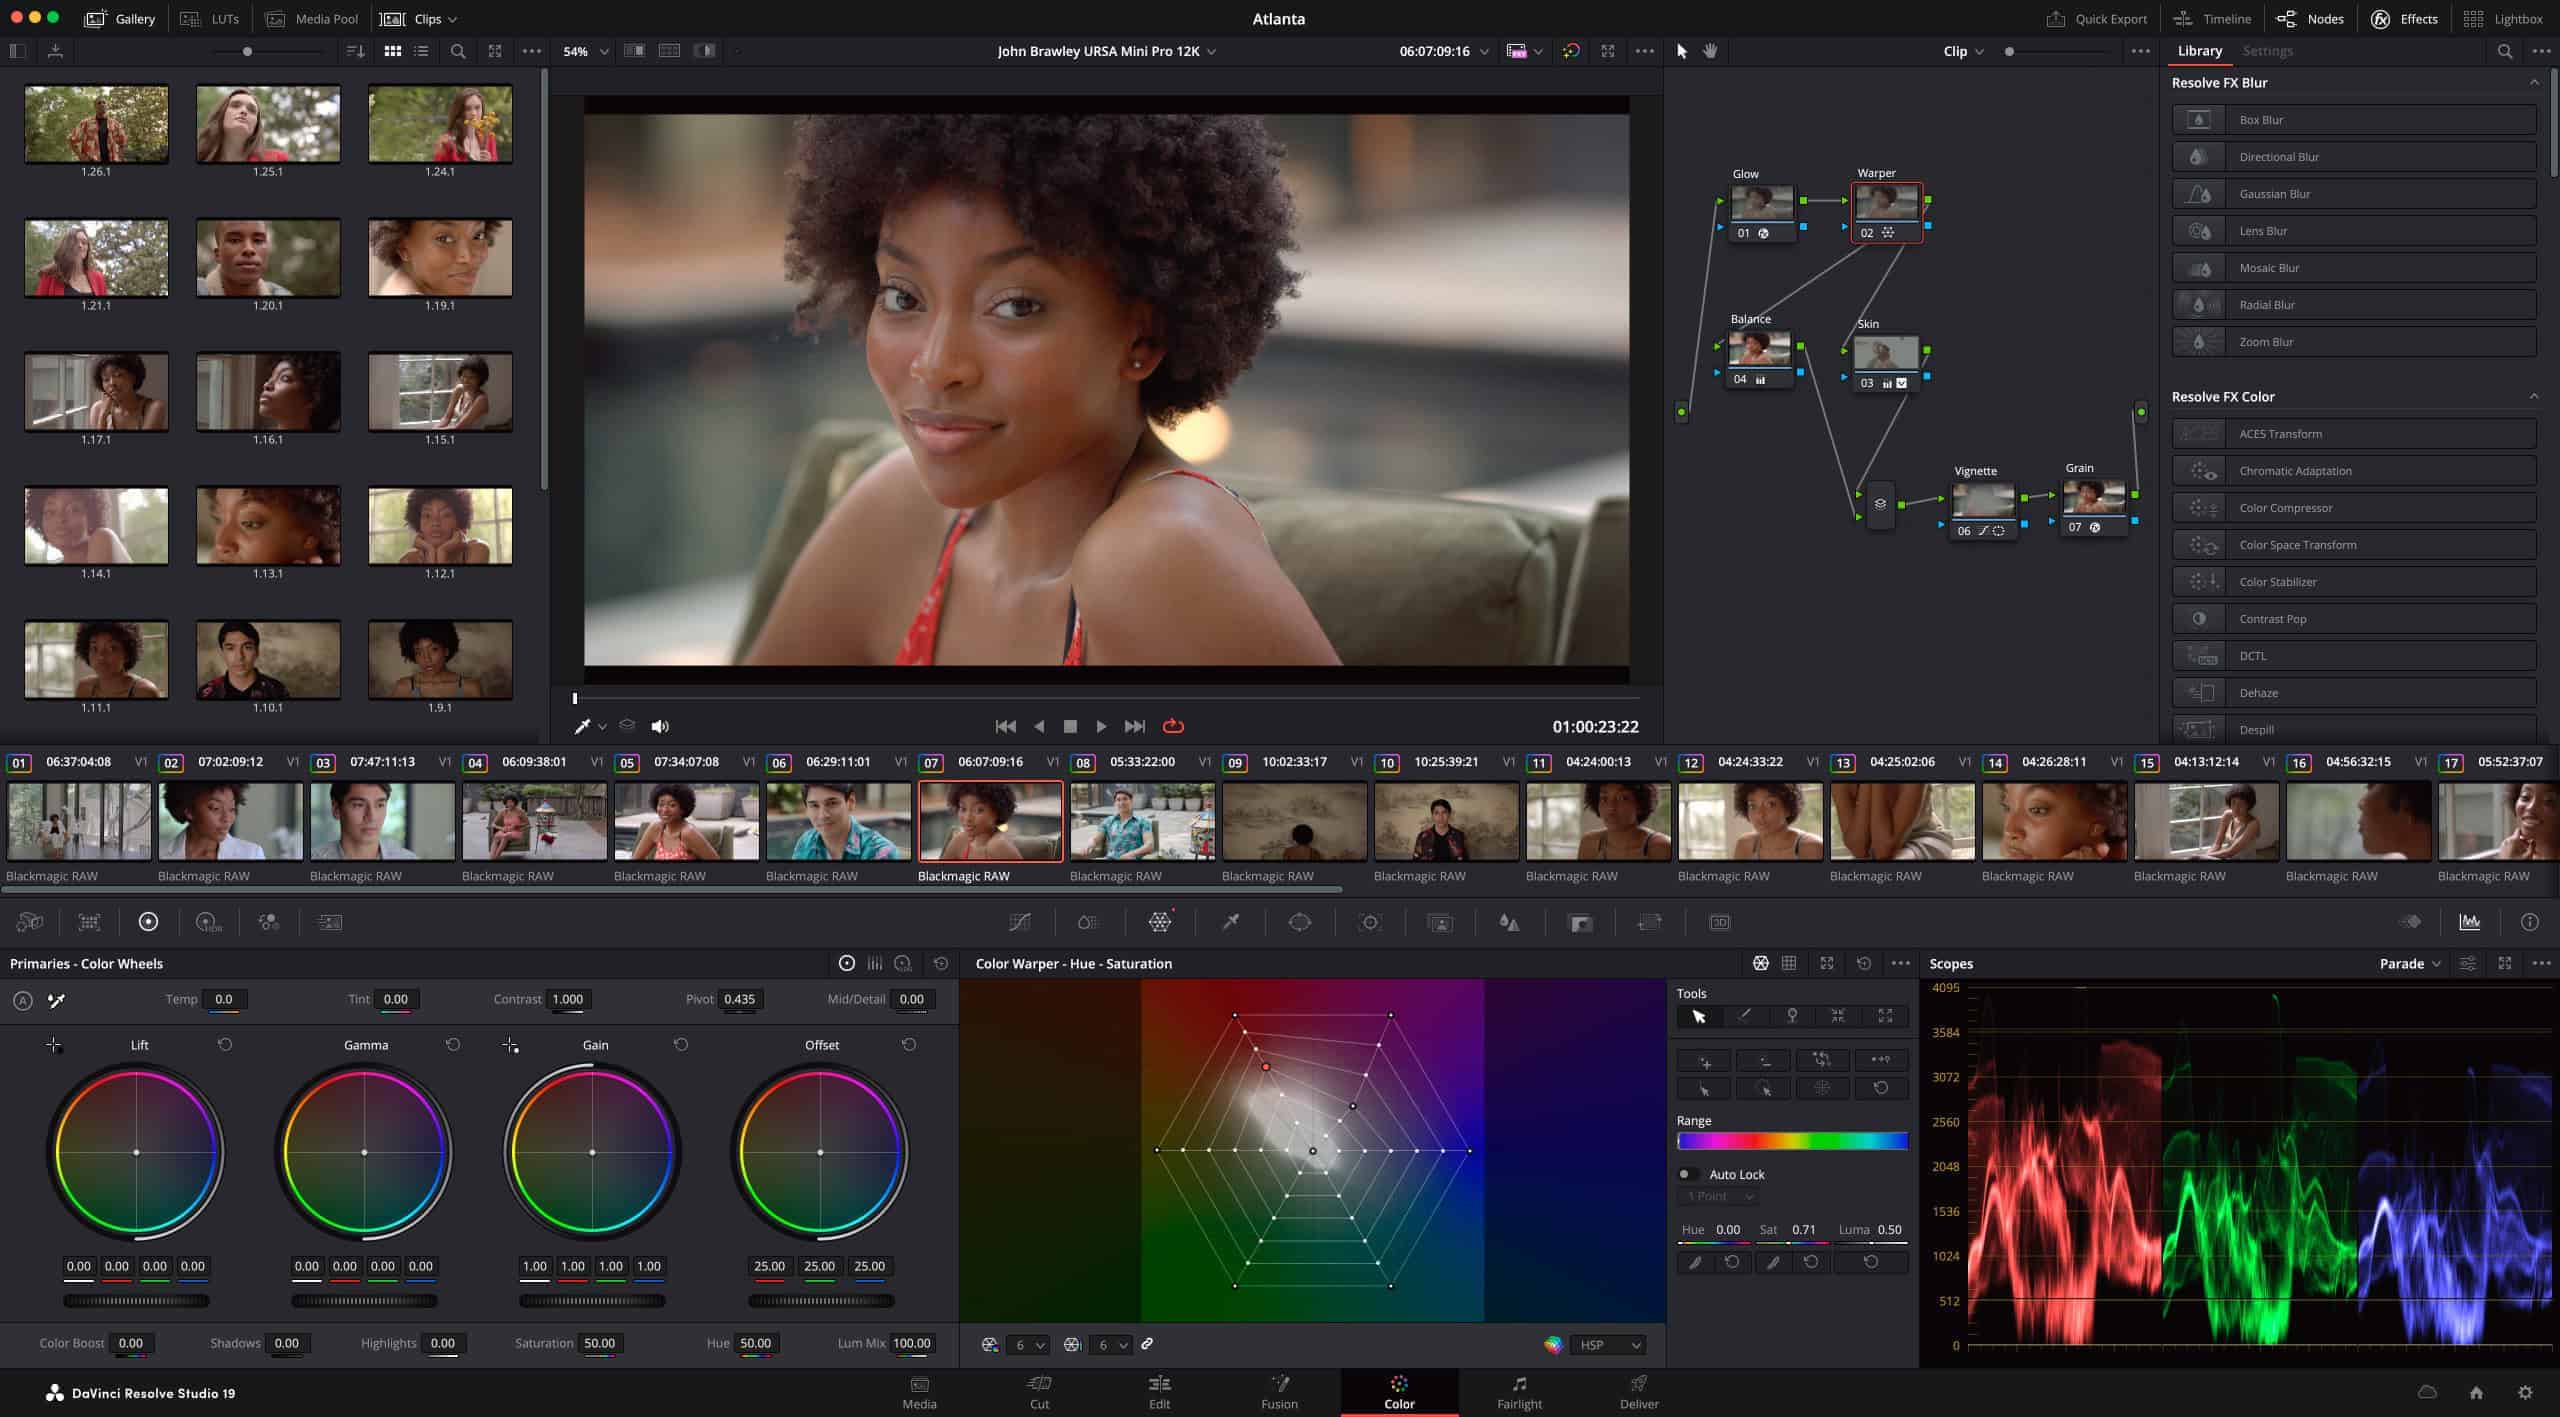
The Color page is where you adjust the look of your footage. You can color correct to ensure consistency, or grade to create a specific mood or style. DaVinci Resolve is renowned for its color grading capabilities.
Fairlight Page: Professional Audio Editing
Fairlight is DaVinci Resolve’s integrated audio editor. It offers a full suite of tools for recording, editing, mixing, and mastering audio. You can use it to clean up dialogue, add sound effects, and create a polished soundtrack.
Deliver Page: Exporting Your Masterpiece
Once your project is complete, you can export it in the Deliver page. DaVinci Resolve supports a wide range of formats and codecs, so you can choose the best settings for your needs.
| Page | Function |
|---|---|
| Media | Import, organize, and manage your footage. |
| Cut | Fast-paced editing and rough cuts. |
| Edit | Detailed editing, transitions, titles, and effects. |
| Fusion | Visual effects, motion graphics, and 3D animation. |
| Color | Color correction and grading. |
| Fairlight | Audio editing, mixing, and mastering. |
| Deliver | Export your finished project. |
Key Takeaways
- DaVinci Resolve is powerful yet beginner-friendly.
- Start with basic tasks to build confidence.
- Key skills include marking points and using the timeline.
Getting Acquainted with Davinci Resolve
DaVinci Resolve 18 offers a rich set of tools for video editing. Beginners can quickly learn its workspace, set up projects, and navigate the interface with ease.
Understanding the Workspace
The DaVinci Resolve workspace is divided into multiple pages: Media, Cut, Edit, Fusion, Color, Fairlight, and Deliver. Each page has distinct tools and functions. The Media Pool is essential for organizing your clips. Cut Page provides a streamlined editing experience. Edit Page offers more advanced editing tools. Fusion allows for VFX and motion graphics. Color Page is for color correction and grading. Fairlight handles audio editing. Deliver is where you export projects. Understanding these pages is crucial for efficient workflow.
Setting Up Your First Project
To download DaVinci Resolve, go to the Blackmagic Design website. After installation, open the software and create a new project. Ensure correct project settings like timeline frame rate and playback frame rate. Import media by dragging video clips into the Media Pool. Organize your clips into bins if needed. Adjust timeline resolution based on your desired output quality. This groundwork ensures a smooth editing process. A proper setup saves time and prevents issues in later stages.
Navigating the Interface
The interface consists of various panels like the Media Pool, Timeline, Inspector, and Effects Library. The Media Pool stores all imported project files. The Timeline is where you edit videos by arranging clips. The Inspector provides detailed clip properties and allows adjustments. The Effects Library offers transitions and effects that can be applied to clips. Keyboard shortcuts like “Ctrl + I” (Import Media) or “I” and “O” (In and Out points) streamline navigation, speeding up the editing workflow. Familiarity with these elements enhances productivity.
The guide covers basic elements to help beginners efficiently learn and navigate the software.
Fundamentals of Video Editing
Mastering video editing involves understanding basic techniques, utilizing advanced features, and enhancing audio quality. These essentials ensure the creation of polished, professional content.
Basic Editing Techniques
Effective basic editing includes cutting, trimming, and organizing footage. Tools such as the cut and trim functions help in refining rough cuts. Video transitions, like fades and wipes, seamlessly connect different clips.
Using b-roll footage can enhance the storyline. Meanwhile, the Inspector panel assists in adjusting clip properties. Text and titles add context and can emphasize important points. Managing resolutions is also crucial to ensure compatibility with various outputs.
Advanced Editing Features
DaVinci Resolve offers features like color grading, visual effects utilizing Fusion, and motion graphics. Color grading and correction help in setting the right tone and mood.
Visual effects and compositing allow integrating multiple elements seamlessly. Keying, often used for green screens, is essential for professional work. Incorporating LUTs (Look-Up Tables) aids in achieving consistent color profiles across projects.
Enhancing Audio Quality
Good audio is crucial for professional videos. The Fairlight tool in DaVinci Resolve provides extensive audio editing capabilities. Dialogue editing, voiceover recording, and managing the sound library all contribute to clear and impactful audio.
Audio effects and music can set the scene and enhance storytelling. Fine-tuning these elements ensures that the audio quality matches the high standards of the video content.
Frequently Asked Questions
Beginners often have many questions about using DaVinci Resolve. From downloading the software to finding the best tutorials, here are some answers to common questions.
How can I download DaVinci Resolve for beginners?
To download DaVinci Resolve, visit the Blackmagic Design website. Choose the free version for basic needs, which is sufficient for most beginners. Follow the instructions to install it on your computer.
What are the main differences between the free and paid versions of DaVinci Resolve?
The free version of DaVinci Resolve provides a wide range of features suitable for beginners, including basic editing, color correction, and audio post-production tools. The paid version, DaVinci Resolve Studio, offers advanced features like more GPU acceleration, additional effects, and support for higher resolutions and frame rates.
What are the first steps for editing with DaVinci Resolve as a novice?
Start by importing your media files into a new project. Use the Cut or Edit page to make your initial edits. Learn the basic functions: cutting clips, adding transitions, and using the timeline. Practice marking in-points and out-points to trim your footage.
Are there any comprehensive beginner guides for DaVinci Resolve available for free?
Yes, many free guides are available online. Websites like Envato Tuts+ offer detailed quick-start tutorials. These guides cover everything from importing footage to basic color correction, making them ideal for beginners.
How can I improve my editing skills in DaVinci Resolve quickly as a beginner?
Practice regularly on small projects. Explore various tools and features within the software. Watch tutorial videos and follow along with step-by-step guides. Joining online communities or forums can also provide valuable tips and feedback.
What resources are recommended for new users to learn DaVinci Resolve effectively?
Popular resources include video tutorials on YouTube, online courses on platforms like Udemy, and comprehensive guides from sites like Envato Tuts+. Participating in forums and reading books dedicated to video editing can also enhance your skills and knowledge.


