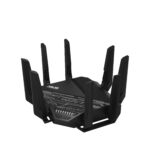
An old router gathering dust may still have a trick or two left in its hardware. With the right tweaks, it can take on a new life as a Wi-Fi extender, saving the cost of new equipment and extending the reach of your wireless network. This thrifty conversion can bridge the gap between areas in your home or office where the signal from the main router is weak or nonexistent.
Converting an old router to a Wi-Fi extender does not require technical expertise. A factory reset of the device is often the first step, followed by adjustments to the settings to enable extender or repeater mode. This setup allows the old router to amplify the signal from your main router and provide a stronger connection to devices that are farther away.
Repurpose Your Old Router: Expand Your WiFi Network
Turning an old wireless router into a Wi-Fi extender is a cost-effective way to boost your network coverage. It’s a great solution for dead zones or weak signals in certain areas of your home or office.
What You’ll Need
- An old wireless router
- An Ethernet cable
- A computer
Steps to Follow
- Reset Your Router: Factory reset your old router to its default settings. This usually involves pressing and holding a reset button for a few seconds.
- Connect and Log In: Connect your computer to the old router using an Ethernet cable. Open a web browser and enter the router’s default IP address (often found on a label on the router or in its manual). Log in using the default username and password.
- Disable DHCP: Locate the DHCP settings in the router’s interface and disable the DHCP server. This prevents IP address conflicts between the old and new routers.
- Change the IP Address: Assign a static IP address to the old router that falls within your main router’s network range but outside its DHCP pool. For example, if your main router’s IP is 192.168.1.1 and its DHCP range is 192.168.1.2 to 192.168.1.100, you could set the old router’s IP to 192.168.1.101.
- Enable Bridge/Extender Mode: Some routers have a built-in bridge or extender mode. If yours does, enable it. Consult your router’s manual or the manufacturer’s website for specific instructions.
- Connect to Your Main Router: Connect an Ethernet cable from a LAN port on your main router to a LAN port on the old router.
- Configure Wireless Settings: In the old router’s settings, configure the wireless network name (SSID) and password to match your main network. If your router doesn’t have a bridge/extender mode, you might need to manually configure the old router’s wireless settings to connect to your main network as a client.
Important Considerations
- Compatibility: Not all routers can be easily converted into extenders. Check your router’s documentation or online resources to see if your model supports this function.
- Placement: Position your repurposed router halfway between your main router and the area with a weak signal.
Troubleshooting Tips
If you encounter issues, try the following:
- Double-check all connections and settings.
- Restart both routers.
- Update the firmware on both routers.
By following these steps, you can give your old router a new life and extend your Wi-Fi network without spending a dime on additional equipment.
Key Takeaways
- An old router can be repurposed to extend the reach of a home Wi-Fi network.
- Repurposing equipment saves money and enhances wireless extension capabilities.
- The conversion process includes a factory reset and toggling specific settings to enable the extender function.
Converting Your Old Router into a Wi-Fi Extender
With the right steps, an old router can boost your Wi-Fi network’s range. This guide breaks down the process into manageable tasks.
Compatibility Assessment
Before you start, check if your old router supports extender functionality. This usually involves verifying that it can operate in a bridge or repeater mode. Look through the router’s documentation or visit the manufacturer’s website for this information.
Installation of Alternative Firmware
If your router’s default firmware doesn’t support extender modes, you might need to install custom firmware like DD-WRT, OpenWRT, or Tomato. Make sure to select a firmware version compatible with your router’s model. Always follow the custom firmware’s installation guidelines to avoid bricking your router.
Configuring the Extender Settings
After firmware installation, log in to the router’s web interface to configure the settings. Set up the router to operate in extender or bridge mode. Assign a static IP address that matches your primary router’s subnet but avoid the DHCP range to prevent IP conflicts. Disable the router’s DHCP server when in bridge mode to let the primary router manage all IP assignments.
Physical Connection and Placement
For a wired connection, use an Ethernet cable to connect the old router’s LAN port to the primary router’s LAN port. If you’re setting up a wireless repeater, place the second router within the primary router’s range but close enough to the area where you need better coverage. Avoid physical obstructions and radio interference for optimal signal strength.
Optimizing Performance and Security
Choose a less crowded Wi-Fi channel and set the same wireless security mode as your primary router. Regularly conduct speed tests using tools like speedtest.net to monitor the extended network’s performance. Keep your firmware updated and regularly change your network’s SSID and password to maintain security.


